1-11
46
Adjusting the Recording Picture Quality and Size
Adjusting the Recording
Picture Quality and Size
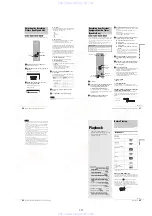
You can adjust the recording picture quality and picture size.
a
Press TOOLS before recording starts.
The TOOLS menu appears.
b
Press
M
/
m
to select “Rec Settings,” then press
ENTER.
The following display appears.
c
Press
M
/
m
to select the item you want to
adjust, then press ENTER.
The adjustment display appears.
Example: Rec NR
◆
Rec Mode
Selects the recording mode for the desired recording
time and picture quality. For more information, see
“Recording mode” (page 36).
• HQ
• HSP
• SP (default)
• LP
• EP
• SLP
◆
Rec Screen Size
Sets the picture size of the program to be recorded
• 4:3 (default): Sets the picture size to 4:3.
• 16:9: Sets the picture size to 16:9 (wide mode).
This function works with DVD-Rs and DVD-RWs
(Video mode) when the recording mode is set to HQ,
HSP, or SP. For all other recording modes, the screen
size is fixed at “4:3.”
For DVD-RWs (VR mode), the actual picture size is
recorded regardless of the setting. For instance, if a
16:9 size picture is received, the disc records the
picture as 16:9 even if “Rec Screen Size” is set to
“4:3.”
For DVD+RWs, the screen size is fixed at “4:3.”
◆
Rec NR (noise reduction)
Reduces noise contained in the video signal.
◆
Rec Video Equalizer
Adjusts the picture in greater detail.
Press
M
/
m
to select the item you want to adjust, then
press ENTER.
• Contrast: Changes the contrast.
• Brightness: Changes the overall brightness.
• Color: Makes the colors deeper or lighter.
• Hue: Changes the color balance.
d
Adjust the setting using
<
/
M
/
m
/
,
, then
press ENTER.
The larger the number, the greater the effect. The
default setting is underlined.
e
Repeat steps 3 and 4 to adjust any other
items.
f
Press RETURN to turn off the display.
Note
The adjustments made here are for the recorder and cannot be saved for
individual titles.
RETURN
<
/
M
/
m
/
,
,
ENTER
TOOLS
Rec. Settings
Select the item you want to change.
Rec Mode :
Rec Screen Size :
Rec NR :
Rec Video Equalizer
SP
4 : 3
1
Off
1
2
3
Rec NR
Items
Settings
Rec NR
Off 1 ~ 3
Rec Video Equalizer
Contrast
–3 ~ 0 ~ 3
Brightness
–3 ~ 0 ~ 3
Color
–3 ~ 0 ~ 3
Hue
–3 ~ 0 ~ 3
47
Recording from External Equipment with a Timer (Synchro Rec)
Record
ing/Timer Recording
Recording from External
Equipment with a Timer
(Synchro Rec)
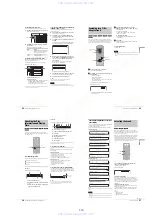
You can set the recorder to automatically record programs from
connected equipment that has a timer function (such as a satellite
receiver). Connect the equipment to the LINE IN 1 jacks of the
recorder (page 30).
When the connected equipment turns on, the recorder starts
recording a programme from the LINE IN 1 jacks.
a
Press
}
/
1
.
b
Turn on the TV, and switch the input selector
on your TV so that the signal from the
recorder appears on the TV screen.
◆
When using an amplifier (receiver)
Turn on the amplifier (receiver) and select the
appropriate channel so that you can hear the sound
from the recorder.
c
Press
Z
OPEN/CLOSE, and place a
recordable disc on the disc tray.
d
Press
Z
OPEN/CLOSE to close the disc tray.
Wait until “LOAD” disappears from the front panel
display.
If you use an unused DVD, formatting starts
automatically.
When using an unused DVD-RW, select the
recording format, VR or Video.
e
Select the line input audio when recording a
program having two types of sound.
A
Press INPUT SELECT to select “L1.”
B
Press TOOLS.
C
Press
M
/
m
to select “Line Audio Input,” then
press ENTER.
D
Press
M
/
m
to select “Main/Sub*,” then press
ENTER.
* When recording a program having two types of sound, select
“Main/Sub.” Both sounds can be recorded. You can select either
sound when playing a disc.
Select “Main/Sub” only when using a DVD-RW (VR mode).
For other discs, select “Stereo.” Only stereo sound is recorded.
f
Press REC MODE repeatedly to select the
recording mode, HQ, HSP, SP, LP, EP, or
SLP.
g
Set the timer on the connected equipment to
the time of the program you want to record,
and turn it off.
h
Press SYNCHRO REC.
The SYNCHRO REC indicator lights up on the front
panel. The recorder automatically turns off and
stands by for Synchro-Recording.
The recorder automatically starts recording when it
receives an input signal from the connected
equipment. The recorder stops recording when the
connected equipment turns off.
To stop recording
Press
x
REC STOP.
To cancel Synchro Rec
Press SYNCHRO REC or turn on the recorder before the
Synchro-Recording Starts. The SYNCHRO REC indicator turns
off.
If the timer settings of a Synchro-Recording and
another timer recording overlap
Regardless of whether or not the program is a Synchro Rec
program, the program that starts first has priority and the second
program starts recording only after the first program has
finished.
Before you start
…
• Check that the disc has enough available space for the
recording (page 37).
• Adjust the recording picture quality and picture size if
necessary (page 46).
REC MODE
<
/
M
/
m
/
,
,
ENTER
"
/
1
Z
OPEN/CLOSE
x
REC STOP
SYNCHRO REC
TOOLS
INPUT SELECT
7:00
8:00
9:00
10:00
First program
Second program
will be cut off
,
continued
48
Recording from External Equipment with a Timer (Synchro Rec)
Notes
• The recorder starts recording only after detecting the video signal from
the connected equipment. The beginning of the program may not be
recorded.
• You cannot set Synchro-Recording only by pressing the SYNCHRO
REC button when the recorder is turned off. Be sure to turn on the
recorder first to set Synchro-Recording.
• While Synchro-Recording, other operations such as normal recording
cannot be done.
• Do not turn on the recorder while it stands by for Synchro-Recording.
Synchro-Recording will be canceled.
• Any program that contains a Copy-Never copy guard signal cannot be
recorded. When you record a program that contains a Copy-Once
signal, use a DVD-RW (Ver. 1.1 with CPRM) in VR mode for
recording. For details, see “Unrecordable pictures” (page 36).
• When using the Synchro Rec function, do not use the VCR control
function on connected equipment.
• To use the connected equipment while the recorder is standing by for
Synchro-Recording, cancel Synchro-Recording by pressing
SYNCHRO REC. Before timer recording starts, be sure to turn off the
connected equipment, then turn on the recorder and press SYNCHRO
REC to reset Synchro-Recording.
• The Synchro Rec function does not work with some satellite receivers.
For details, refer to the satellite receiver’s operating instructions.
49
Before Playing
Pl
ay
back
Playback
This section explains the basics of
playback, such as playable disc types, and
describes the settings necessary for
playback in general.
Before Playing
Read the following information before playing a disc.
Playable discs
This recorder can play the following discs in both the 12 cm and
8 cm sizes.
◆
Disc types
* “DVD VIDEO,” “DVD-RW,” “DVD+R,” “DVD+RW,” and “DVD-
R” are trademarks.
Region code (DVD VIDEO only)
Your recorder has a region code printed on the rear of the unit
and will only play DVD VIDEOs (playback only) labeled with
identical region codes. This system is used to protect copyrights.
DVD VIDEOs labeled
will also play on this recorder.
If you try to play any other DVD VIDEO, the message
“Playback prohibited by region code.” will appear on the TV
screen. Depending on the DVD VIDEO, no region code
indication may be labeled even though playing the DVD VIDEO
is prohibited by area restrictions.
DVD VIDEO*
DVD-RW*
Ver. 1.0
Ver. 1.1
Ver. 1.1 with CPRM
DVD+RW*
DVD-R*
DVD+R*
Music CD
CD-R/CD-RW
(Music CD format
only)
ALL
RDR–XXXX
00V 00Hz
00W
NO.
0-000-000-00
X
Region code
•
Before Playing
. . . . . . . . . . . . . . . . . . .
page 49
•
Playing Discs
. . . . . . . . . . . . . . . .
page 50
•
Selecting a Recorded Title on a Disc
. . . . . . . . .
page 53
•
Searching for a Title/Chapter/Track
. . . . . . . . . . . . . . . . . . . . . . . . . . . .
page 55
•
Checking the Play Information and Playing Time
. . . . . . . . . . . . . . . . . . . . . .
page 56
•
Selecting the Sound
. . . . . . . . . . . . . . . . . . . . . . . . . . . .
page 57
•
TV Virtual Surround Settings (TVS)
. . . . . . . . . . . . . . . . . . . . . . . . . . . .
page 58
•
Changing the Angles
. . . . . . . .
page 59
•
Displaying the Subtitles
. . . . . .
page 60
•
Adjusting the Playback Picture and Sound
. . . . . . . . . . . . . . . . . . . . . . . . . . . .
page 60
,
continued
www. xiaoyu163. com
QQ 376315150
9
9
2
8
9
4
2
9
8
TEL 13942296513
9
9
2
8
9
4
2
9
8
0
5
1
5
1
3
6
7
3
Q
Q
TEL 13942296513 QQ 376315150 892498299
TEL 13942296513 QQ 376315150 892498299


