1-9
MVS-8000X/7000X
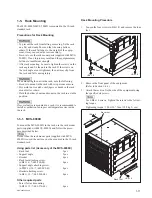
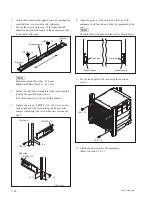
2. While the rear levers are opened, remove the blank
panel.
m
.
Store the removed blank panel in a safe place.
.
In case there is a blank panel consecutive in steps
above (in a unit), remove these blank panel too.
Rear lever
Rear lever
Blank panel
Unit
In case there is a blank panel consecutive in steps
above (in a unit), remove these blank panel too.
This figure shows MVS-8000X
3. While the rear levers are opened as shown in the
illustration, insert the plug-in board into the board
guide rail.
n
Insert making sure the board's upper and lower spring
plates do not catch on the board.
Spring plate
Plug-in board
This figure shows MVS-8000X
4. Push the rear levers inward until a click sound is made
and they are locked.
Rear lever
Rear lever
This figure shows MVS-8000X
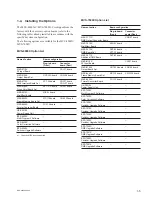
MVS-8000X Option List
Name of option
Name of board
Slot on the rear side
MKS-8110X
CNI-37 board
6, 7, 8, 9, 10, 11
MKS-8160X
CNO-38 board
14
MKS-8170X
CNI-37 board
1
CNO-37 board
2
MKS-8180X
CNI-37 board
3
MKS-8440X
CN-3235 board
16
MVS-7000X Option List
Name of option
Name of board
Slot on the rear side
MKS-7171X
CNO-37 board
3
MKS-8110X
CNI-37 board
2, 6, 7, 8
MKS-8160X
CNO-38 board
10
MKS-8440X
CN-3235 board
12
5. Install the blank panel removed once in the slot on one
step.
Summary of Contents for MVS-8000X System
Page 4: ......
Page 54: ......
Page 58: ...Sony Corporation MVS 7000X SY MVS 8000X SY E 4 189 509 03 Printed in Japan 2011 5 08 2010 ...


