20
SETU
P
SETU
P
S
E
TU
P
SETU
P
Set
up
SETU
P
Cable Box and
Cable Only
For best results, use this connection if:
❑
Your cable TV company scrambles some channels, such as
premium channels (which requires you to use a cable box), but
does not scramble all channels.
❑
You do not have a VCR. (If you have a VCR, see pages 24 and 26.)
With this connection you can:
❑
Use the TV remote control to change channels coming through
the cable box to the TV’s VHF/UHF input jack. (You must first
program the remote control for your specific cable box; see
“Programming the Remote Control” on page 51.)
❑
Use the TV remote control to change channels coming directly
into the TV’s CABLE input. (The TV’s tuner provides a better
signal than the cable box.)
Notes on Using This Connection
About Using This Connection with Dual Picture (Twin View, etc.) Features
With this connection, you can use all the dual picture features for unscrambled channels
coming directly into the TV’s CABLE input jack.
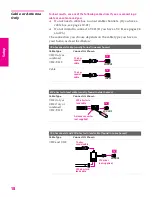
Before connecting a cable
box, see “About Using
CableCARD” on page 17.
CABLE
VHF/UHF
Coaxial cable
CATV cable
Cable box
Coaxial cable
Coaxial cable
Splitter
TV
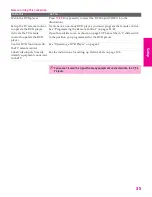
To Do This ...
Do This ...
Use the cable box
Tune the TV to the channel the cable box is set to (usually channel 3 or 4)
and then use the cable box to switch channels.
Set up the TV remote control
to operate the cable box
Program the remote control. See “Programming the Remote Control” on
pages 51-52.
Activate the remote control to
operate the cable box
Press
SAT/CABLE FUNCTION
.
Switch
the TV’s input
between the cable box and
cable
Press
ANT
to switch back and forth between the TV’s VHF/UHF (scrambled
channels) and CABLE (unscrambled) inputs.
34XBR.book Page 20 Thursday, May 20, 2004 7:09 AM
Summary of Contents for FD Trinitron WEGA Hi-Scan KD-34XS955
Page 215: ......
Page 219: ......
Page 222: ...15 SETUP Setup SETUP SETUP SETUP SETUP Rear Panel 3 4 1 2 5 6 7 8 9 q qa qs ...
Page 253: ......
Page 299: ......
Page 317: ......
Page 329: ......
Page 333: ......
Page 342: ......
Page 347: ...13 SETUP Setup SETUP SETUP SETUP SETUP Rear Panel 3 4 1 2 5 6 7 8 9 q qa ...
Page 378: ......
Page 428: ......

