101
Upgrading the Monitor and Controller
Cha
p
te
r 4
Op
er
at
ions
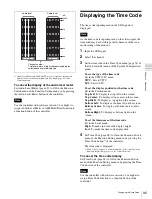
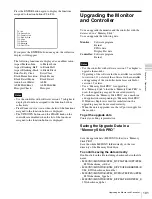
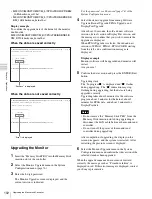
Press the ENTER button again to display the functions
assigned to function buttons F9 to F16.
If you press the ENTER button once again, the collective
display will disappear.
The following functions are displayed as an abbreviation.
Aspect Marker-Line:
A-Marker Line
Aspect Blanking-Half: A-Blank Half
Aspect Blanking-Black: A-Blank Black
Error Notify Clear:
Error Clear
Black Frame Insertion: Black Frame
Black Detail Mode:
Black Detail
Audio Level Meter:
ALM
ALM Hold Reset:
ALM Hold Rst
Horopter Check:
Horopter
• Use the controller with software version 1.7 or higher to
display the functions assigned to the function buttons
collectively.
• Pixel Zoom is not set to on when the list of the functions
assigned to the function buttons is displayed.
• The UP/DOWN buttons and the PHASE knob on the
controller are disabled when the list of the functions
assigned to the function buttons is displayed.
Upgrading the Monitor
and Controller
You can upgrade the monitor and the controller with the
data saved in a “Memory Stick”.
You can upgrade the following data:
Monitor:
Software program
Kernel
FPGA data
DisplayPort data
Controller:
Software program
Kernel
• Use the controller with software version 1.7 or higher to
upgrade the monitor.
• Upgrading of the software for the controller is available
for version 1.11 or later of the software for the controller,
and upgrading of the controller kernel is available for
version 1.2 or later.
• Use a “Memory Stick PRO” for upgrading.
If a “Memory Stick” other than “Memory Stick PRO” is
used, the upgrading may not be executed correctly.
• To initialize the “Memory Stick PRO”, use a machine
and application corresponding to “Memory Stick PRO”.
If Windows Explorer is used for initialization, the
upgrading may not be executed correctly.
• When the unit is upgraded, use the AC power supply for
the monitor.
To get the upgrade data
Contact your Sony representative.
Saving the Upgrade Data in a
“Memory Stick PRO”
Save the upgrade data (MSSONY folder) in a “Memory
Stick PRO”.
Save the whole MSSONY folder directly in the root
directory of the Memory Stick drive.
To confirm saving the data correctly
Double-click on the file including checksum.bat in the file
name.
• MSSONY/MONITOR/BVM_E/UPDATES/SOFT/BVM
_E250/checksum_soft.bat
• MSSONY/MONITOR/BVM_E/UPDATES/KERNEL/B
VM_E250/checksum_kernel.bat
• MSSONY/MONITOR/BVM_E/UPDATES/FPGA/BVM
_E250/checksum_fpga.bat
• MSSONY/MONITOR/BVM_E/UPDATES/DP/BVM_E
250/checksum_dp.bat
Notes
F9: 16:9
F10: Native Scan
F11: Capture Load
F12: Side by Side
F13: Wipe
F14: Butterfly
F15: Blending
F16: Pixel Zoom
Notes

