45
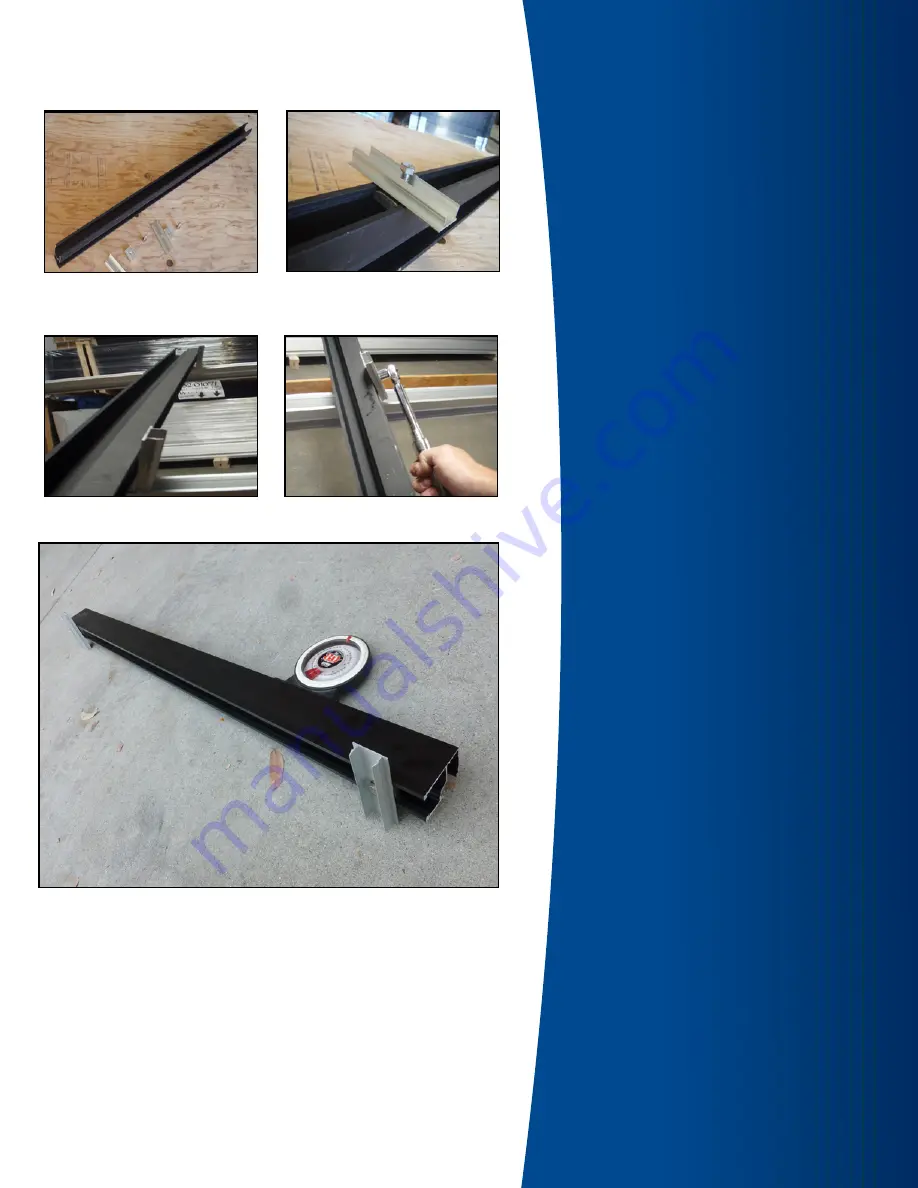
1) Construct pieces
3) Set rail to proper
length
2) Assemble hardware
4) Tighten hardware
Installing the Tilt Tool
Series 100 UL
High Tilt Tool
Warning
- Do not over tighten hardware.
- Always wear fall protection
and safety gear.
Notes
- SnapNrack engineered systems should
only be used with SnapNrack components
and hardware. Any alternate application
may void the warranty and structural
calculations could become invalid.
Step-by-Step Instructions
1) Construct either a standard, shallow,
or ground scrap piece of rail to the
dimensions of the panels being installed.
Drill 3/8" holes in each rail cover. Cut two
5/16" channel nuts to length. Drill holes
into channel nuts. Obtain all of the parts:
rail, two rail covers, two channel nuts,
two bolts, and two split lock washers.
2) Once 3/8" holes are drilled in
each rail, cover the channel nuts
so they can be bolted to the rail
covers and slid in to the rail.
3) The rail covers can then be slid to the
correct positions and tightened down.
4) Tighten hardware.
Design Tools
- SnapNrack has a suite of design tools
to help configure your PV installation to
be an accurate and fast install. Please
visit us at: www.SnapNrack.com.
Assembled tilt tool
Summary of Contents for Series 100 UL
Page 48: ...48 Notes...


