


86
|
Quick Start Guide
|
87
CNC Carving
Congratulations!
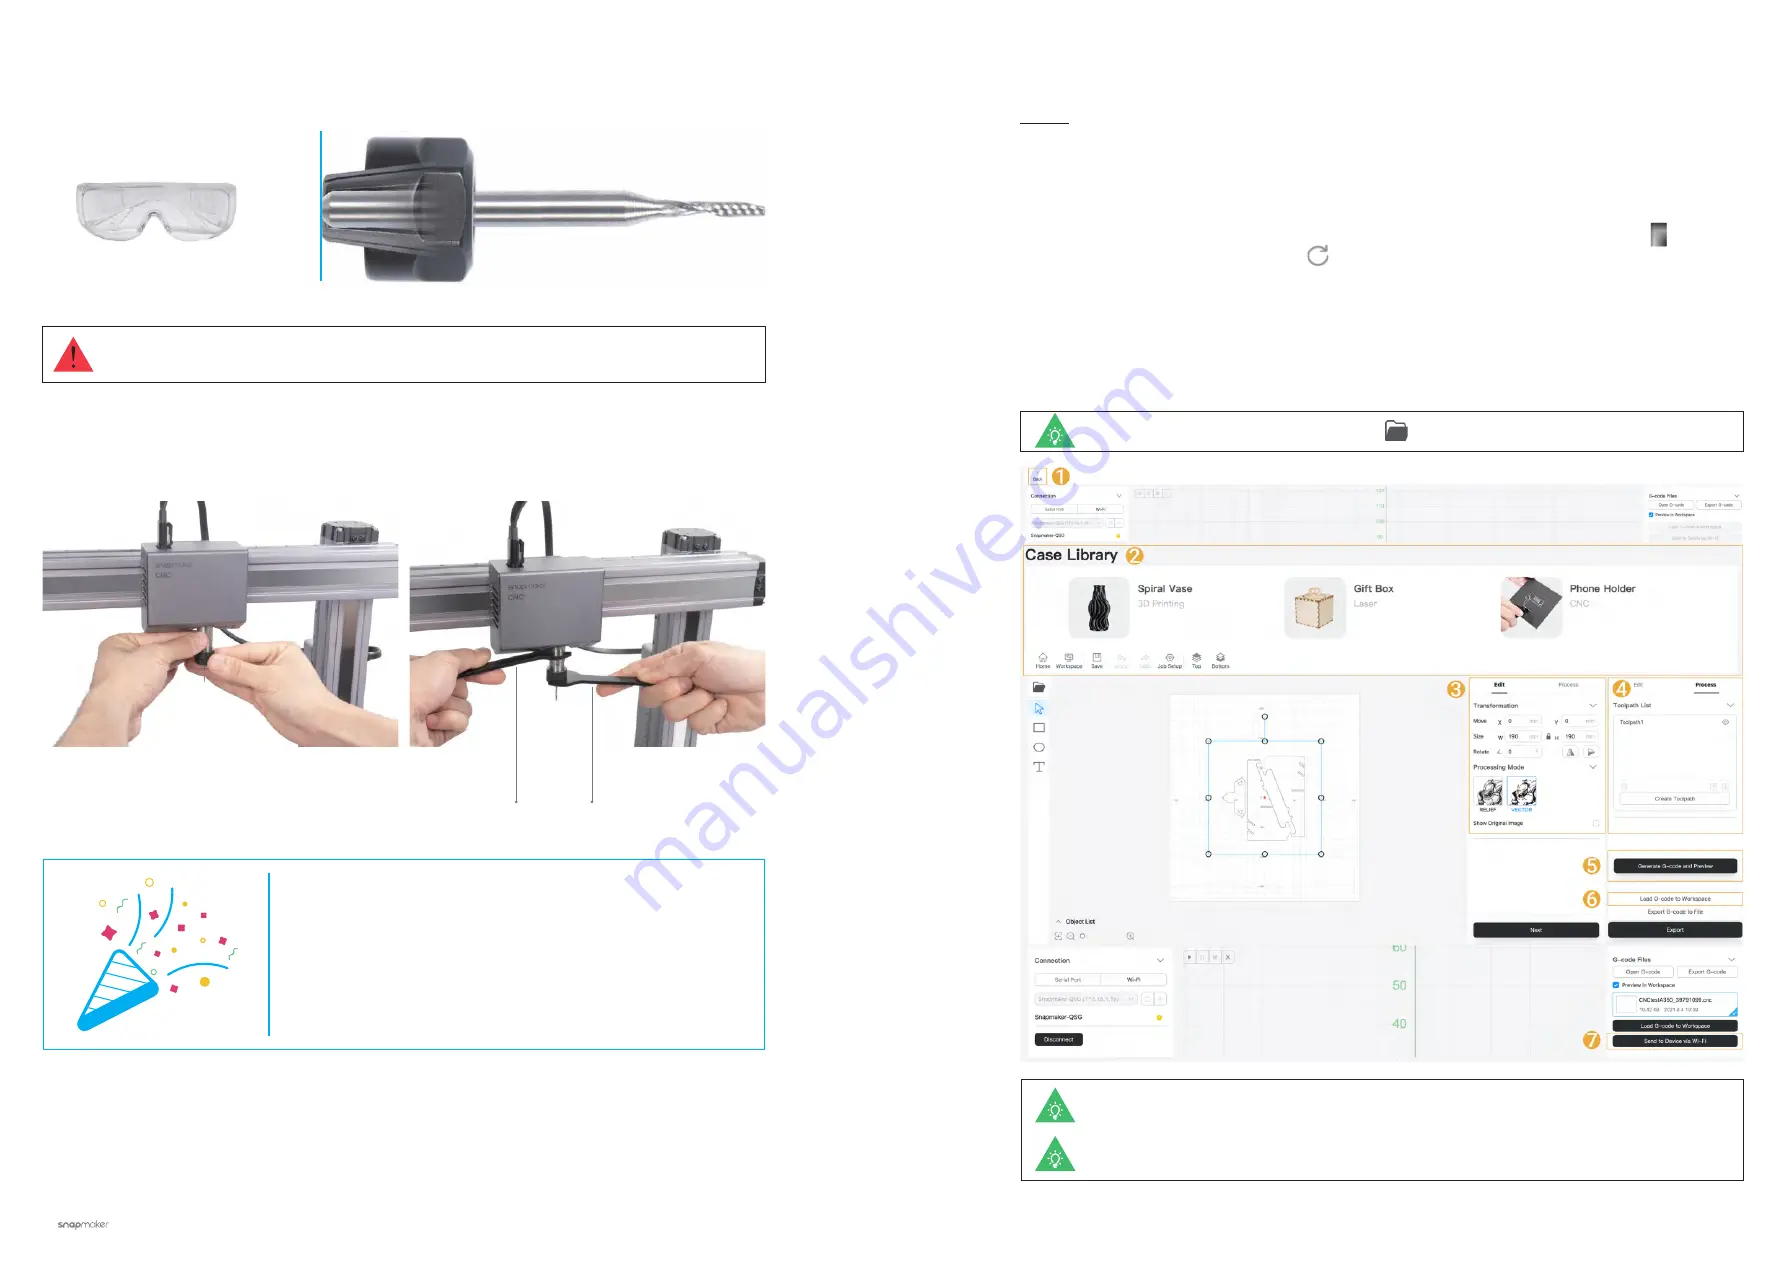
Handle the CNC Bits carefully and keep them out of reach of children.
2. Put on the CNC Safety Goggles. Insert the CNC Bit into the ER11 collet (Flat End Mill is required for our
provided model). Keep pushing the CNC Bit until its end bottoms against the shell of the ER11 collet.
3. Twist the entire unit onto the shank as tight as possible, and then completely tighten the ER11 nut using the
open-end wrenches.
You are now ready to print. Please continue to
generate the G-code file.
14 mm Open-End Wrench
17 mm Open-End Wrench
5.3.1 Prepare the G-code File
Guides & Pictures
/ Snapmaker
1. Install the Software and Complete the Initial Setup
Download our software the Snapmaker Luban at
https://www.snapmaker.com/download
and install. Then
connect Snapmaker Luban to your machine through the same Wi-Fi network: Enter
Workspace
->
Connection
-> Select
Wi-Fi
-> Click
Refresh
-> Select your machine -> Click
Connect
-> Tap
Yes
on the
Touchscreen.
2. Generate the G-code File and Send It to the Machine
①
Click
Back
to return to
Home
->
②
Open the test file from
Case Library
->
③
Use the default settings in the
Edit
section ->
④
Click
Process
and still use the default settings ->
⑤
Generate the G-code file ->
⑥
Load G-code
to Workspace ->
⑦
Send G-code to the machine via Wi-Fi.
You can also upload your own files by clicking and configure the file settings.
Files sent by Wi-Fi can be found on the Touchscreen:
Files
>
Local
.
You can also send the G-code file to the machine via the USB disk. For detailed instructions,
refer to our
Snapmaker Luban User Manual
.


