13
5.
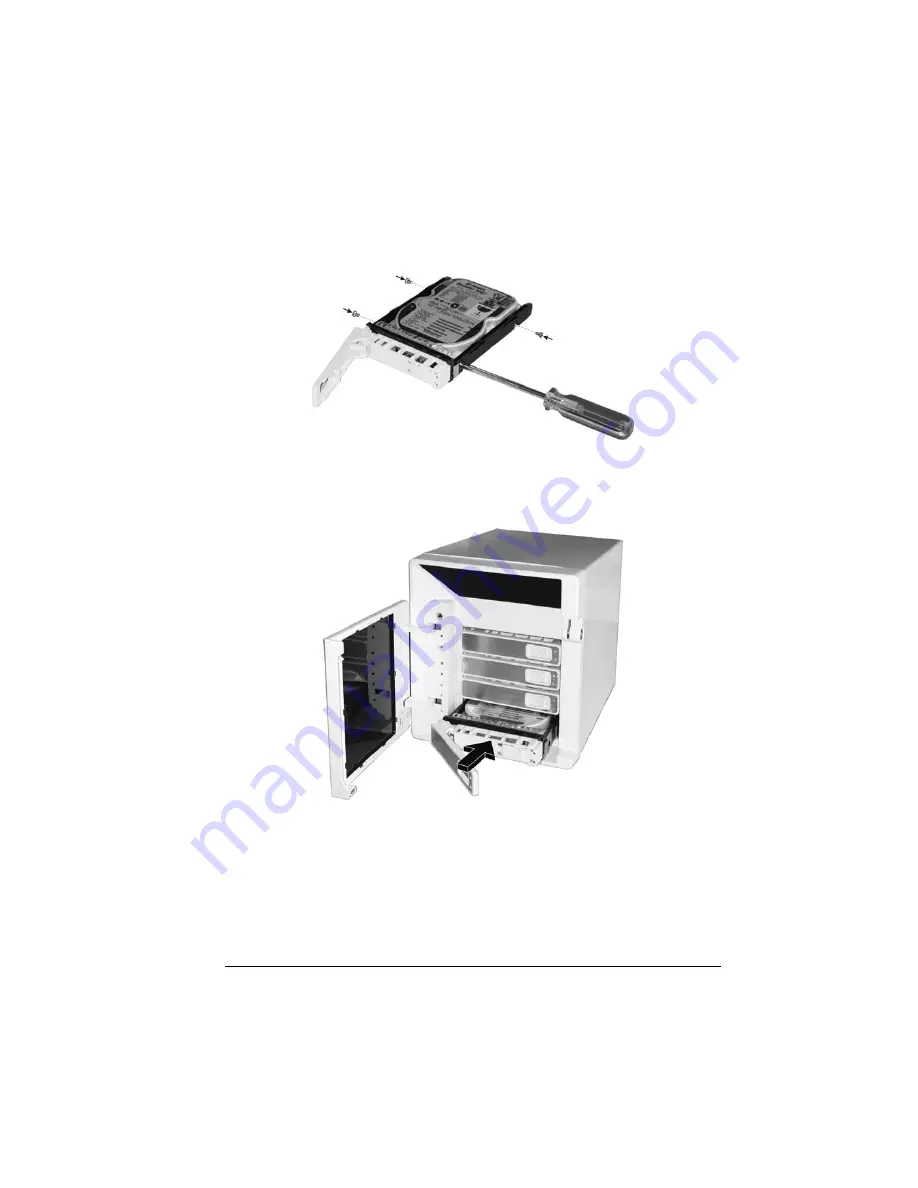
Fit the hard disk into the tray with the connectors pointing toward the rear.
Then align and fasten four screws to secure the hard disk in place.
6.
Keeping the handle in its full-open state, slide the hard disk tray all the way
into the device until the hinge of the handle is inside the device. Then, close
the handle. The latch should click into place.
7.
Follow the same procedure for installing other hard disk(s) in the other
compartment(s).
Step 2. Connect to the Network
1.
Make sure that the computer is connected to a router.
Summary of Contents for NAS04 - annexe 3
Page 1: ...USER GUIDE SMCNAS04 SMCNAS24 TigerStore SMB Network Attached Storage Server...
Page 2: ...SMCNAS04 SMCNAS24 User s Guide Revision 1 8 February 2008...
Page 7: ......
Page 11: ......
Page 21: ......
Page 27: ......
Page 31: ...20 4 Click Finish when the following screen appears to exit installation...
Page 32: ...21 5 Click Setup NAS Discovery Utility 6 The following screen appears Click Next...
Page 37: ...26 14 The following screen appears...
Page 55: ...44 26 After rebooting log in by root again and no password is required...
Page 66: ...55 7 After rebooting it will display your new RAID mode log in again...
Page 81: ...70 1 Click Network setting and the following screen appear...
Page 86: ...75 z Click File and the following screen appears...
Page 98: ...87 3 Click Shared Folders and the following screen appears...
Page 99: ...88 4 Select the shared folder and click Assign Access The following screen appears...
Page 141: ......
Page 143: ...132 For non JAVA based...


