C
ONFIGURING
C
LIENT
TCP/IP
5-2
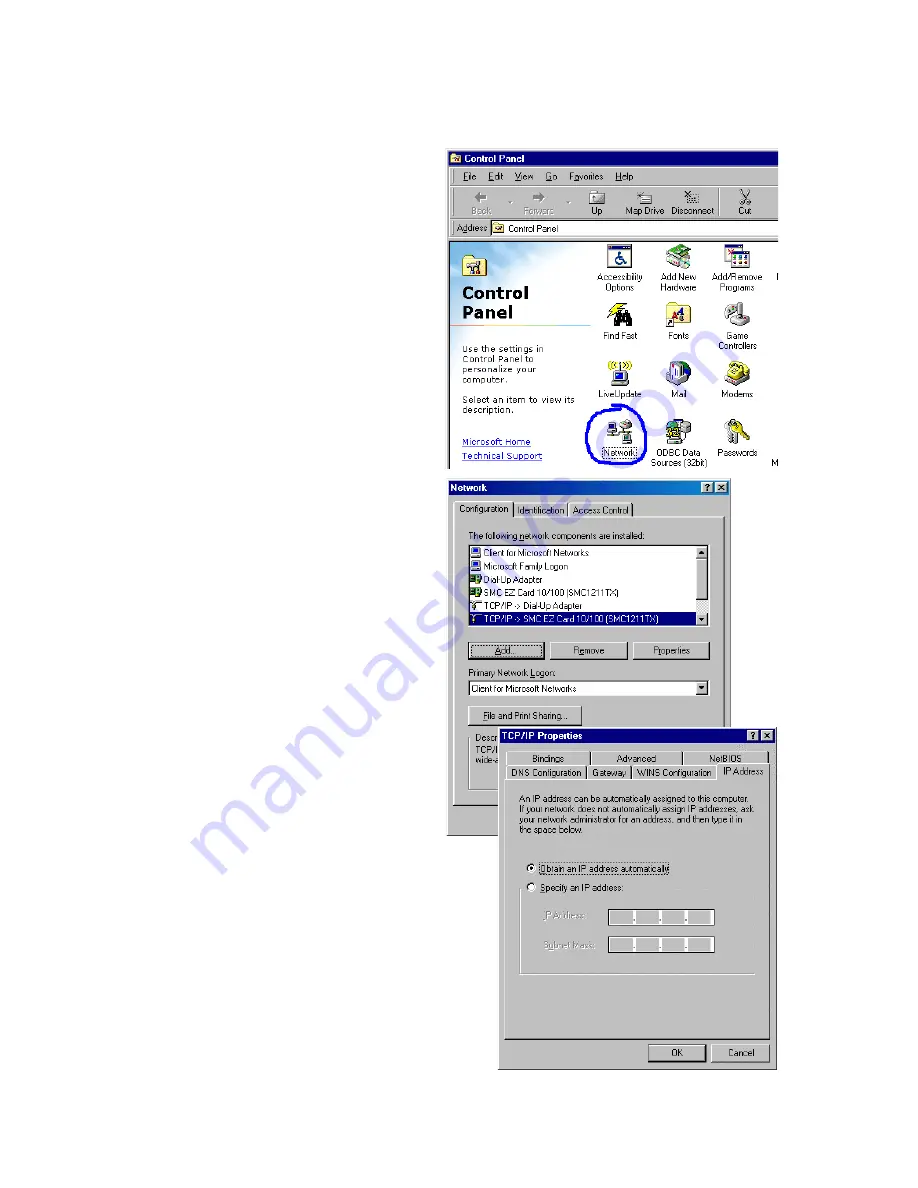
2. In “Control Panel”
double-click the “Network”
icon.
3. In the “Network” window,
under the “Configuration”
tab, double-click the “TCP/
IP” item listed for your
network card.
4. Select the “IP Address” tab.
5. If “Obtain an IP address
automatically” is already
selected, your computer is
already configured for
DHCP. Click “Cancel” to
close each window, and skip
to “Disable HTTP Proxy”
on page 5-4.” If not, locate
your IP address and subnet
mask. Record the numbers
in the space provided on the
following page.
Summary of Contents for 7404WBRA
Page 2: ......
Page 10: ...COMPLIANCES vi ...
Page 14: ...TABLE OF CONTENTS x ...
Page 26: ...INSTALLATION 2 8 ...
Page 28: ...CONFIGURING CLIENT PCS 3 2 ...
Page 57: ...WIRELESS 4 29 MAC Address Filtering ...
Page 60: ...CONFIGURING THE BARRICADE 4 32 Virtual Server ...
Page 67: ...FIREWALL 4 39 Access Control ...
Page 69: ...FIREWALL 4 41 Access Control Add PC ...
Page 72: ...CONFIGURING THE BARRICADE 4 44 3 Click OK and then click APPLY to save your settings ...
Page 73: ...FIREWALL 4 45 Intrusion Detection ...
Page 82: ...CONFIGURING THE BARRICADE 4 54 Status ...
Page 90: ...CONFIGURING THE BARRICADE 4 62 ...
Page 114: ...CONFIGURING CLIENT TCP IP 5 24 ...
Page 132: ...CABLES B 6 ...
Page 135: ......


