C
ONFIGURING
P
RINTER
S
ERVICES
6-5
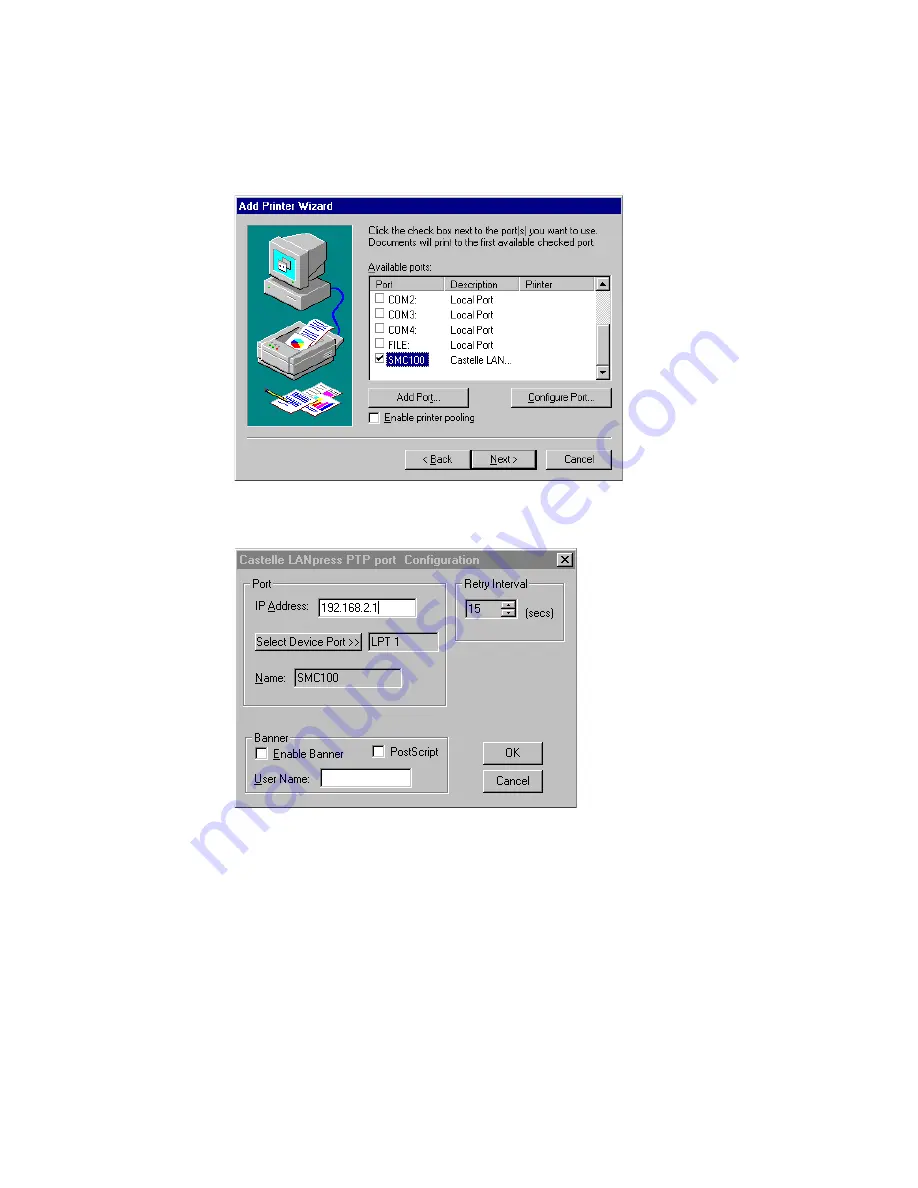
3. Select the monitored port. The default port name is “SMC100.” Then
click the “Configure Port” button.
4. Enter the IP address of the Barricade and click “OK.” Click
“
Next” in
the Add Printer Wizard dialog box.
5. Specify the printer type attached to the Barricade.
6. Continue following the prompts to complete the installation of the
Barricade print server. The printer type you specified will now be
added to your Printers menu.
Summary of Contents for 7404WBRA
Page 2: ......
Page 10: ...COMPLIANCES vi ...
Page 14: ...TABLE OF CONTENTS x ...
Page 26: ...INSTALLATION 2 8 ...
Page 28: ...CONFIGURING CLIENT PCS 3 2 ...
Page 57: ...WIRELESS 4 29 MAC Address Filtering ...
Page 60: ...CONFIGURING THE BARRICADE 4 32 Virtual Server ...
Page 67: ...FIREWALL 4 39 Access Control ...
Page 69: ...FIREWALL 4 41 Access Control Add PC ...
Page 72: ...CONFIGURING THE BARRICADE 4 44 3 Click OK and then click APPLY to save your settings ...
Page 73: ...FIREWALL 4 45 Intrusion Detection ...
Page 82: ...CONFIGURING THE BARRICADE 4 54 Status ...
Page 90: ...CONFIGURING THE BARRICADE 4 62 ...
Page 114: ...CONFIGURING CLIENT TCP IP 5 24 ...
Page 132: ...CABLES B 6 ...
Page 135: ......


