background image

Was this document helpful?

smarttech.com/docfeedback/171164

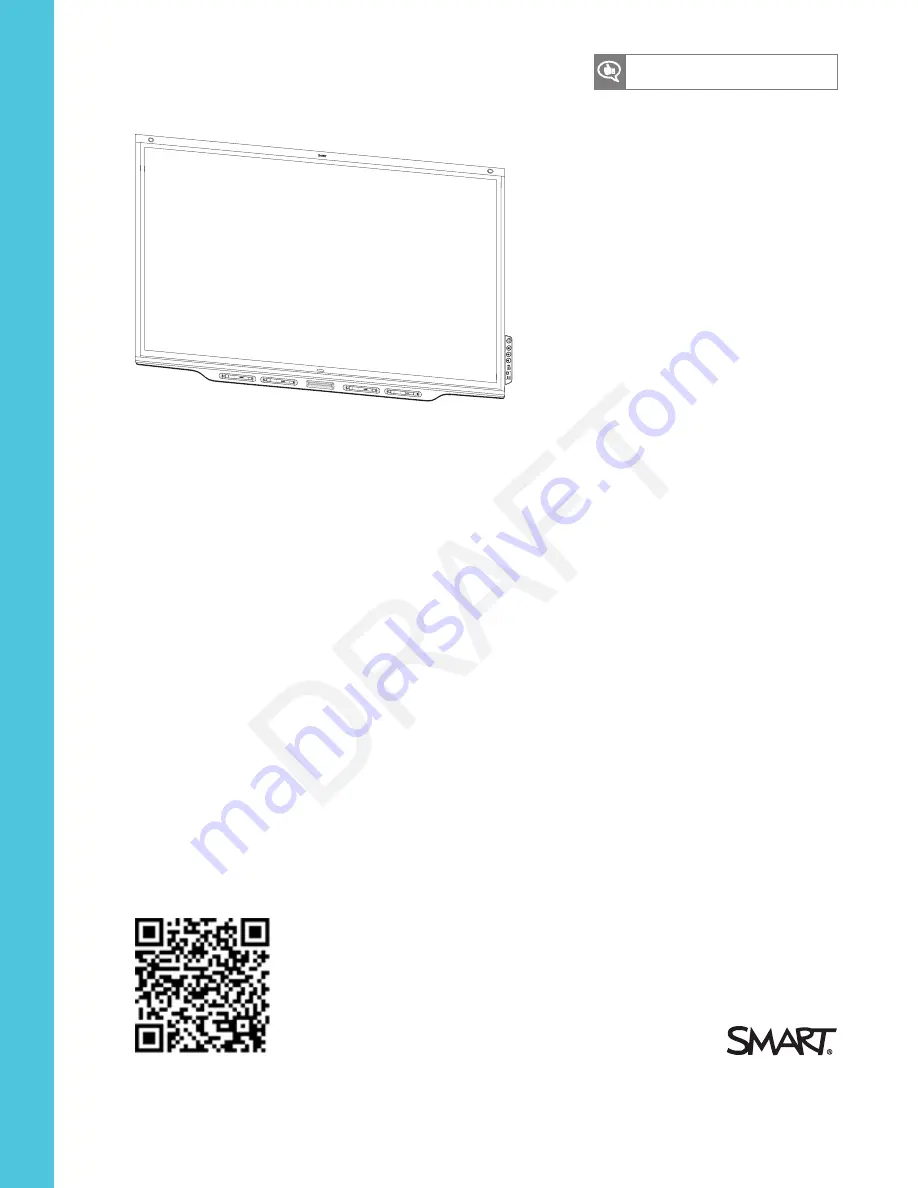
SMART Board® 7000 series

interactive displays

INSTALLATION AND MAINTENANCE GUIDE

FOR MODELS:

l

SBID-7075

l

SBID-7086

l

SBID-7275

l

SBID-7286

l

SBID-7075P

l

SBID-7086P

l

SBID-7275P

l

SBID-7286P

Summary of Contents for SBID-7075

Page 1: ...smarttech com docfeedback 171164 SMART Board 7000 series interactive displays INSTALLATION AND MAINTENANCE GUIDE FOR MODELS l SBID 7075 l SBID 7086 l SBID 7275 l SBID 7286 l SBID 7075P l SBID 7086P l...

Page 2: ...pple Mac OS X iPhone iPad iPod touch iTunes AirPlay and Bonjour are trademarks of Apple Inc registered in the U S and other countries Google Google Cast Google Play Android Chrome Chromebook and Chrom...

Page 3: ...hock do not expose the display to rain or moisture l If the display requires replacement parts make sure the service technician uses replacement parts specified by SMART Technologies or parts with the...

Page 4: ...Otherwise you may scramble the desktop icons or inadvertently activate applications when you wipe the screen l Avoid setting up and using the display in an area with excessive levels of dust humidity...

Page 5: ...dditional requirements and other information refer to the display s specifications see More information on page 10 Federal Communication Commission interference statement This device complies with Par...

Page 6: ...te this equipment Radiation exposure statement This equipment complies with FCC radiation exposure limits set forth for an uncontrolled environment This equipment should be installed and operated with...

Page 7: ...oduire de brouillage pr judiciable et 2 ce dispositif doit accepter tout brouillage re u y compris un brouillage susceptible de provoquer un fonctionnement ind sirable D claration d exposition aux rad...

Page 8: ...aximum transmitted power in EUare listed below Transmitting Band MHz Maximum Transmit Power EIRP dBm 2400 2483 5 19 5150 5350 16 5470 5725 16 Restrictions in AT BE BG CZ DK EE FR DE IS IE IT EL ES CY...

Page 9: ...ting power and devices 21 Connecting power 22 Connecting to a network 22 Connecting cables for room computers guest laptops and other input sources 23 Connecting external speakers 25 Connecting other...

Page 10: ...dge base for additional troubleshooting information 70 Contacting your reseller for additional support 70 Appendix A Using settings 73 iQ appliance AM30 73 iQ appliance AM40 79 Appendix B Remotely man...

Page 11: ...ion audio system 9 SMART Audio 400 classroom amplification system 10 USB extenders 10 More information 10 This chapter introduces the SMART Board 7000 series interactive display About this guide This...

Page 12: ...screen sharing and a web browser Touch support You can do everything on the display that you can do at your computer open and close applications meet with others create new documents or edit existing...

Page 13: ...SBID 7086P Black 86 218 cm No SBID 7275P Black 75 190 cm Yes SBID 7286P Black 86 218 cm Yes Refer to the specifications for detailed technical information for this model including product dimensions...

Page 14: ...e information Pictured 1 Screen Page 5 2 Presence detection sensor 2 Page 9 3 Home button Page 5 4 Eraser Page 7 5 Pen 4 Page 6 6 Convenience panel Page 8 7 iQ appliance Page 5 8 Connector panel Page...

Page 15: ...your model of iQ appliance Screen The following are the dimensions for the display Model Diagonal Width Height SBID 7075 75 190 5 cm 65 165 2 cm 38 5 8 93 cm SBID 7086 86 218 4 cm 74 7 8 190 3 cm 42...

Page 16: ...r when you re done Solid amber The pen is charging quickly and can be used for less than two hours Use the pen for up to two hours Return the pen to the magnetic holder when done NOTE It is normal for...

Page 17: ...pair it with another display to use it with that display When you do this the pen s firmware may be updated to align with the other display s software l To fully charge the pens keep them in the holde...

Page 18: ...ss and hold for 10 seconds to reset the display 2 Volume increase Press to increase the volume 3 Volume decrease Press to decrease the volume 4 Freeze Press to freeze and unfreeze the screen 5 USB Typ...

Page 19: ...0 W integrated speakers You can also connect external speakers see Connecting external speakers on page 25 Related products Related products for the display include the following l SBA 100 projection...

Page 20: ...23 the USB connection between the display and computer should be no longer than 16 5 m If you need to connect a computer that is more than 16 5 m from the display use one of the following USB extender...

Page 21: ...ttech com kb 171213 SBID 7286P specifications smarttech com kb 171214 Comparison smarttech com kb 171161 These documents are available in the Support section of the SMART website smarttech com support...

Page 22: ......

Page 23: ...s install the display This chapter is for installers Installers should read this information along with the installation instructions included with the display before they install the display WARNING...

Page 24: ...anical lifts Refer to the installation instructions for information on using a mechanical lift Accommodating doorways hallways and elevators In some situations you might need to remove the display fro...

Page 25: ...repair center If the display s glass shatters carefully clean up the area and have the display repaired or replaced CAUTION For safety and to prevent further damage do not continue to install or use...

Page 26: ...urniture that has doors or drawers that could hit the display Wall support The wall can support the weight of the display and mounting equipment Refer to the model s specifications for the weight of t...

Page 27: ...quate ventilation or air conditioning around the display so that heat can flow away from the unit and the mounting equipment l If you re planning to install the display in a recessed area there is at...

Page 28: ...e included installation instructions In addition consider the following l Mount the display vertically 90 relative to the floor plus or minus 2 for tolerance and in landscape orientation SMART doesn t...

Page 29: ...N m CAUTION Do not over tighten the screws NOTE SMART recommends M8 30 mm mounting screws for standard installations where the total wall mount bracket and washer thickness is less than 7 mm l Because...

Page 30: ...d RS 232 cables Do not use a null modem cables Null modem cables typically have ends of the same type NOTE For more information on using RS 232 cables for remote management see Appendix B Remotely man...

Page 31: ...ector panel 27 Display convenience panel 28 iQ appliance 28 Other connectors 29 Connect the display to power after you install it but before you turn it on for the first time and configure the iQ appl...

Page 32: ...ion on page 10 Connecting to a network The display requires a network connection for downloading software and firmware updates and a number of the iQ appliance s apps require a network connection as w...

Page 33: ...in the room Connecting cables for room computers guest laptops and other input sources You can connect cables to the display so that users can connect and use room computers guest laptops or other dev...

Page 34: ...For more information see USB extenders on page 10 Using cables that exceed these maximum lengths may produce unexpected results degraded picture quality or degraded USB connectivity Connecting to the...

Page 35: ...ew the computer or other device s input on the display For information about the Input app see the SMART Board 7000 series interactive display user s guide smarttech com kb 171163 Connecting external...

Page 36: ...kers Connecting other devices In addition to external speakers you can connect the following devices to the display Device type Details Microphones Microphones can improve the audio experience in a cl...

Page 37: ...page 25 2 S PDIF out Digital audio output See page 25 3 Stereo 3 5 mm in VGA input audio See page 23 4 USB Type B VGA input touch See page 23 5 VGA in VGA input video See page 23 6 USB Type B HDMI 1 i...

Page 38: ...ector Connects to Notes 1 USB Type A 2 Supported peripherals N A 2 USB Type B HDMI 2 input touch See page 23 3 HDMI 1 4 in HDMI 2 input video and audio See page 23 iQ appliance The following diagram a...

Page 39: ...d audio Do not use this connector Use the connectors on the display instead See page 23 6 USB Type B N A This connector is a service port 7 Micro SD N A This connector is a service port 8 LED N A LED...

Page 40: ......

Page 41: ...dating system software 39 Applying an automatic system software update manually 39 Updating system software manually 40 Switching to the Beta channel 40 Before switching to the Beta channel 40 Switchi...

Page 42: ...red language and then tap Next 3 Select your country and then tap Next 4 Name the display and then tap Next 5 Set the date and time and then tap Next 6 If the display isn t using a wired network conne...

Page 43: ...iguring the network properly allows the display to download important iQ system software and feature updates automatically Network administrators need to configure the network so users can use the Scr...

Page 44: ...es app Activities app SMART Notebook Player https smarttech com SMART Notebook Player https www fabric io SMART Notebook Player https classlab com Workspaces app Activities app https www firebase com...

Page 45: ...00 Picture sharing TCP 7001 Video streaming UDP 7010 Display mirroring UDP 7011 Display mirroring TCP 7100 Display mirroring TCP 47000 Audio negotiation TCP 49152 65535 Dynamic ports UDP 49152 65535 D...

Page 46: ...ernet connection Network administrators can also add a browser proxy or install a certificate To connect to a Wi Fi network 1 If an Ethernet cable is connected to the display disconnect it 2 Tap the H...

Page 47: ...launcher appears 2 Tap Settings The Settings window appears 3 Tap Wi Fi 4 Tap and hold the network to which you re adding a proxy A dialog box appears 5 Tap Modify network 6 Select Show advanced opti...

Page 48: ...the certificate was installed Evaluating the impact of Screen Share on your network data usage When you connect your device or computer to the display using Screen Share the screen sharing protocol c...

Page 49: ...y shows the Whiteboard and any content that was on Whiteboard before the update NOTE You can configure your organization s network to allow or prevent automatic system software and firmware updates se...

Page 50: ...l Features previewed in the Beta channel may never appear in a Stable channel release l There may be frequent updates to the display s system software l The user interface may change significantly as...

Page 51: ...ble Channel A dialog box appears asking you to confirm the switch to the Stable channel system software releases The display checks for a Stable channel system software update 5 Tap Ready to apply upd...

Page 52: ...you want to include in the launcher OR Clear the check boxes for apps you want to remove from the launcher Enabling the Whiteboard Library The display saves Whiteboard sessions to the Library The Lib...

Page 53: ...on page 23 Installing SMART software on connected computers The display comes with either SMART Learning Suite or SMART Meeting Pro software Installing SMART Learning Suite The SBID 7075 SBID 7086 SBI...

Page 54: ...n other computers Contact your authorized SMART reseller smarttech com where for more information IMPORTANT Make sure a computer meets the minimum requirements in the SMART Meeting Pro software releas...

Page 55: ...stalled l Check the mounting location for signs of damage or weakness that can occur over time l Check for loose screws gaps distortions or other issues that could occur with the mounting hardware If...

Page 56: ...hly with a dry cloth l Use a vacuum cleaner with a narrow hose end fitting to clear the back ventilation holes regularly You might have to remove the display from the wall For more information on remo...

Page 57: ...re for SMART Parts see smarttech com Support PartsStore Turning the display off and back on In most situations you can put the display to sleep when not using it following the instructions in the SMAR...

Page 58: ...e the display safely use two or more trained installers WARNING l Do not attempt to move the display by yourself The display is very heavy l Do not move the display by connecting a rope or wire to the...

Page 59: ...sloping or unstable cart stand or table The display could fall resulting in injury and severe product damage CAUTION Do not leave the display face up face down or upside down for an extended period T...

Page 60: ......

Page 61: ...ith Input 59 Resolving issues with Screen Share 60 Resolving issues with Android mobile devices 61 Resolving issues with Apple devices 63 Resolving issues with Chrome browser and Chromebook 65 Resolvi...

Page 62: ...ure the computer is on l Pickup a pen or press the display s Power button You re experiencing other issues with power or the previous solutions don t resolve the issue See Referring to the SMART knowl...

Page 63: ...ions don t resolve the issue See Referring to the SMART knowledge base for additionaltroubleshooting information on page 70 Resolving issues with image quality Issue Solutions You re experiencing the...

Page 64: ...underscan See the computer s operating system documentation l If the computer s desktop is entirely black change it to darkgray or a different color l If the computer s background is extended across m...

Page 65: ...and make sure neither are muted l Adjust the display s audio settings If you have an iQ appliance AM30 see Audio on page 78 If you have an iQ appliance AM40 see Audio on page 80 l Make sure the displ...

Page 66: ...te SMART Product Drivers The display doesn t respond to touch or writing with a pen Make sure any connected computers have detected the display s USB connection and installed drivers On Windows comput...

Page 67: ...ot support High Bandwidth Digital Content Protection HDCP Make sure the sync device is able to receive and display HDMI content that is protected by HDCP For more information see SMART Board interacti...

Page 68: ...k See Connecting to a networkon page 33 l If Workspaces can t visit secure https websites make sure the display s date and time are correct If you have an iQ appliance AM30 see Date time on page 77 If...

Page 69: ...splay See Turning the display off and backon on page 47 Resolving issues with Browser Issue Solutions There is an issue with Browser l Make sure the display is connected to a network See Connecting to...

Page 70: ...on of SMART Product Drivers is installed on your computer See smarttech com downloads l Remove any USB cable extenders For best results use a 16 5 m or shorter USB cable There is an issue with audio l...

Page 71: ...ur computer s documentation If you have an iQ appliance AM40 see Date Time on page 81 and your computer s documentation l On your mobile device turn Airplane mode on and then off again l Restart your...

Page 72: ...mobile device may not be optimized for sharing its screen and is limited to lower quality performance Try connecting with a different mobile device l Ensure you have the latest operating software on...

Page 73: ...evice l Restart your mobile device NOTE Restarting your mobile device can clear networkaddress information that your mobile device had cached Restarting the mobile device can also reinitialize audio a...

Page 74: ...1080 or lower l Sharing videos or playing video games with frequent screen updates requires more networkbandwidth Try reducing the video quality to improve performance See Evaluating the impact of Scr...

Page 75: ...ve an iQ appliance AM40 see Date Time on page 81 and your computer s documentation l On your computer turn Wi Fioff and then backon or disconnect and then reconnect the Ethernet cable l Restart your c...

Page 76: ...for performance with Chromebooks For best results limit usage to static content l The display and the computer might be connected to different wireless access points which can increase latency On the...

Page 77: ...connect and then reconnect the Ethernet cable l Restart your computer NOTE Restarting your computer can clear networkaddress information that your computer had cached Restarting the computer can also...

Page 78: ...restarted your display and stilldon t see the display s name in the list of devices wait severalminutes and then try to connect to the display again When using Miracast you can t add or connect to di...

Page 79: ...clickSearch b Enter Sound in the search box and clickSound c ClickPlayback and make sure the display is selected as the default device The screen is not responding to touch or you re unable to write o...

Page 80: ...e is not working on Android devices l Ensure your Android device is on the same networkas the display l Casting the screen is available on mobile devices running Android 4 4 2 or later l Turn off the...

Page 81: ...lay s serial number is located in the following places l In the iQ settings if the AM40 appliance is installed see Serial Number on page 82 l On the bottom frame l On the back of the display Locating...

Page 82: ......

Page 83: ...e time 77 Usage Data 77 Auto Update 77 Display 78 Audio 78 Launcher 78 SMART Whiteboard 78 Screen Share 79 iQ appliance AM40 79 Network settings 79 Application settings 80 System settings 80 You can a...

Page 84: ...N A N A Serialnumber N A Shows the iQ appliance s serial number N A Bluetooth address N A Shows the display s Bluetooth address N A Up time N A Shows how long the display has been turned on Turning o...

Page 85: ...e Library and erases the Whiteboard N A Clean up the browser N A Closes the browser tabs and clears the history cache and cookies N A Clean up other applications N A Closes open applications N A Wi Fi...

Page 86: ...Google s location service and other applications to scan for networks even when Wi Fiis turned off N A Wi Fifrequency band Auto 5 Ghz 2 4 Ghz Wi Fifrequency band N A Installcertificates N A Installcer...

Page 87: ...clock N A Choose date format N A Sets the display s date format N A Usage Data Option Values Function Notes Share Usage Data N A Sends usage statistics and error reports to SMART N A Auto Update NOTE...

Page 88: ...rties Balance 0 100 Sets the audio output from the speakers Drag the slider allthe way to the left to have allaudio from the left speaker Drag the slider allthe way to the right to have allthe audio f...

Page 89: ...te people to your session Screen Share Option Values Function Notes Screen Share Reset N A Closes and restarts Screen Share app and its discovery services You can restart Screen Share as a troubleshoo...

Page 90: ...ur mobile device is unable to save snapshots of the display in the app Sharing Whiteboards On Off Enables or disables the Invite function on the SMART kapp app If this is off you re unable to invite p...

Page 91: ...ay s date Disable Automatic date time to set the date manually Time N A Sets the display s time Disable Automatic date time to set the time manually 24 Hour Time On Off Shows the display s time using...

Page 92: ...are updates the display receives When switching from the Beta Channelto the Stable Channel a factory reset occurs See page 81 for more information about factory reset Checkfor Updates Now N A Checks f...

Page 93: ...Scaler version N A N A N A LegalInformation N A N A N A End User License Agreement N A Shows the SMART end user license agreement N A Open Source Licenses N A Shows the open source licenses N A SMART...

Page 94: ......

Page 95: ...ds and responses 89 Command inventory 91 Power state 91 Input 92 Brightness 92 Freeze 92 Volume 93 Mute 93 Firmware version 93 Serial number 93 Part number 94 Resolving issues with remote management 9...

Page 96: ...cting a computer to the display Connect an RS 232 cable from the computer s serial output to the RS 232 IN connector on the bottom of the display IMPORTANT Use only a standard RS 232 cable Do not use...

Page 97: ...display s RS 232 IN connector NOTES l When you connect displays in this manner they behave as a single unit see Mounting multiple displays on page 20 l With the exception of the get input set input a...

Page 98: ...normal operating mode READY The screen is off but the display is ready to turn on when the following occurs l A user presses the Power button on the convenience panel l A user picks up a pen or the e...

Page 99: ...tings using the room control system type commands after the command prompt and then wait for the response from the display CORRECT get volume volume 55 If you type a command that the room control syst...

Page 100: ...ample sets the volume to 65 set volume 65 volume 65 To increase or decrease the value of a setting Use the set command to increase or decrease the value by a designated number This example increases t...

Page 101: ...a specific display for only the get input set input and get fwver commands Command inventory Power state Get command Set command Response get powerstate set powerstate Value Where Value is one of the...

Page 102: ...re l Display is the display s label A B and so on l Value is one of the following o hdmi1 o hdmi2 o dp1 o vga1 o ops1 Display input Value Where l Display is the display s label A B and so on l Value i...

Page 103: ...f the following l on l off Firmware version Get command Response If one display is connected get fwversion fwversion Value Where Value is the firmware version If multiple displays are connected Displa...

Page 104: ...emote management and explains how to resolve them Issue Solutions You re experiencing generalissues with remote management l Make sure allthe cable connections are secure l Restart the display and the...

Page 105: ...and Electronic Equipment WEEE Electrical and electronic equipment contain substances that can be harmful to the environment and to human health The crossed out wheeled bin symbol indicates that produc...

Page 106: ...SMART TECHNOLOGIES smarttech com support smarttech com contactsupport smarttech com kb 171164...

Reviews: