


Configuring Your SmartRG™ - Common Use Cases
S m a r t R G © 2 0 1 2
C o n f i d e n t i a l
P a g e
| 29
today. See us at
www.smartrg.com
.
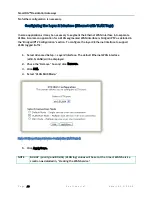
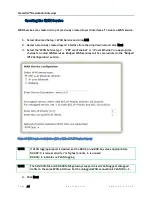
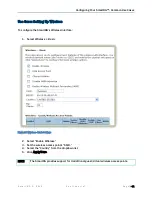
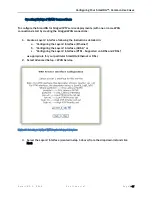
Use Case: Setting Up the LAN
To configure the SmartRG’s LAN interface:
1.
Select
Advanced Setup -> LAN
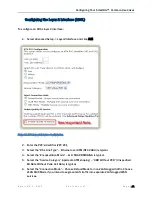
Figure 20 LAN Settings
2.
Leave the “GroupName” as Default.
3.
Set the LAN interface’s “IP Address” and “Subnet Mask” – Default values are:
192.168.1.1/255.255.255.0.
4.
IMPORTANT
– If you intend to support IPTV (either bridged or routed), you MUST select
“Enable IGMP Snooping.” Select “Blocking Mode.”
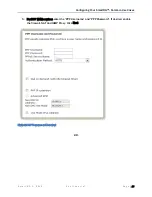
5.
Select “Enable DHCP Server” and set the DHCP address pool’s start and end IP addresses.
6.
Set the DHCP “Leased Time” in hours.
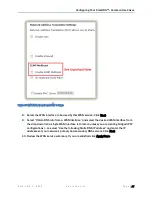
7.
If you would like to create static DHCP leases for specific LAN hosts,
click Add Entries.