19
3.
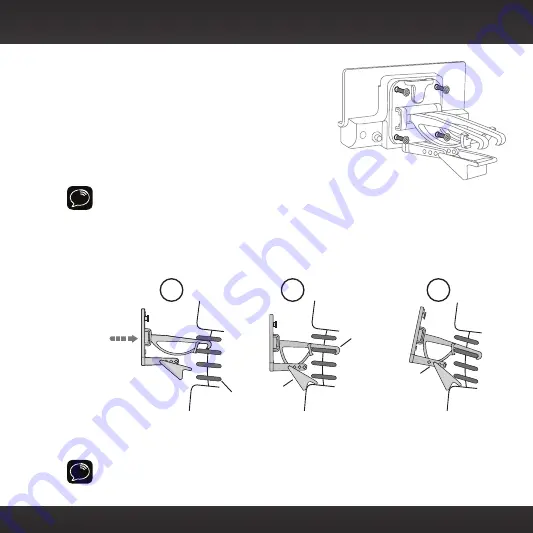
Attach the Vent Mount to the
Power
Connect Vehicle Dock using the
4 provided screws.
4.
Before you attach the Vent Mount to
the vent, skip ahead and finish the
remainder of the vehicle installation
so that the cables are attached to the
dock.
Note!
For greater clarity, the next illustration does not show the dock attached
to the Vent Mount, however, the dock should be attached before continuing.
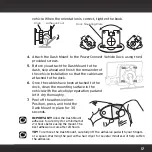
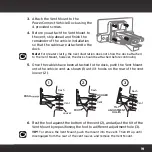
5.
Once the cables have been attached to the dock, push the Vent Mount
onto the vehicle vent as shown (1) until it hooks on the rear of the vent
louver (2).
6.
Rest the foot against the bottom of the vent (2), and adjust the tilt of the
Vent Mount by repositioning the foot to a different adjustment hole (3).
TIP!
To remove the Vent Mount, push the mount into the vent. Then lift up until
disengaged from the rear of the vent louver, and remove the Vent Mount.
PUSH
Dash
Vent
Louver
Vent
Vent
Dash
Dash
HOOKED
TILT
ADJUSTMENT
HOLES
FOOT
1
2
3
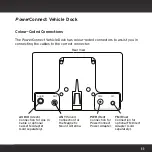
AUDIO
ANT
PWR
FM
Summary of Contents for Onyx
Page 1: ...Onyx Radio Vehicle Kit User Guide ...
Page 2: ......
Page 4: ...4 ...
Page 5: ...5 Introduction ...
Page 13: ...13 Vehicle Installation ...
Page 48: ...48 ...
Page 49: ...49 Activation ...
Page 51: ...51 Using Your Onyx ...
Page 62: ...62 ...
Page 63: ...63 Special Features ...
Page 71: ...71 Configuring Your Onyx ...
Page 90: ...90 ...
Page 91: ...91 Troubleshooting ...
Page 96: ...96 ...
Page 97: ...97 Product Specifications ...
Page 103: ......


