25
Siemens Building Technologies
Fire Safety & Security Products
10.2008
8.5
Confirm software versions
1.
Run the VisiPC software.
2.
If VisiPC starts as the
Visilynx 3 Tester and Simulator
, select the
Visilynx3
Configurator
sub-program at the
Switch
drop-down menu, as detailed in the
VisiPC Software User Manual.
3.
On the menu bar, select
Transfer
and then the
Versions…
option. This
brings up the
Software Version
pop-up box.
4.
Select each software Version Type, in turn, from the drop down menu and
press the Send button. The software version is then displayed in the
Version
field. (Note: Only the local node, as Node L, can currently be queried.)
5.
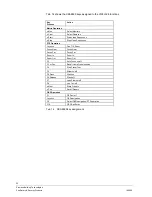
You can record the versions in the table below, for reference:
Version Type
Version Reported
Visilynx FPGA firmware
Visilynx main software
Visilynx flash boot loader
Visilynx configuration
Visilynx font
6.
You can perform any required software upgrades, by selecting the
Transfer
menu command and then the
Software…
option, as detailed in the VisiPC
Software User Manual.
IMPORTANT
Any Configuration held in the VIS3i-328 is erased when you transfer the main
control software. You will therefore need to transfer the configuration back to the
VIS3I-328, once you have loaded the revised software.
8.6
Set clock time and perform VisiPC self-test
8.6.1
Set clock time
On a new unit, we recommend that you set the internal clock on the VIS3I-328 to
the current PC time. You can do this on the
VisiPC (Visilynx 3 Configurator)
sub-
program. From the
Transfer
drop-down menu, select
Date/Time
.
Ensure that
Current Time
is ticked and select
Send
.
8.6.2
VisiPC tester and simulator
You use the features of the VisiPC
Visilynx 3 Tester & Simulator
sub-program to
test the functions of the VIS3I-328.

