40
en
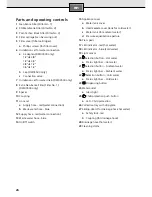
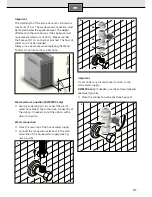
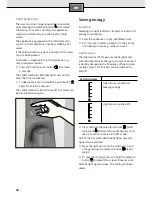
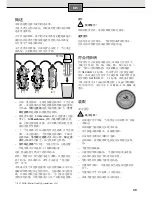
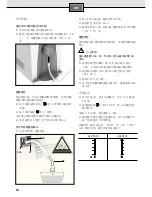
To replace the filters, proceed as follows:
Switch off the appliance and unplug it.
■
Shut off the water supply at the connection
■
valve (6c).
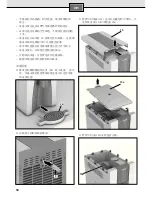
Unscrew the two screws (5a) on the filter cover
■
(5) and remove the cover.
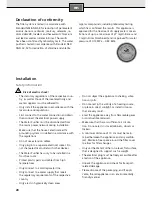
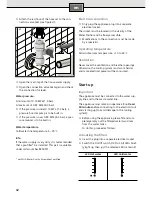
Now, swing out the filter carrier (4) by 30° and
■
pull off the used filter cartridges. To do this, push
the ring upward and pull the filter downward.
Water droplets may form and drip when replacing
the filters.
30°
1
2
3
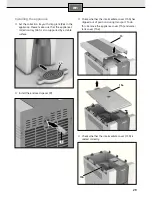
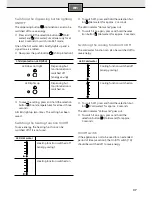
Insert the new filter cartridges until they click
■
audibly into place. The filters are marked with
a small arrow on the upper edge. This indicates
the front side of the filter when inserting it.
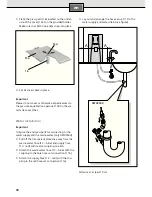
Swing the filter carrier (4) back in place.
■
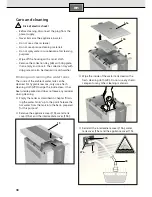
Reinstall the cover (5) using the two screws (5a).
■
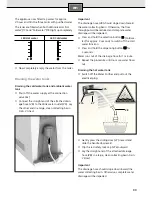
When replacing a filter, the filter must be rinsed
■
twice and the tank is to be wiped clean with a
fresh cleaning cloth. Refer to “Draining the water
tanks”.
Important:
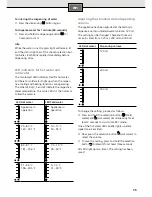
After every filter replacement, the operating time-
count of the respective filter must be reactivated.
This is also indicated by a blinking light. To set the
operating time-count, please proceed as follows.
After replacing the
Neo-Sense Filter (Filter No. 1)
:
Press and hold the push-button
■
(Child protec-
tion) and selection button (Hot water) simul-
taneously for at least 3 seconds.
The new operating time-count is activated.
After replacing the
RO Membrane Filter
(Filter No. 2)
:
Press and hold the push-button
■
(Child protec-
tion) and selection button (Ambient water)
simultaneously for at least 3 seconds.
The new operating time-count is activated.
After replacing the
Post-Carbon Block Filter
(Filter No. 3)
:
Press and hold the push-button
■
(Child protec-
tion) and selection button (Cold water) simul-
taneously for at least 3 seconds.
The new operating time-count is activated.
Transporting and storing the
appliance
If the appliance is to be transported or stored, all
water must be removed from the appliance.
Only transport or store the appliance in an upright
position.
Please look up the procedure in Chapter “Draining
the water tanks” and carry this out completely ex-
cept for the last point (Open the water supply again,
insert the appliance‘s electrical plug in the electrical
socket and switch the On/Off switch to I).
Summary of Contents for DW03500 pureFlow
Page 25: ...23 de ...
Page 47: ...45 en ...
Page 89: ...87 fr ...
Page 111: ...109 it ...
Page 133: ...131 nl ...
Page 177: ...175 tr ...
Page 200: ...198 ...
Page 201: ......

