63
Useful Features &
Network Function
Controlling Multiple Projectors with ID Numbers
1.2.3
4.5.6
1
,
6
5
2
,
3
,
4
Projector
(GUI) On-screen Display
Remote Control
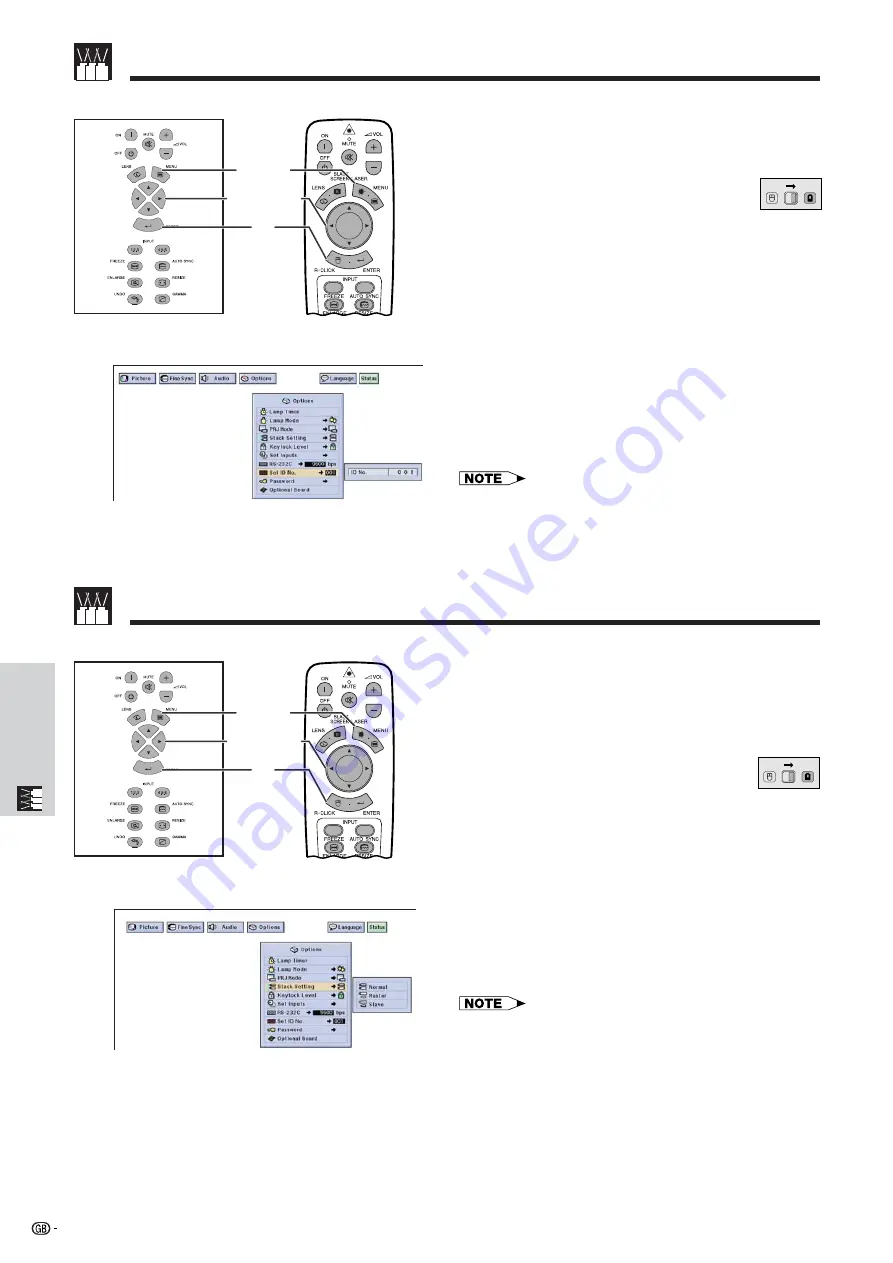
This projector can form a network of up to 250
projectors. To identify separately and control specified
projector, you need to set ID No..
The ID No. you set is displayed on the LED.
(Slide the
MOUSE/ADJUSTMENT
switch
on the remote control to the ADJ. position.)
Setting the ID No.
1
Press
MENU
.
2
Press
ß
/
©
to select “Options (2)”.
3
Press
∂
/
ƒ
to select “Set ID No.”. (The ID No. is
factory preset to “001”.)
4
Press
©
to select the first digit and
∂
/
ƒ
to select
the desired number. Continue this procedure for
the remaining two digits.
5
Press
ENTER
to save the setting.
6
To exit from the GUI, press
MENU
.
• When ID NO. is not be displayed, refer to the setting of “ID No.
Display”. See page 56 for setting “Display Off” function.
• The ID No. can be set from 001 to 250.
• For details on intended purpose, see pages 65 to 68.
Setting the Stacking Mode
1.2.3
4.5.6
1
,
6
5
2
,
3
,
4
Projector
(GUI) On-screen Display
Remote Control
You can double the brightness of an image by stacking
two projectors and projecting same picture
simultaneously. To control two projectors, assign one
as the master and one as the slave. The slave projector
will duplicate any operational settings made to the
master projector.
(Slide the
MOUSE/ADJUSTMENT
switch
on the remote control to the ADJ. position.)
1
Press
MENU
.
2
Press
ß
/
©
to select “Options (2)”.
3
Press
∂
/
ƒ
to select “
Stack Setting
”, and then
press
©
.
4
Press
∂
/
ƒ
to select “Normal”, “Master” or
“Slave”.
5
Press
ENTER
to save the setting.
6
To exit from the GUI, press
MENU
.
• When the projector is set to “Master”, button operation signals will
be transmitted through RS-232C.
• When the projector is set to “Slave”, operations follow the button
operations sent from the “Master”.
• If you set slave, only
∂
/
ƒ
/
ß
/
©
,
ENTER
,
UNDO
,
Power ON
,
Power
OFF
,
LENS
and
MENU
can be used. Other buttons cannot be
used and are controlled by the master projector or computer
through the RS-232C connection.
• For details on intended purpose, see pages 67 and 68.
MOUSE
ADJ.
MOUSE
ADJ.
Summary of Contents for XG-V10XE
Page 92: ...89 Appendix SHARP CORPORATION ...


