


Storing Numbers in Group Keys
Group Keys allow you to dial a group of fax numbers by simply pressing the
appropriate Group Key once. They are convenient for the Broadcasting function,
which is used to transmit a document to a group of fax machines.
Rapid Keys 19/G1 and 20/G2 can be programmed as Group Keys. To program or
clear a Group Key, follow the steps below. Note that one key cannot be
simultaneously programmed as both a Rapid Key and a Group Key.
♦
Up to 49 fax numbers can be stored in one Group Key.
♦
Only Rapid Keys and Speed Dial numbers can be stored in a Group Key. No full
numbers can be stored.
♦
A Group Key cannot be cleared if it is being used in a programmed Broadcasting
operation. First clear the programmed operation as described in "Entering and
Using Programs" in Chapter 5, then clear the key. If you need to check which
program the key is used in, print out the Program and Group List as described in
Chapter 7.
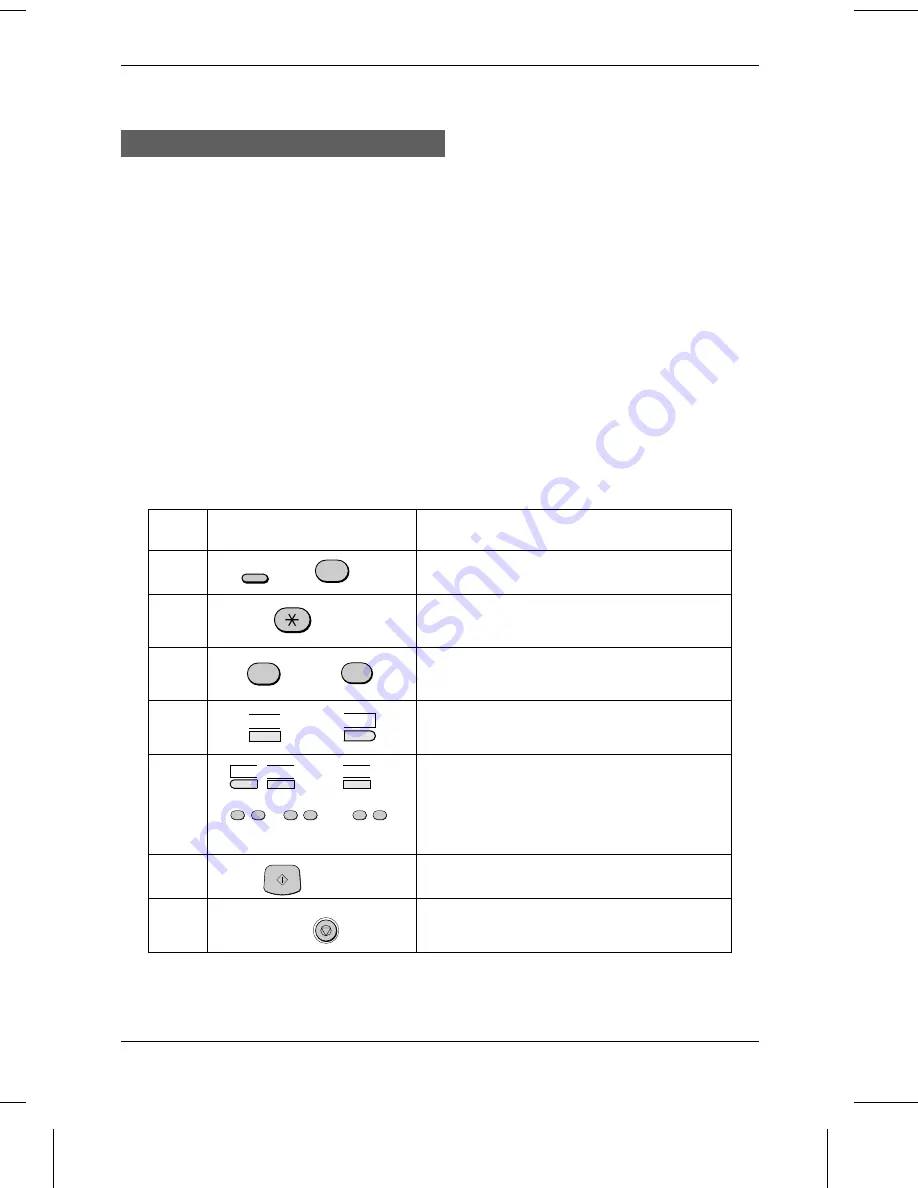
Step
Press these keys:
Comments
1
PROGRAM/GROUP will appear in the display.
2
GROUP ENTRY MODE will appear in the
display.
3
or
Press "1" (SET) to program a Group Key, or "2"
(CLEAR) to clear a Group Key.
4
or
Press a Group Key ("19/G1" or "20/G2") to
select it. If you are clearing the key, go to Step 6.
5
(Example)
Enter fax numbers using one or both of the
following methods:
•
Press one or more Rapid Keys.
•
Enter one or more Speed Dial numbers
with the numeric keys.
6
7
Step 4 or
Return to Step 4 to program/clear another Group
Key, or press STOP to exit.
1
2
S T A R T
19/G1
20/G2
01
02
…
…
09
FUNCTION
7
0
1
0
2
2
2
…
…
STOP
STORING NUMBERS FOR AUTOMATIC DIALLING
INITIAL SETTINGS
2-11
Summary of Contents for FO-2600
Page 8: ...Notes TABLE OF CONTENTS iv ...
Page 20: ...Notes LOADING PRINTING PAPER 1 12 INSTALLATION ...
Page 36: ...Notes USING THE MERCURY FUNCTION 2 16 INITIAL SETTINGS ...
Page 82: ...Notes ANTI JUNK FAX 5 24 SPECIAL FUNCTIONS ...
Page 100: ...Notes CLEARING PAPER JAMS 9 8 TROUBLESHOOTING ...
Page 104: ...Notes INDEX Index iii ...


