17
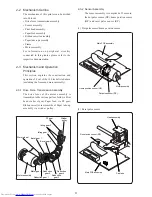
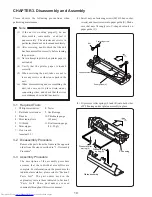
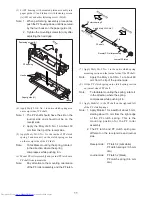
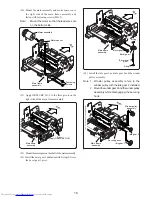
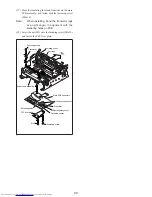
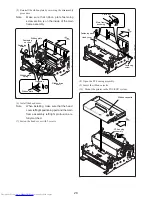
Frame (R) support
plate assembly
Apply ORELUBE
G-1/3 to ratchet
Ribbon drive shaft
Ribbon gear
E-ring
(35) Apply ORELUBE G-1/3 to the four pivots on the
frame (R) support plate assembly and on the ribbon
drive shaft mount hole.
(36) Apply ORELUBE G-1/3 to the ratchet on inside of
ribbon gear and mount on ribbon drive shaft. Then
install the frame (R) support plate assembly and
fasten with E-ring (E4).
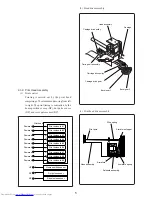
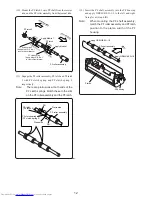
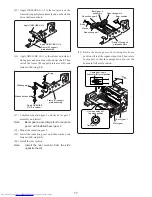
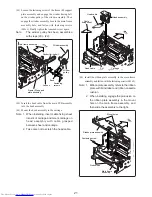
Frame (R) support
plate assembly
Apply ORELUBE G-1/3
Apply ORELUBE G-1/3
(37) Combine reduction gear 4 and the bevel gear 2
assembly, and install.
Note:
Bevel gear 2 assembly refers to reduction
gear 3 with installed bevel gear 2.
(38) Mount the reduction gear 2.
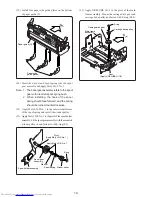
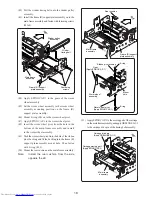
(39) Install the reduction gear 1 and slide washer, and
fasten with E-ring (E2).
(40) Install the rear cushion.
Note:
Install the rear cushion from the side
opposite the slit.
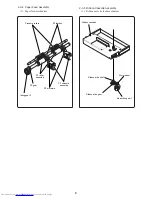
Frame (R) support
plate assembly
Rear cushion
Reduction gear 4
Reduction gear 2
Reduction gear 1
Washer
E-ring
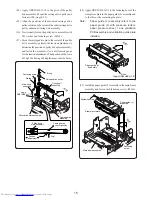
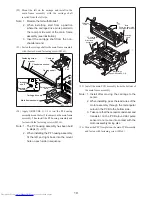
Bevel gear 2
assembly
Rear
Motor gear
Bevel gear 1
Carriage drive pin
horizontal left most position
Timing disc
Home position slit
top most position
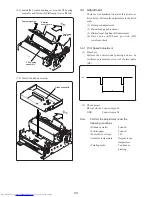
(41) Rotate the motor gear so that timing disc home
position slit is at the topmost position. Then rotate
bevel gear 1 so that the carriage drive pin is at the
horizontal left most position.

