SGM Technology for lighting
GB
User Manual 1.00
Genio Mobile
- 14 -
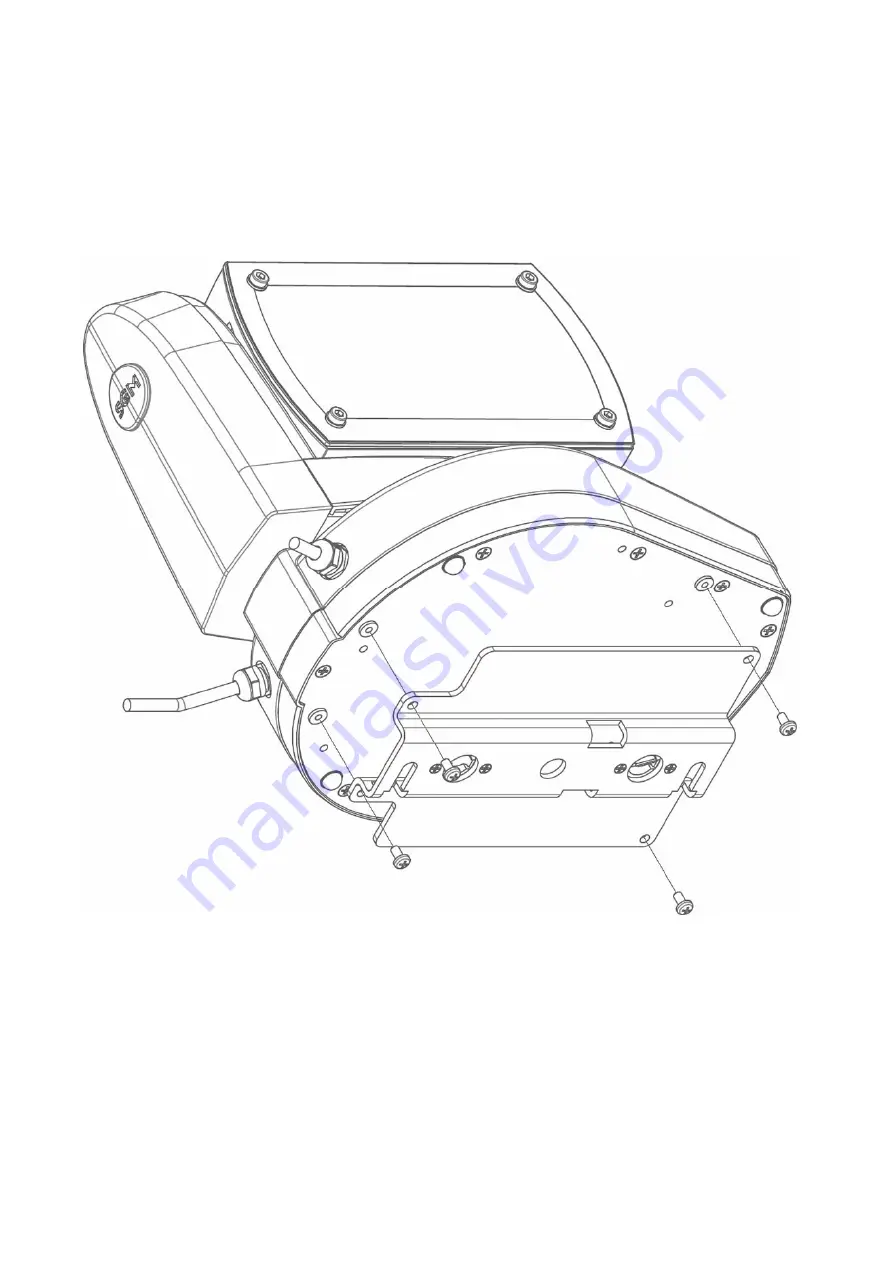
2.4
Installing the bracket
Genio Mobile Mobile is an automated colour-changing fixture suitable for use in decorative/architectural and
show lighting. The type of installation can therefore be varied according to its use.
Genio Mobile can be permanently mounted, in the case of fixed installations, by means of a bracket
supplied along with the fixture, where it will be possible to fit clamps or any other accessories used for
trussing or wall mounting purposes.
1.
The bracket can be installed on the bottom of the fixture by means of the 4 screws supplied as
standard along with the fixture.