Collecting Data
135
7. Collecting Data
From the main menu, press
Run System
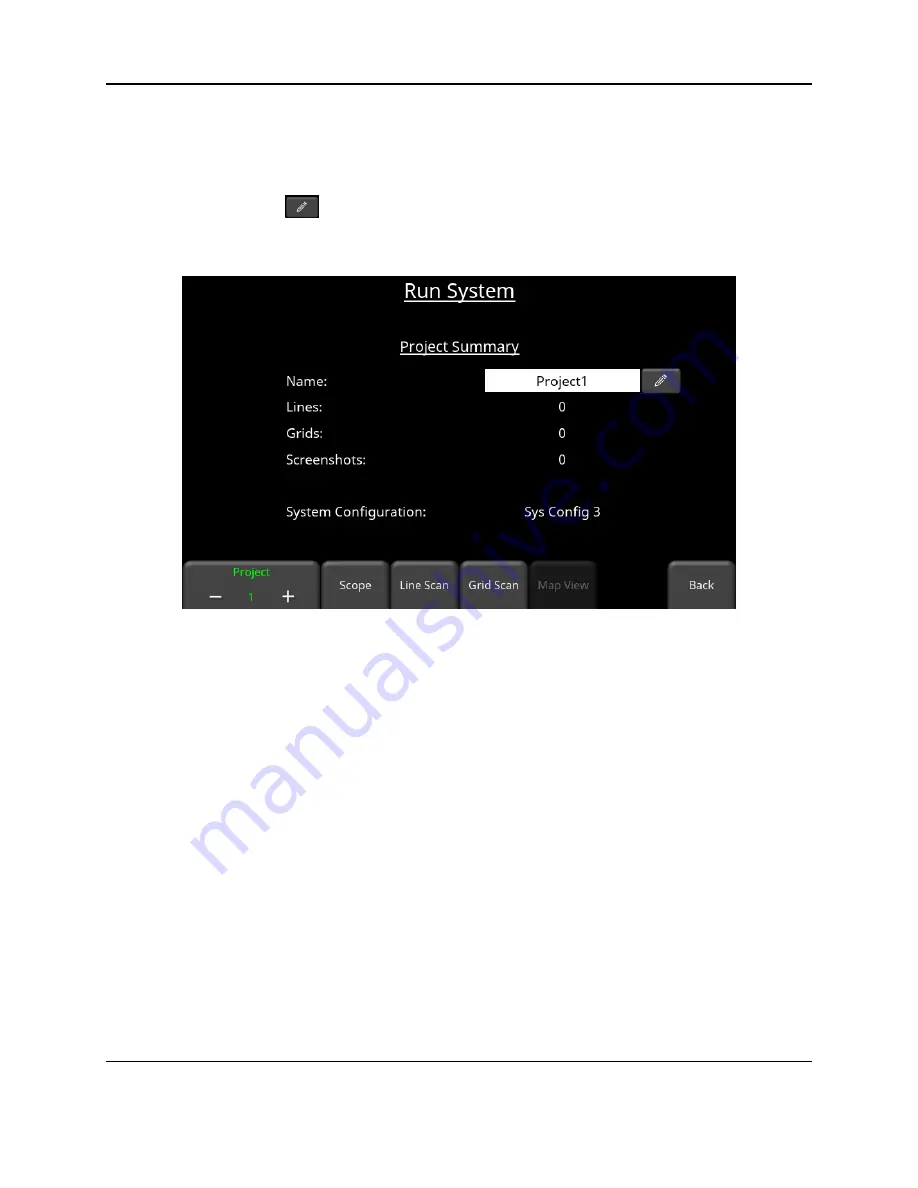
. This takes you to the screen shown in Figure 7-1.
Data is organized into Projects, numbered from 1 to 9. Projects can be given a custom name by
pressing the pencil icon
beside the project name; this opens a keyboard where the user
can type in a name. The project will always be referenced by the number and name shown at
the bottom.
Figure 7-1: Preparing to collect data
The user has the option to collect Lines and/or Grids in a given project, depending on the survey
type selected. Grids can only be collected in reflection mode surveys. Line Scan and Grid
Scan operation are described below.
If no antenna or transducer is detected, you will see the screen in Figure 7-2. The only
difference is that the Scope button is replaced with a Turn On GPR button. Make sure antenna
or transducer is connected; if it’s an antenna, make sure both the Transmitter and Receiver are
turned on.
Summary of Contents for pulseEKKO
Page 1: ...2005 00040 09 ...
Page 2: ...ii ...
Page 4: ...Warranty Confirmation iv ...
Page 10: ...x ...
Page 14: ...Introduction 2 ...
Page 72: ...Assembling Full Configurations 60 ...
Page 80: ...Getting Started 68 ...
Page 116: ...Tools and Preferences 104 ...
Page 180: ...Collecting Data 168 ...
Page 190: ...Map View 178 ...
Page 198: ...Managing Data 186 ...
Page 221: ...Care Maintenance 209 ...
Page 222: ...Care Maintenance 210 ...
Page 226: ...Technical Specifications 214 ...
Page 228: ...Appendix A 216 ...
Page 234: ...Appendix B 222 ...
Page 236: ...Appendix C 224 ...
Page 238: ...Appendix D 226 ...
Page 246: ...Appendix E 234 ...
Page 248: ...Appendix F 236 ...
Page 250: ...Appendix G 238 ...


