Conquest 100
SliceView
89
position of the drill locator. The alpha/numeric coordinates and the drill diameter will be
listed on the left. While the drill locator is on, switch to the PCD display or cycle
through the depth slices to make sure you aren’t going to hit an embedded object at
any depth.
•
Options
– pressing this takes you to a sub-menu where you have the following options
for viewing the depth slice image (Figure 8-6):
Figure 8-6: Pressing Options displays a different menu at the bottom.
o
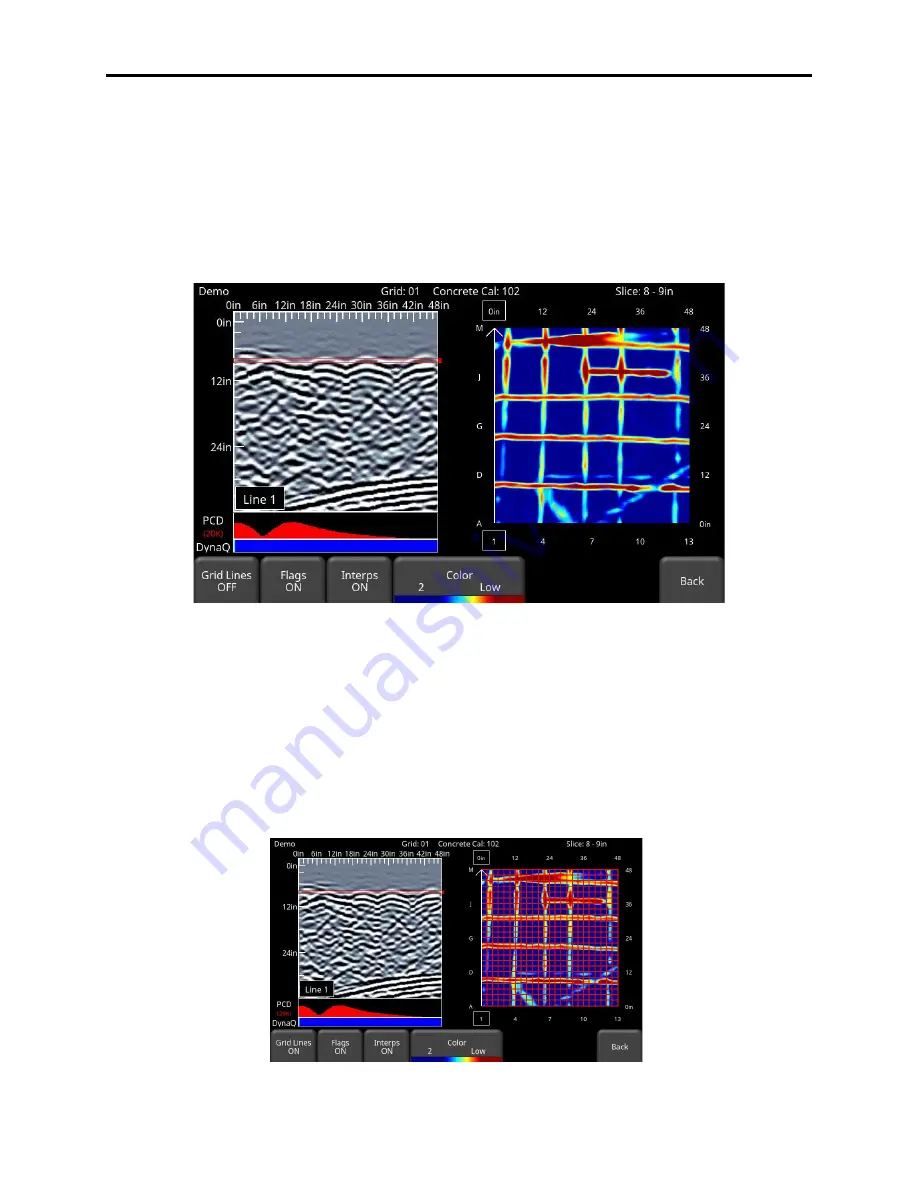
Grid Lines -
press this button to overlay the grid lines on the depth slice image.
It is useful to see grid lines, so you know the position of the GPR Line in the grid
(displayed in white). Pressing this button cycles between ON, PARTIAL or
OFF. When set to ON, all the collected lines are displayed. When set to
PARTIAL, only some of the grid lines are displayed. This may be necessary for
some larger grids as having all grid lines ON tends to obscure the image
beneath (Figure 8-7)
Summary of Contents for CONQUEST 100
Page 1: ... Copyright 2015 Sensors Software Inc 2015 00049 05 ...
Page 2: ......
Page 4: ......
Page 10: ......
Page 16: ...Conquest 100 Overview 6 ...
Page 46: ...Conquest 100 Main Screen 36 ...
Page 84: ...Conquest 100 Line Scan 74 ...
Page 104: ...Conquest 100 SliceView 94 ...
Page 114: ...Conquest 100 Transferring Data to a PC 104 ...
Page 116: ...Conquest 100 Transferring Data to a PC 106 ...
Page 120: ...Conquest 100 Troubleshooting 110 ...
Page 124: ...Conquest 100 Care and Maintenance 114 ...
Page 128: ...Conquest 100 Technical Specifications 118 ...
Page 130: ...Conquest 100 Appendix A Health Safety Certification A2 ...
Page 140: ...Conquest 100 Appendix C Instrument Interference C2 ...
Page 142: ...Conquest 100 Appendix D Safety Around Explosive Devices D1 ...


