Chapter 2
Getting Started
2-6
Smart Label Printer Models 220 and 120
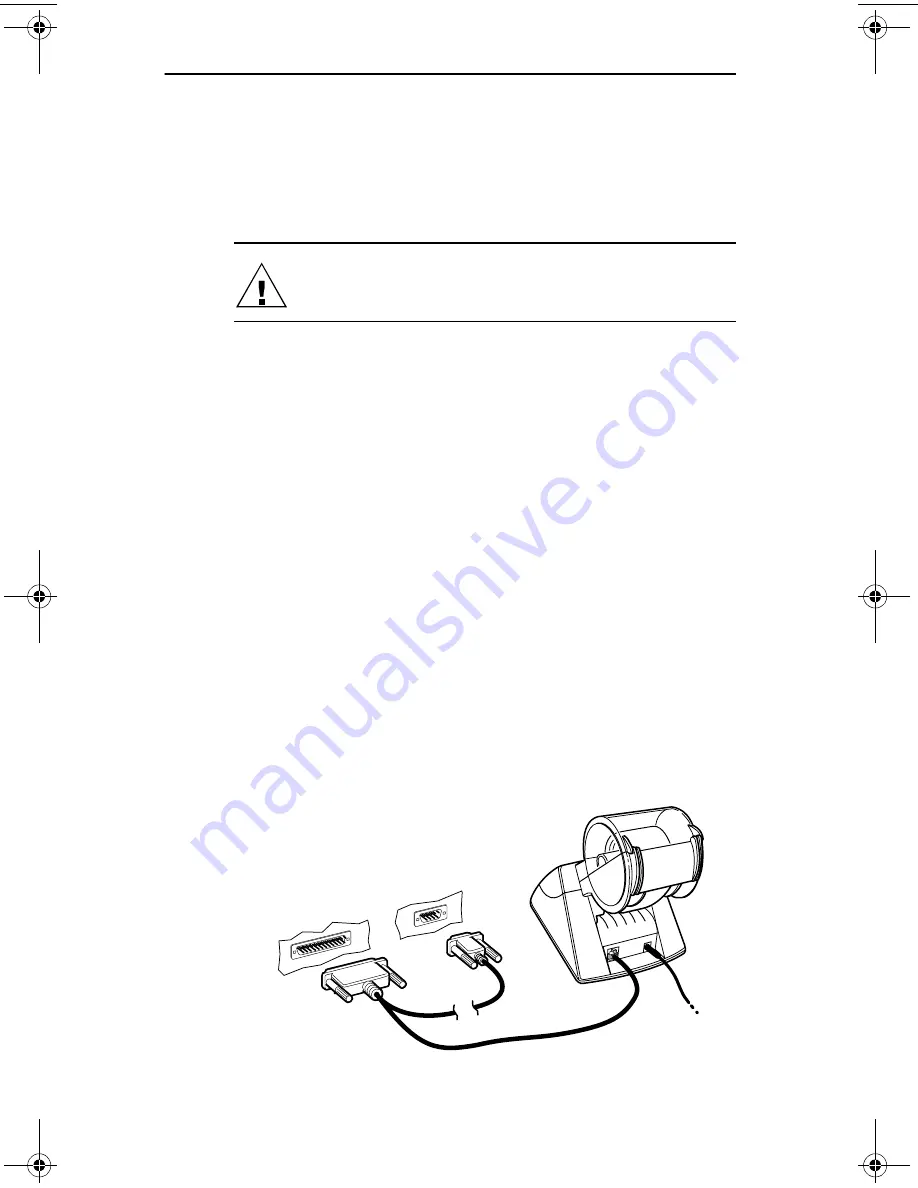
Connecting the SLP to an IBM-compatible PC
Use the serial cable provided with the SLP 120/220 to
connect the SLP to your computer. It has a telephone-style
connector at one end and two computer connectors at the
other end.
CAUTION: Connecting or disconnecting the interface
cable while the printer is turned on may damage the
printer.
Follow these steps:
1 Make sure that the SLP is turned off.
When the power is on, the status light on the front of the
printer is lit.
2 Plug the telephone-style connector into the jack on the
rear panel of the SLP.
3 Plug the other end of the cable — either the 9- or 25-pin
connector as appropriate — into a serial port on your
computer.
Note…
Serial ports are also called COM ports — COM1,
COM2, COM3, or COM4. If your COM ports are all in use,
purchase either another serial port or an “A-B” switch box
to connect the SLP and another device to the same port.
The Seiko Instruments’ serial-to-parallel converter can be
used if you have an available parallel port (see Appendix D,
Ordering Labels and Parts for ordering information).
- OR -
PC Serial port
Do Not Use
Both
slp120-2.bk Page 6 Friday, March 3, 2000 12:40 PM
Summary of Contents for SLP120
Page 1: ...USA User Guide for Windows 95 98 and Windows NT 4 0 Models 220 and 120...
Page 11: ...Chapter 1 User Guide 1 1 Introduction About Your Smart Label Printer 1 2 Software Features 1 3...
Page 49: ...Appendix B User Guide B 1 Commonly Asked Questions and Answers...
Page 52: ...Appendix C User Guide C 1 Technical Support and Service...
Page 57: ...Appendix D User Guide D 1 Ordering Labels and Parts...
Page 60: ...User Guide Index 1 Index...


