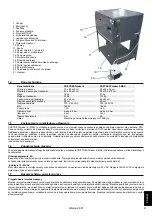
2.3
Preparing the machine for operation and initial start-up
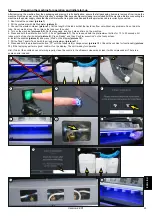
After removing the machine from the packaging and placing it in its destination, ensure that all packaging items are removed from inside the
machine. Nozzles, power cords, filters, allen keys, carriage filter key and ultrasonic cleaner are included with the machine. Before connecting the
machine to the power supply, check that the electrical socket is in good condition and that the protective cable is correctly connected.
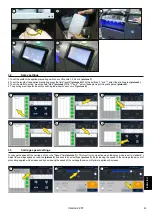
2. Fill the containers with distilled water
(picture 2).
1. Don’t install the nozzles!
(picture 1)
3. Connect the waste container
(picture 3).
Cut the length of the tube so that the liquid can flow out without any problems. Do not kink the
tube. Do not make a loop. Do not place the tank over the outlet.
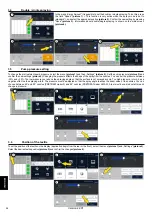
5. Press and hold the water button for 10 - 30 sec.
(pictures 6-7)
. Then press and hold the pretreatment button for 10 to 30 seconds. All
tubes must be free of air bubbles
(picture 8).
Press „Ready” and then „Confirm execution” on the touch screen.
4. Turn on the machine
(pictures 4-5).
Set the language, location, date and time on the machine.
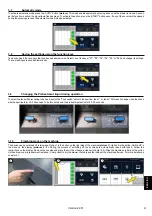
6. Install the nozzles
(picture 9)
and press
„S
tart
”
on the display
(picture 10).
8. Press and hold the pre
treatment
button
”PT” until the tubes visibly change colour
(picture 12).
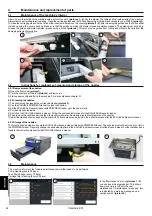
Check the nozzles for functionality
(picture
13).
If the test spray pattern is good,
confirm it on the
display
. The
unit
is ready for operation.
Hint: If one of the nozzles does not work properly, clean the nozzle in the ultrasonic cleaner and clean it with compressed air. There is a
spare nozzle included.
7. Fill the Tank 1 and/or Tank 2 with the mixed pretreatment
(picture 11).
Version
2
2
.0
1
2
3
E
N
G
L
IS
H
10
1
4
7
12
2
5
8
3
9
1
1
13
6
Summary of Contents for PRETREATmaker 5
Page 2: ......
Page 17: ...5 3 Schaltplan Version 22 01 17 DEUTSCH ...
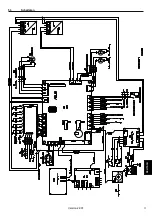
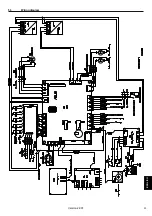
Page 33: ...5 3 Wiring diagram Version 22 01 ENGLISH 33 ...
Page 49: ...5 3 Schemat połączeń 49 POLSKI Wersja 22 01 ...
Page 51: ......
Page 52: ......


