Chapter 5
Applying and editing zone styles
93
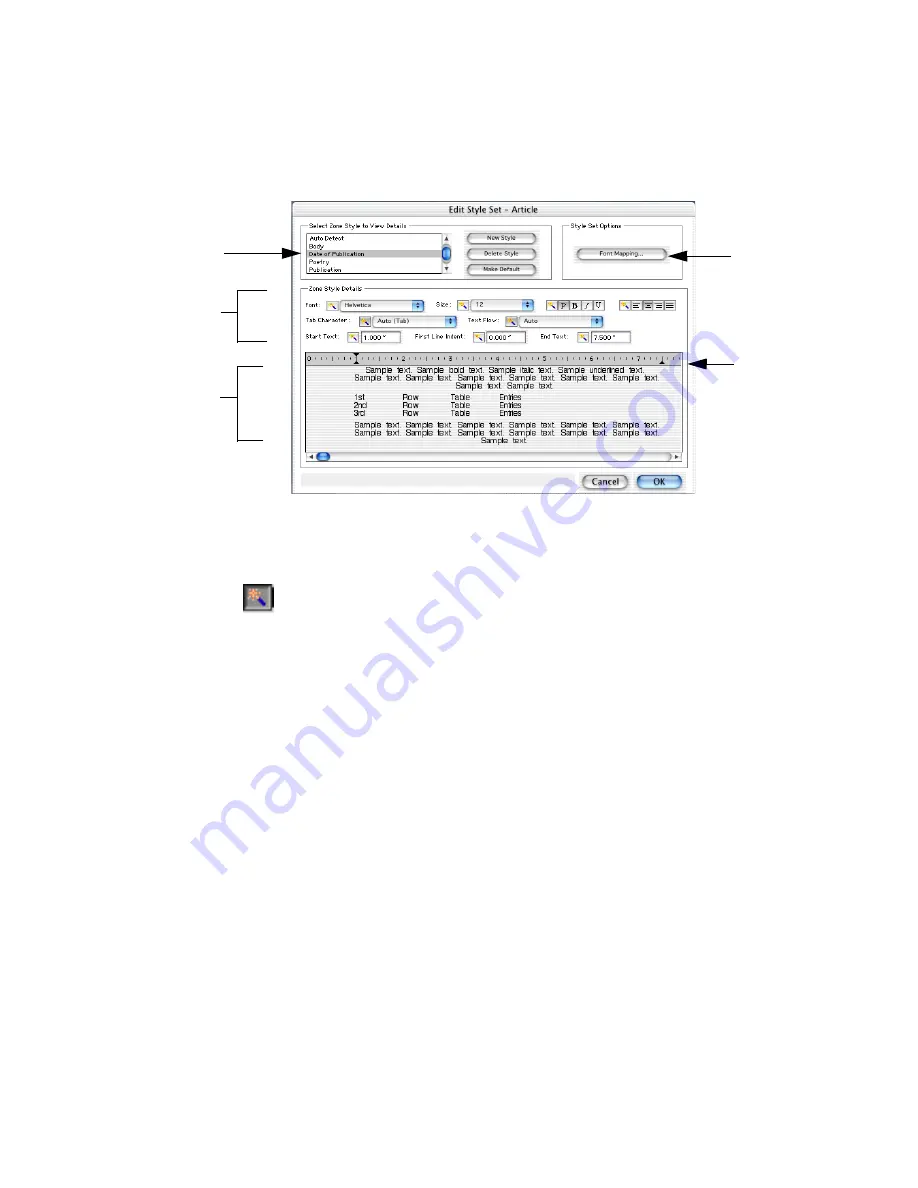
The Edit Style Set dialog box lists the zone styles in the set.
Click the name of the zone style you want to edit. The formatting
attributes for the selected zone style are displayed.
Change these formatting attributes as detailed in steps 5 to 11
(described from left to right and top to bottom). Whenever the
auto button to the left of an attribute is selected (pressed in),
OmniPage Pro will detect and transmit the formatting for you.
Choose Auto for Font to have automatic character mapping (see
below). Choose a font name to have it applied to all texts inside
zones with this zone style instead of mapping.
Choose Auto to have the original character sizing detected and
retained, or choose one fixed point size for all text in the zones.
Choose Auto to have attributes (bold, italic, underline) detected
and retained from the original, or choose a value.
Choose Auto to have paragraph alignment detected and retained,
or choose an alignment for all text in the zones.
Choose Auto to have tabs detected and retained. Or choose
replacement character(s) to be placed instead of tabs.
Choose Auto to let the program decide whether to flow text or
not. Choose Word Wrap to make all text flow within the text
areas. Choose Hard Line Returns to keep all line endings as they
were in the original document.
The currently
selected zone style
Click to make
font mapping
selections for the
entire style set.
Settings for the
currently selected
zone style
Specimen text for
the current zone
style
Drag the
markers in this
ruler to change
text start, end
and indent
values.
Summary of Contents for OMNIPAGE PRO X
Page 1: ......


