background image

 Chapter 4

OCR Toolbar options

73

[Zone Templates] 

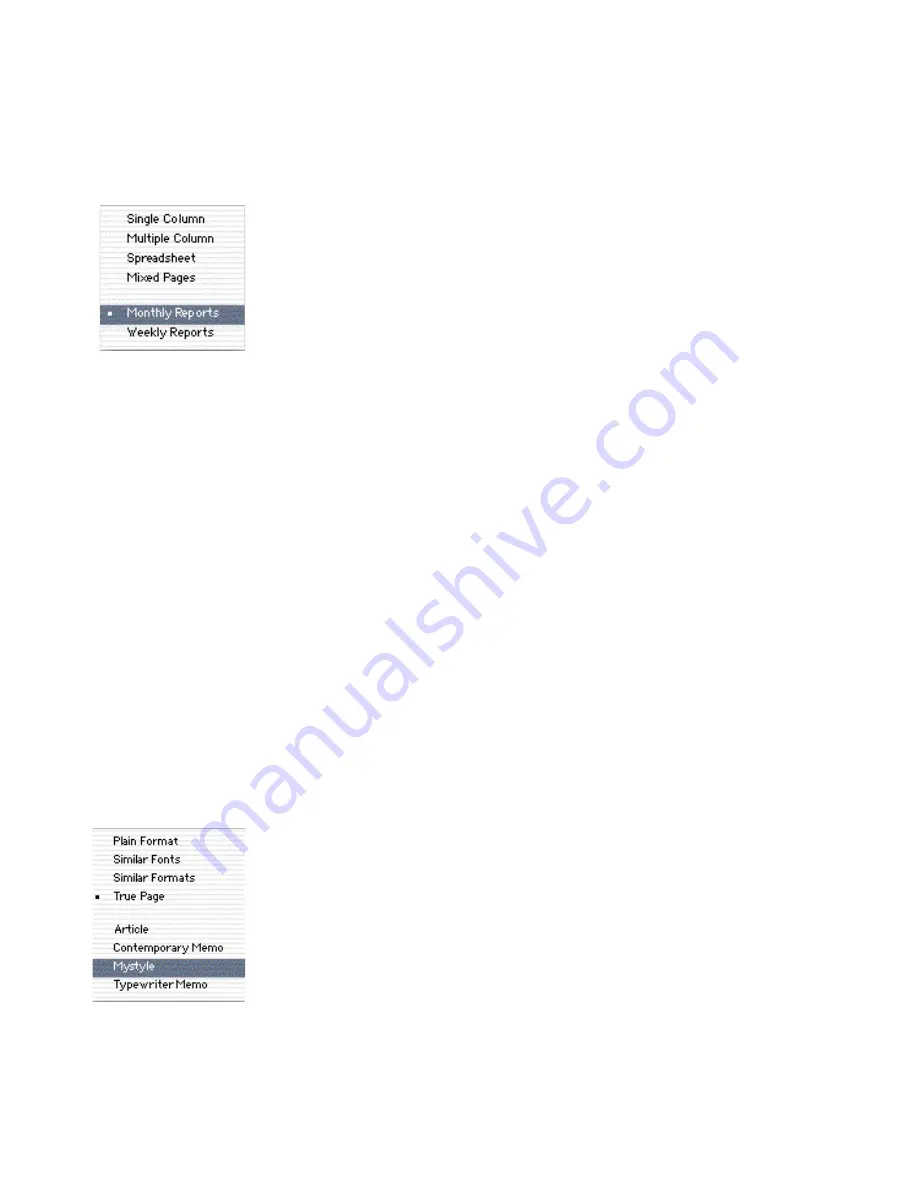
Select the name of a zone template file that you want to use to place 
zones on new incoming pages. Any zone templates you have created 
appear at the bottom of the pop-up menu. The example comes from a 
user who has created two templates to process standardized form-like 
printed reports – one type arrives each week, the other each month.

To place template zones on an existing page, select the template here, 
then click the Apply Template tool in the Tools palette. For more 
information, see Zone templates on page 96.

Style Set options

You can select a page-level style set option from the Style Set pop-up 
menu. The choice made here determines the appearance or formatting 
level to be applied to the recognition results coming from new 
incoming pages. 

The selected OCR Toolbar option has no influence on existing pages, 
even if you re-recognize them. Use the Zone Info palette to change the 
style set for an existing page.

Tables and graphics can be handled by all style sets. With True Page, 
these are retained at their original location on the page. With all other 
style sets, tables are placed at their location in the decolumnized text 
and graphics are placed at the end of the text from the page.

The first four style sets define basic formatting levels. The remaining 
style sets are fully editable. Choose from the following options:

Plain Format

Select this to have plain text in one font and size that you can define. 
Text will be left aligned, decolumnized and wrapped (it will use the 
whole page width). 

Similar Fonts
Select this to have text with font formatting retained. Fonts are 
mapped as specified. Font sizes and bold, italic and underlined texts 
are detected and maintained. Text is left aligned, decolumnized and 
wrapped. 

Summary of Contents for OMNIPAGE PRO X

Page 1: ......

Page 2: ...of merchantability or fitness for a particular purpose Some states or jurisdictions do not allow disclaimer of express or implied warranties in certain transactions therefore this statement may not ap...

Page 3: ...ling the software 12 Running the program under Mac OS 9 13 Starting OmniPage Pro 14 Selecting your scanner 14 Registering OmniPage Pro 18 Removing OmniPage Pro 18 2 Introduction 19 What is Optical Cha...

Page 4: ...s 36 Loading image files 36 Opening OmniPage Documents 38 Using drag and drop 38 Creating and modifying zones 39 Creating zones automatically 40 Specifying zone types 41 Drawing zones manually 44 Modi...

Page 5: ...ity 65 Direct OCR 66 Using Direct OCR 67 4 Settings 69 OCR Toolbar options 70 Get Page options 70 Original Layout options 72 Style Set options 73 OCR options 75 Export options 75 Preference settings 7...

Page 6: ...rst 104 Low memory situations 104 Low disk space situations 105 Improving accuracy 105 Improving fax recognition 108 Interface problems and solutions 109 System failure during OCR 109 Supported langua...

Page 7: ...king areas and controls starting with the OCR Toolbar Chapter 3 Processing documents tells you how to do automatic and manual processing and how to combine them It details processing steps acquiring p...

Page 8: ...try u Search Search keywords through the whole text of all help topics It lists all topics containing the specified word s For advice on other Help facilities please consult the documentation for your...

Page 9: ...splay its related topic If an entry is linked to more than one topic a pop up list appears Select the desired topic t To browse through a series of topics Use the Previous and Next buttons top right o...

Page 10: ...s new to the world of OCR processing u Improved parsing of page elements to retain the formatting and layout of the original pages in particular better retention of color graphics and smarter text gra...

Page 11: ...ing installation This User s Guide is also supplied in PDF format It is copied to the sub folder User s Guide The Mac OS X operating system includes a PDF viewer Under Mac OS 9 please use Adobe Acroba...

Page 12: ...MB of free hard disk space u A color monitor with at least 256 colors and 800x600 pixel resolution u A Macintosh compatible pointing device u A supported and correctly installed scanner if you plan to...

Page 13: ...ng Files User Dictionaries User s Guide and Zone Templates Note Under Mac OS 9 you may get a warning message if you have no CarbonLib installed on your machine In this case double click the CarbonLib...

Page 14: ...ument icon The program launches and opens the previously created OmniPage Document See page 56 and Saving an OmniPage Document on page 61 u Use the Direct OCR feature See Direct OCR on page 66 Selecti...

Page 15: ...es the user interface differences depending on which type of scanner driver is chosen t To auto select a scanner for OmniPage Pro Switch on your scanner and start OmniPage Pro Choose Preferences from...

Page 16: ...der Manufacturer Photoshop plug in and TWAIN driver To decide which of these general scanner drivers your scanner supports refer to the documentation supplied with your scanner See the next two sectio...

Page 17: ...ences dialog box t To access a scanner through a Photoshop plug in Copy your scanner driver from the Plug Ins folder of the Adobe Photoshop program to the OmniPage Pro X Components Scanner Support Plu...

Page 18: ...electronic form that can be completed in less than five minutes You are asked to enter OmniPage Pro s serial number which appears on a sticker on the CD sleeve When the form is filled and you click Se...

Page 19: ...er recognition OCR technology accurately and easily converts text from scanned pages and image files into editable form for use in your favorite computer applications You do not have to retype whole t...

Page 20: ...ord processing desktop publishing and spreadsheet applications Beyond OCR In addition to text OmniPage Pro X can retain the following elements in a document after OCR for display and export t Graphics...

Page 21: ...ists auto zoning and a style set defines a formatting level for the recognized pages When processing manually zones should be drawn and styled at this point 2 Perform OCR Pages can be recognized with...

Page 22: ...to be done The Export button lets you save results from all recognized pages in the document to file or copy them to Clipboard u The five pop up menus let you select options Processing is done accord...

Page 23: ...th Image view and Text view u The Thumbnail window u The Zone Info and Tools palettes u The Preferences dialog box OCR Toolbar Thumbnail window Tools palette Document window Zone Info palette Image vi...

Page 24: ...to the left edge of the Document window To restore Image view drag it to the right The Document window can be minimized and restored Closing the document window closes the current document with a warn...

Page 25: ...status line at the base of the OCR Toolbar The style set True Page lets you conserve the original page layout Use the Tools palette to draw regular or irregular zones modify zones apply a zone templa...

Page 26: ...ts icon on the left Guidance on selecting settings in each section is provided in chapter 4 You can save your set of preference settings to a Settings file as described on page 102 Note Online Help ha...

Page 27: ...ithin a single document The chapter also provides instructions for performing each OCR step and for other tasks you can do with your documents Please continue reading this chapter for information on t...

Page 28: ...e OCR Toolbar s pop up menus For example OmniPage Pro can scan a stack of pages from a scanner s automatic document feeder ADF create zones on all pages recognize the pages offer the results for proof...

Page 29: ...Pages Or choose a zone template if you have one 4 Select the type of recognition you want Choose Perform OCR to have recognition without proofing You can still proof the text later after its first exp...

Page 30: ...it starts from the top of the first page Make corrections as desired Click in Text view to interrupt proofing Then you can edit or verify the recognized text move to other pages or change settings The...

Page 31: ...of the document If not the Acquire Images dialog box lets you specify where to place the new pages When recognition and optionally proofing are completed the whole document is exported sent to Clipboa...

Page 32: ...ss step by step 1 Acquire images Define the image source in the Get Page pop up menu Choose to scan pages or to load one or more image files Click the Get Page button number 1 A miniature image of eac...

Page 33: ...mation Using automatic and manual processing together Automatic processing provides speed and efficiency After you have selected settings many pages can be processed from start to finish without user...

Page 34: ...text zones 4 Click the Start button and choose Process All Unrecognized Pages in the OCR Instructions dialog box 5 Make a choice in the Zoning Instructions dialog box for all pages Choose Use Only Cur...

Page 35: ...and key as you click to make or remove multiple selections Step 3 Proofreading Choose to proofread text immediately after recognition or to proceed to first export without proofing Step 4 Original lay...

Page 36: ...it menu and open the Scanner panel to make sure the appropriate settings are selected for your page See page 76 If you want to sequentially scan all pages in an ADF make sure that Scan Until Empty is...

Page 37: ...ile types should be listed 2 Under the OS X operating system select files as follows Files listed together Shift click the first and the last file names These files and all in between will be selected...

Page 38: ...you have a document open you are prompted to close the current document However you can add pages to your current document using the Get Page button t To open an OmniPage Document 1 Choose Open in the...

Page 39: ...a dialog box lets you specify where to place the new image s You can also launch the program by dragging the icon of an OmniPage Document onto the program icon or by double clicking the OPD icon You c...

Page 40: ...Check all other settings then click the Start button to begin automatic processing This will include auto zoning unless you applied a template and chose Use Only Current Zones After recognition the au...

Page 41: ...y box will show Mixed Zone Types Click a tool to change the zone type This will apply to all currently selected zones if any and to new zones drawn from now on Here are the properties of the different...

Page 42: ...zone contents as a table The contents will be placed in a table grid or in tab separated columns as requested in the Miscellaneous panel of the Preferences dialog box These zones have orange borders...

Page 43: ...to Automatic or Multiple Column Text The columns will then be recognized separately and text will flow from one column to the next t To specify a zone type 1 Click the Draw Select Zones tool in the T...

Page 44: ...d 3 Click the appropriate zone type in the Zone Info palette For example click the Graphic type to draw a zone around a photo See Specifying zone types on page 41 4 Enclose an area of the image you wa...

Page 45: ...e you want to start drawing the first side of the zone and click the mouse button once 5 Move the drawing tool to form the first side of your zone 6 Click the mouse button again when the dotted line h...

Page 46: ...down the mouse button and drag the zone where you want to move it Or use the arrow keys Only the zone borders are moved The contents of the page image remain as is t To resize zones 1 Click the Draw...

Page 47: ...xisting zone at one corner of the area you want to add to the zone Point A in the example below 3 Hold down the mouse button and drag the mouse pointer to the opposite corner of the area you want to a...

Page 48: ...t To divide a zone 1 Click the Modify Zones tool in the Tools palette 2 Position the mouse pointer at the point where you want to divide the zone 3 Hold down the Command key z and the mouse button wh...

Page 49: ...lick this then move the mouse pointer into a table zone It will appear Each click inserts a horizontal row divider Insert columns Click this then move the mouse pointer into a table zone It will appea...

Page 50: ...zones and settings are appropriate for your document For example to transfer the contents of graphic zones to have them embedded in the recognition results you must select Retain Graphics in the OCR p...

Page 51: ...User dictionaries on page 101 t To check and correct errors in recognized text 1 Choose Proofread OCR in the Edit menu Proofing stops on words containing an unrecognizable character and displays them...

Page 52: ...r you select an option for the word OmniPage Pro finds the next doubted word As you proof each word its colored marking is removed 3 To interrupt proofing click in Text view Then you can make editing...

Page 53: ...e edit box when the second part appears Verifying recognized text You can compare recognized text against its original image to make sure that text was recognized correctly t To verify text against it...

Page 54: ...e green and blue words and these will be available for marking in Text view Changing the Use Language Analyst setting has no effect on text which has already been recognized Color markers are not reta...

Page 55: ...ing text u Printing a document u Listening to a document u Closing a document u Quitting OmniPage Pro Resizing a page display You can enlarge zoom in or reduce zoom out the view of a page displayed in...

Page 56: ...OmniPage Document under a different name leaving its state from the previous save under its existing name You can also protect your work by clicking the Export button and saving recognition results to...

Page 57: ...difying images You can modify an image when Image view is active Drag the splitter at the base of the Document window to the right if Image view is not big enough or not visible at all Rotating an ima...

Page 58: ...areas of a page from OCR identify the areas as Ignore zone types prior to auto zoning or do not include them in zones when you do manual zoning Modifying text You can modify recognized text in Text v...

Page 59: ...selected text or graphics on the Clipboard Copied items are not removed You cannot cut or copy text and graphics at the same time If both are selected only the text will be placed on the Clipboard Tex...

Page 60: ...hoose one of its voices from the Speech Menu Also select Speak Selection Speak This Page or Speak Document The Speech Manager interface appears as the text is read You can change the reading speed Sel...

Page 61: ...l images together with their zones and their properties some settings and any recognition results The links between text and image are conserved so proofing and verifying will still work in another se...

Page 62: ...es to disk in a variety of file formats See page 111 for information on these formats When you do automatic processing the Export dialog box appears as soon as the last page is recognized or proofed i...

Page 63: ...roviding the selected format supports them The graphics are saved at 75 or 150 dpi as specified in the Preferences dialog box 7 If you chose Save and Launch the target application linked to your savin...

Page 64: ...image overlays so uncertain characters display as they were in the original document The PDF file can be viewed edited and searched Copying a document to the Clipboard You can choose to send a copy of...

Page 65: ...t for processing just a few pages especially under Mac OS 9 if an application s partition is almost full Save larger documents to a file format compatible with your application Using drag and drop fun...

Page 66: ...ertion point in a target application Direct OCR works with virtually any Macintosh application that supports pasting text from the Clipboard Your Macintosh must have enough memory to run both OmniPage...

Page 67: ...eder ADF if you plan to scan Be sure Scan Until Empty is enabled if you want to scan multiple pages from the ADF 2 Open or switch to the application and place the insertion point where you want recogn...

Page 68: ...h page if you asked it to start automatically Verify and edit text as desired Start proofing manually if you wish 6 The Export button displays To Application If you clicked Start export follows automa...

Page 69: ...tings are appropriate for your document before you start processing it You may have to experiment with different settings to get the results you want Please continue reading this chapter for informati...

Page 70: ...Get Page options You can select from the following options in the Get Page pop up menu The selection is activated at the start of automatic processing images are acquired and recognized or by clickin...

Page 71: ...ner is installed Note The scanner options in the Get Page pop up menu may vary depending on your scanner configuration Scanning modes not supported by your scanner will be grayed If you see only one i...

Page 72: ...automatically draw and order zones on multiple column page images such as from magazines or newspapers The program will try to find columns Spreadsheet Select this for pages containing spreadsheets or...

Page 73: ...ming pages The selected OCR Toolbar option has no influence on existing pages even if you re recognize them Use the Zone Info palette to change the style set for an existing page Tables and graphics c...

Page 74: ...hange the properties of these zone styles and add new styles Contemporary Memo This is an editable sample style set Select it to have the Similar Formats layout but with additional editable zone style...

Page 75: ...will not start automatically For more information see Performing OCR on page 50 OCR Proof Select OCR Proof to recognize text and then automatically start the OCR Proofreader allowing you to check for...

Page 76: ...he Clipboard ready for pasting to the cursor position in the target application See Direct OCR on page 66 Preference settings The Preferences dialog box is the central location of OmniPage Pro setting...

Page 77: ...Page Orientation Select the orientation of the pages you plan to scan in the Orientation pop up menu Be sure to also load pages correctly in your scanner Select Portrait for vertically oriented pages...

Page 78: ...quent page Select Double sided Pages to scan pages that have text printed on both sides OmniPage Pro scans pages and then prompts you to turn them over so it can scan the reverse sides If you have a s...

Page 79: ...at on a television set This setting is only activated if you have Grayscale or Color selected in the Scanner settings It lets you increase or decrease the difference between light and dark areas on th...

Page 80: ...Select Dot Matrix for text characters printed in draft mode with a 9 pin monospaced dot matrix printer Training File A training file is a set of up to 256 pre recognized character shapes linked to OC...

Page 81: ...re ignored Pictures will neither appear in Text view nor be available for export In the lower part of the panel you specify the resolution for graphics exported in grayscale or color Exported graphics...

Page 82: ...ponding loss of image quality The memory requirements for a typical exported page of a given size stored at the selected resolution are displayed below the options This is for a typical page with abou...

Page 83: ...ram monitors text as it is recognized to determine its language and which dictionary to apply This lengthens the processing time so you should only activate additional languages if your pages really c...

Page 84: ...stionable characters and those not found in a dictionary If you deselect Use Language Analyst proofing will stop only on words containing unrecognizable characters and only these words will be availab...

Page 85: ...tables detected in the original document placed in tab separated columns Grids will not be used for export Scripting Select Log Script Activity to have a record of events placed in a file named Scrip...

Page 86: ...gs from page to page draw zones manually or verify and edit the recognized text inside OmniPage Pro Select Keep OmniPage Pro Running after Pasting with Direct OCR Document Loaded if you want the recog...

Page 87: ...tyle set u Applying and editing zone styles u Zone templates u Training OCR u User dictionaries u Settings files Specifying the style set A style set determines the appearance of the recognition resul...

Page 88: ...Auto Detect allow only the font mapping settings to be modified Whichever style set is chosen you can still apply font formatting to selected blocks of recognized text in Text view after recognition...

Page 89: ...n add new zone styles Auto Detect is set as default but you can change the default zone style All zone styles except Auto Detect can be deleted If you try to delete the zone style selected as default...

Page 90: ...ave to recognize it again for the new style set to take effect Creating style sets You can create and use custom style sets This is useful for imposing consistent formatting on particular types of doc...

Page 91: ...s That means text is decolumnized but original column widths can be maintained and frames are not used Auto Detect is the only zone style automatically created Add zone styles and define their propert...

Page 92: ...n down while the mouse pointer is over a zone A menu of all the zone styles in the current style set is displayed Select the style you want to use for that zone If the style set for the page only cont...

Page 93: ...izing detected and retained or choose one fixed point size for all text in the zones Choose Auto to have attributes bold italic underline detected and retained from the original or choose a value Choo...

Page 94: ...enter Heading as the name if you are creating a style for heading type paragraphs Modify the desired formatting attributes for the new style as described in the previous procedure Repeat steps 2 4 to...

Page 95: ...uring manual processing specify a font name for a zone style in place of Auto This font will be applied to all text in all zones with this zone style To avoid font mapping in automatic processing sele...

Page 96: ...ication as required See Creating zones automatically on page 40 Choose Save Zone Template in the File menu The Save Zone Template dialog box appears Type a name for your file and click Save The zone t...

Page 97: ...characters in everyday fonts training files should not be needed Training is useful mainly for long documents or a set of documents in which a few character shapes are being repeatedly misrecognized...

Page 98: ...rpretation is incorrect An example in the picture above is the bottom left square Double click a character you want to train Or select it and click Specify The Specify Character dialog box displays th...

Page 99: ...aving or appending a file you are asked if you want to make this the current training file Click OK to re recognize the current page using the training file you have just created Click Cancel to retur...

Page 100: ...r more characters into the Character Code edit box or select non keyboard characters from the scrolling display Click OK to accept each character specification and repeat steps 3 and 4 to continue edi...

Page 101: ...menu The User Dictionaries dialog box lists all user dictionary files Do one of the following Select a file and click Open to edit an existing user dictionary Click New to create a new user dictionary...

Page 102: ...restoring OmniPage Pro to settings required by particular documents A settings file contains all settings made in all panels of the Preferences dialog box except your current scanner selection To chan...

Page 103: ...des other useful guidance The web site includes a Scanner Guide with regularly updated information about supported scanners Access to ScanSoft s web pages is provided from the online Help topic Gettin...

Page 104: ...it with OmniPage Pro u Make sure you have the correct and up to date drivers for your scanner printer and video card See the Scanner Guide on ScanSoft s web site for more information u Delete the fil...

Page 105: ...rash u Close all open applications that are not immediately needed u List your OPD files Delete any you no longer need Open OPD files and save their recognition results as desired then delete them OPD...

Page 106: ...nning if you are scanning pages with text on colored or shaded backgrounds or for degraded documents with low or varied contrast u Adjust the brightness and contrast sliders in the Scanner panel of th...

Page 107: ...template loaded by mistake If zone borders cut through text recognition is impaired u Be sure the original layout option you selected best describes your incoming pages because this influences auto z...

Page 108: ...ee chapter 5 u With the True Page style set recognized text is put into frames formatting boxes Some text may be hidden if a frame is too small You can see a plus sign in the bottom right corner of th...

Page 109: ...yed These become available only if the current page contains a table zone The Export pop up menu offers no choices You are probably using Direct OCR which places the value To Application The pop up me...

Page 110: ...ba English Nahuatl English Blackfoot English Nyanja English Breton French and Spanish Occidental English Bugotu English Papiamento Spanish and French Catalan French and Spanish Pigin English English C...

Page 111: ...TML viewer or editor the JPEG images are embedded provided you have not moved deleted or edited them The PDF pages take their appearance from a True Page representation of each page regardless of the...

Page 112: ...ion images only means recognized pages are saved to a PDF file that can be viewed but not edited Formats Multipage Open Save Black and white Grayscale Color BMP Windows Bitmap No Open and Save All GIF...

Page 113: ...ing against image 53 when to train 97 Checking OCR results 51 53 Clipboard copying a document to 64 copying selection to 59 copying zones to 65 Closing a document 60 Color markers 51 54 Color scanning...

Page 114: ...viders in tables 49 Installing OmniPage Pro X 12 selecting a scanner for OmniPage Pro X 14 Interface problems 109 Irregular zones 45 L Language Analyst 51 54 84 Languages for reading aloud 60 for reco...

Page 115: ...8 Restricted shapes for zones 45 Retain Graphics setting 42 50 63 64 66 81 Retain Table Grids 85 Reverse Text zone type 42 Rotating images 57 Row dividers inserting in tables 49 Running OmniPage Pro X...

Page 116: ...aving 99 selecting for OCR 80 unloading 99 Troubleshooting 104 True Page style set 64 74 88 True Page support 111 TWAIN driver 16 Typewriter Memo style set 74 U Undoing edits 57 Unrecognizable charact...

Reviews: