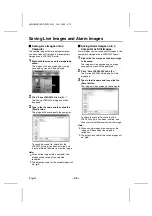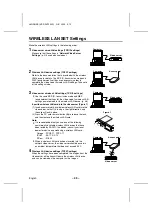
SSP Settings (RS-485)
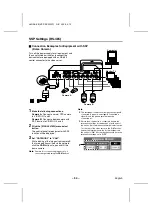
Connect the RS-485 connector of the video server and a device with an
SSP communication function. The various input channels (CAM, MPX,
VCR, DVR) can then be operated by remote control via the network.
1
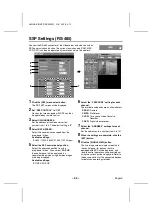
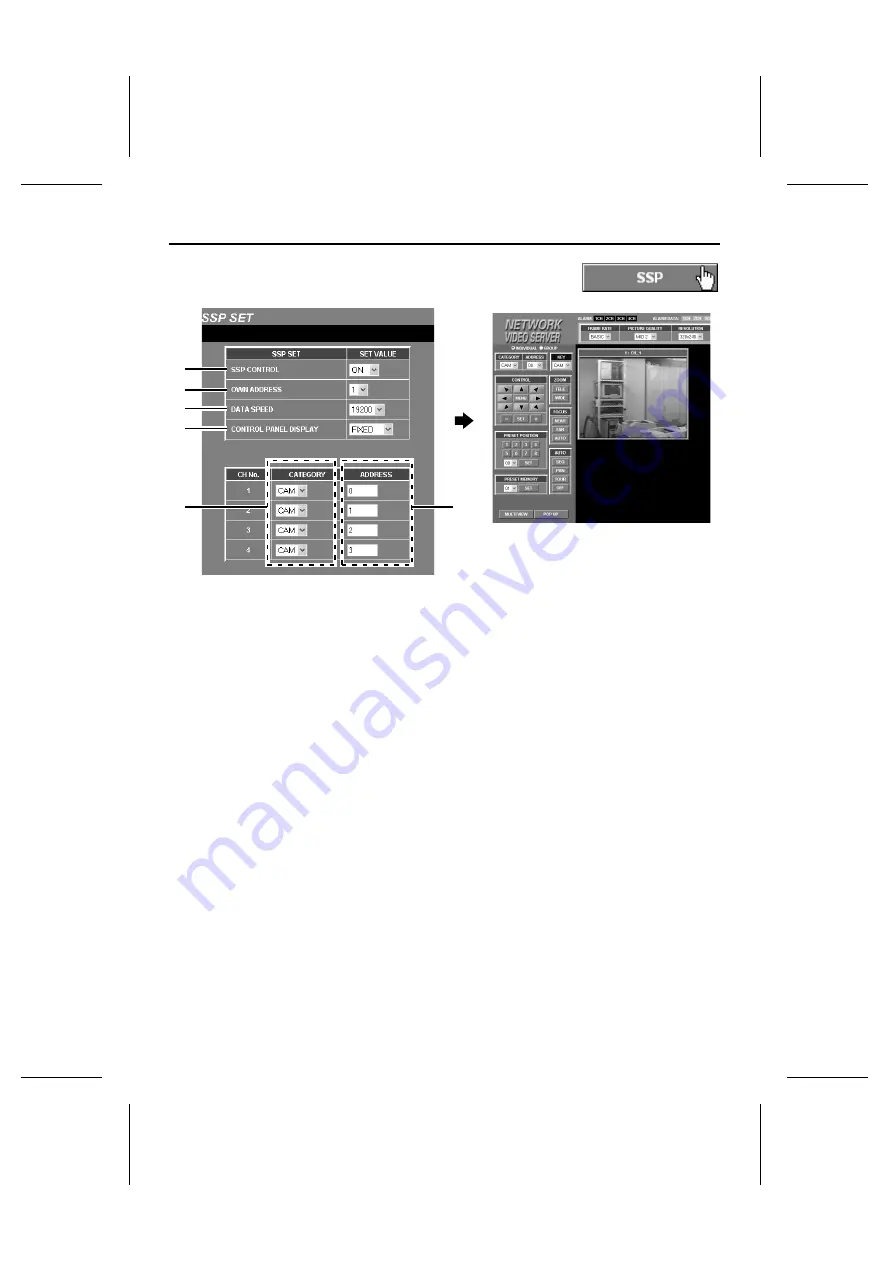
Click the [SSP] menu select button.
The SSP SET screen will be displayed.
2
Set “SSP CONTROL” to “ON”.
Devices that are equipped with SSP can then
be operated by remote control.
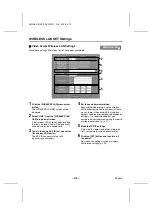
3
Select OWN ADDRESS.
Set the address of the video server to a
number from 1 to 4. The default setting is “4”.
4
Select DATA SPEED.
Select the communication speed from the
drop-down list box.
Available settings:
•
9600, 19200, 38400, 57600, 115200 (bps)
5
Select the SSP control panel position.
Select the operation position from the
drop-down list box. If you select “POP UP”,
the control panel will be displayed in a
separate window when single-screen images
are being displayed.
Available settings:
•
FIXED, POP UP
6
Select the “CATEGORY” setting for each
channel.
The available categories are as shown below.
•
CAM: Camera
•
MPX: Multiplexer
•
VCR: Time Lapse Video Cassette
Recorder
•
DVR: Digital video recorder
7
Select the “ADDRESS” settings for each
channel.
Set the addresses to a number from 0 to 127.
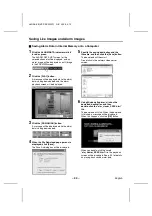
8
When the settings are complete, click the
[SET] button.
9
Click the [SINGLE VIEW] button.
The live image screen (single screen) and
the control panel for devices that are
equipped with SSP will be displayed, and
remote control operations can be carried out
using the various buttons displayed. Refer to
the documentation for the connected devices
for details on operating methods.
2
3
4
5
6
7
L8NAA/XE
(VSP-SV2000P) GB 2003,
5,
12
– 52 –
English

