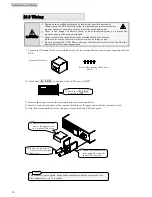
Installation and Wiring
17
§
6
6
.
.
2
2
A
A
t
t
t
t
a
a
c
c
h
h
i
i
n
n
g
g
L
L
C
C
D
D
P
P
a
a
n
n
e
e
l
l
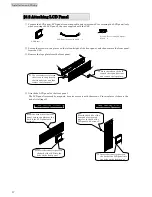
①
Prepare the LCD panel, LCD panel connection cable, and two screws C for securing the LCD panel (only
when securing the LCD panel), that are supplied with the UPS.
②
Loosen the screws in two places on the left and right of the front panel, and then remove the front panel
from the UPS.
③
Remove the logo plate from the front panel.
④
Attach the LCD panel to the front panel.
The LCD panel is secured by magnets, but also secure it with the screws C in two places if there is the
risk of it falling off.
③
Pinch the tabs on the back
toward the top and bottom,
and remove the logo plate.
Screw C: For securing LCD panel
M3×6 2
LCD Panel 1
LCD Panel Connection Cable 1
②
Use a screwdriver to loosen
the screws in two places on
the left and right, and then
remove the front panel.
When Mounting Vertically
When Mounting Horizontally
④
Insert the connector parts on
the back of the LCD into the
holes on the front panel.
From the back side of the front
panel, secure two places at the
back of the LCD panel with
screws C.
④
Insert the connector parts on
the back of the LCD panel into
the holes on the front panel.
From the back side of the
front panel, secure two
places at the back of the
LCD panel with screws C.
Summary of Contents for SANUPS A11J
Page 1: ...M0009237 5 kVA Instruction Manual ...
Page 25: ...Installation and Wiring 22 Blank page ...
Page 41: ...Troubleshooting 38 Blank page ...
Page 50: ...Blank page ...
Page 51: ...Blank page ...
Page 52: ......


