Configuring the camera to start recording at 13:00 and end recording at 23:30 every day (10 hours 30 minutes
every day)
3
Select the check box next to the recording period (day) you want to apply and click
SET
.
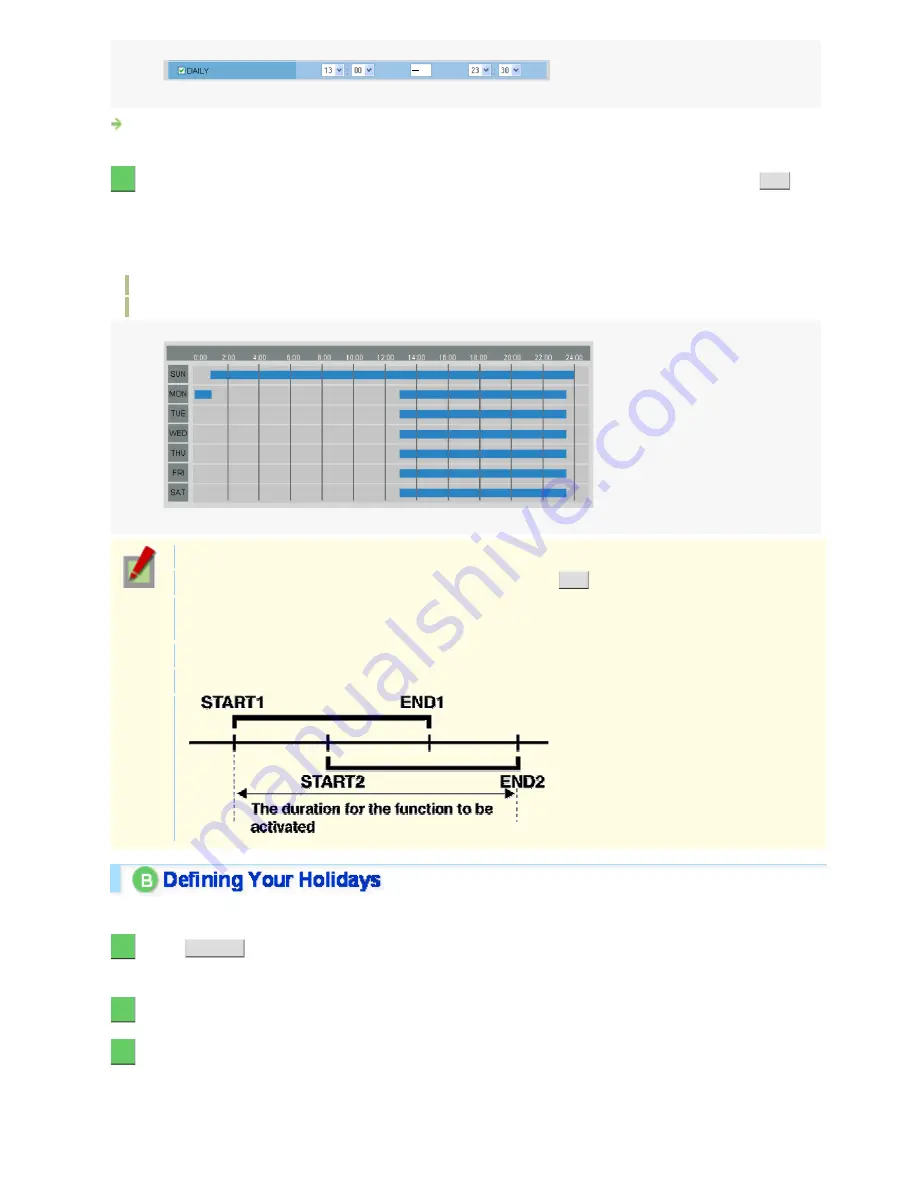
The schedule map appears, showing the recording period you configured for each day of the week and enabled by
selecting the check box.
If both the check box for a day of the week (SUN to SAT) and the “DAILY” check box are selected, the “DAILY”
setting will take precedence.
Normal recording: Blue
Alarm recording: Orange
On the schedule map, each recording period will be indicated in units of 15 minutes.
If you have changed the schedule settings, be sure to click
SET
to update the schedule map.
If you change the scheduled settings while the schedule is enabled, the camera will perform
recording according to the changed schedule.
If you schedule overlapping recording periods, the longer one will take precedence.
If the configured periods overlap as shown below, they will be combined into one long period.
Follow the steps below to define your holidays.
1
Click
HOLIDAY
.
The HOLIDAY SETTINGS screen appears.
2
In [HOLIDAY], select the day of the week that you want to define as a weekly holiday.
3
In [MONTH/DAY], select the day of the year that you want to define as an annual holiday.
To each day of the year configured here, the same operation schedule as that for the weekly holiday setting in
[HOLIDAY] will be applied.
You can define up to 20 annual holidays.
Working with Administrator Configuration Screens 73/77


