


Date & time
1.
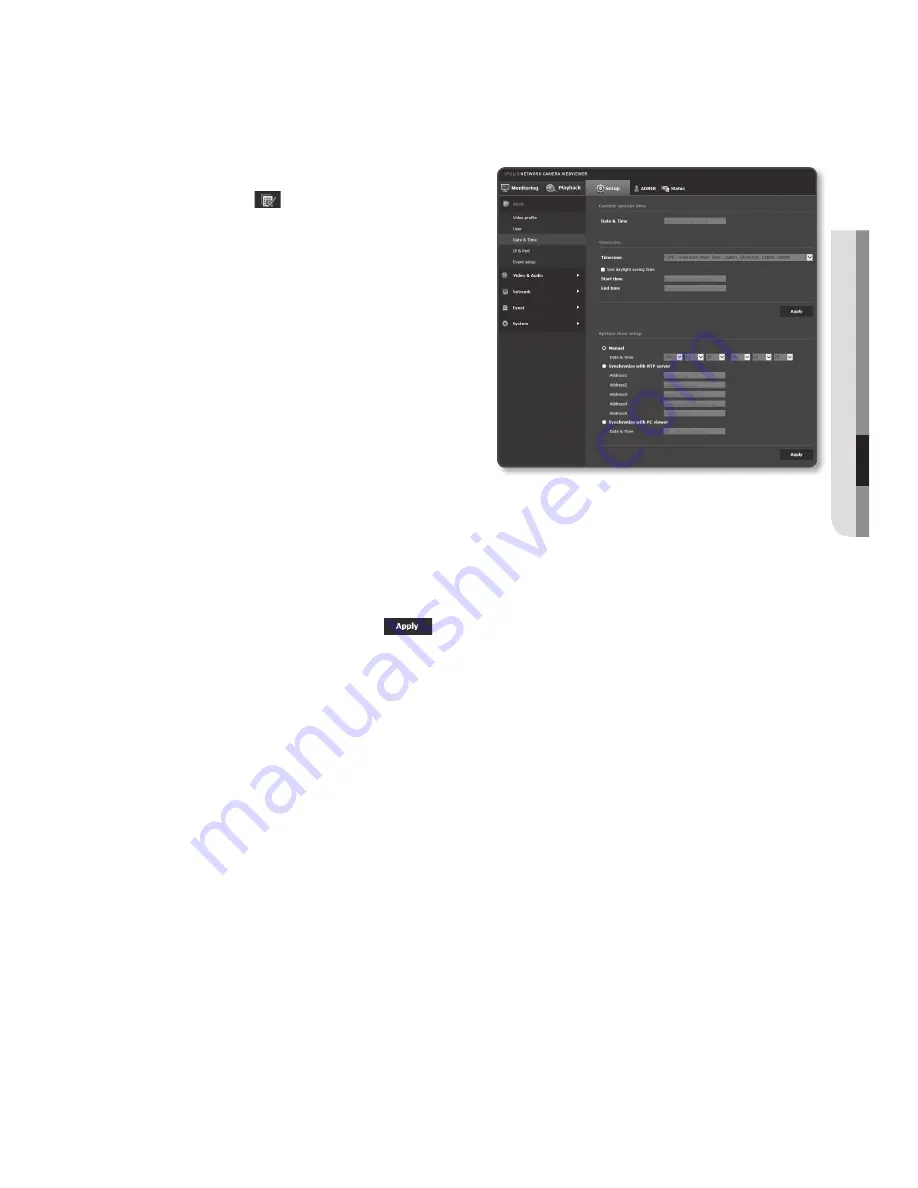
From the Setup menu, select the
<
Basic ( )
> tab.
2.
Click <
Date & time
>.
3.
Specify the time and date that will be
applied to the camera.
•
Current system time : Displays the
current time settings of your system.
•
Timezone : Specify the local time
zone based on the GMT.
•
Use daylight saving time :
If checked, the time will be set one
hour before the local time zone for
the specified time period.
This option will be displayed only in areas where DST is applied.
•
System time setup : Specify the time and date that will be applied to your system.
- Manual : Specify the time manually.
- Synchronize with NTP server : Sync with the time of the specified server address.
- Synchronize with PC viewer : Sets to the time of the computer connected.
4.
When done, click [
apply (
)
].
J
`
When <
Synchronize with PC viewer
> is selected, please set a standard time zone for both PC
and camera.
English
_89
●
Setup
Screen
Summary of Contents for ND-L6013R
Page 1: ...NETWORK CAMERA User Manual SND L6013 SND L6013R SNO L6013R SND L6083R SNO L6083R SNV L6083R ...
Page 16: ...overview 16_ overview Components a NETWORK ACT LINK RESET c d e NETWORK ACT LINK FRONT b ...
Page 19: ...English _19 overview Components NETWORK ACT LINK RESET e f g NETWORK ACT LINK FRONT c d b a ...
Page 26: ...overview 26_ overview At a Glance SNO L6083R Appearance a b c d e f ...
Page 142: ...appendix 142_ appendix SNV L6083R Unit mm inch Ø 137 5 39 Ø 100 3 93 57 7 2 27 106 1 4 17 ...


