background image

SCH-N150 User Guide Draft Rev 1.2  3/16/01

41

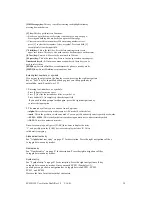
5. Enter your event information. Up to 32 characters can be entered. For
  more information on Text and Symbol entry methods, see “Entering text, numbers,
  or symbols ” on page 76.
6. Press [OK/Message] to accept your entry.
7. Enter the start time and date, and press [OK/Message] to save the information.
  The end time and date form will be displayed.
8. Enter the end time and date, and press [OK/Message] to save the information.
9. The alarm screen displays. Scroll to select an alarm to notify you of your event.

Your Alarm options are: No Alarm, On Time, 10 minutes Before, 30 minutes Before,
and 1 hour Before .

10. Press [OK/Message] to save your selection.

.

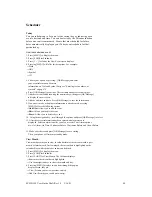
How to view an event:

1. Press [MENU] to display the menu.
2. Press [4 GHI] for Scheduler.
3. Press [2 ABC] for View Month and the Calendar displays.
4. Use the navigation key to display all of an event’s information. If more
  than one event is scheduled, use the navigation key to display them.
5. Press [MENU] to display the options and select ‘View’. The events scheduled displays in order.
6. Press [C] for Exit. This returns the screen to the Scheduler menu.

Jump to Date

Jump To Date allows you to specify the calendar date you wish to ‘jump’ to
for viewing and adding events scheduled on that date.
Once the date is entered, you can add, edit and erase events in your
calendar.

Using Jump to Date

1. Press [MENU] to display the menu.
2. Press [4 GHI] for Scheduler.
3. Press [3 DEF] for Jump To Date.
4. Enter the date of the event and press [OK/Message] to continue.
5. The Calendar screen displays the newly entered highlighted date.
6. Pressing [MENU] displays the options View and Add new.
7. Press [OK/Message] to select View.
8. Pressing [MENU] opens the Add new, Edit, Erase options.
9. You can either schedule a new event, or edit or erase an old one. Press
  [OK/Message] to select the option.

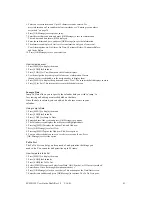
To Do List

The To Do List can help you keep track of, and prioritize the things you
need to do. You can enter and prioritize up to 20 items.

How to create a to do list

1. Press [MENU] to display the menu.
2. Press [4 GHI] for Scheduler.
3. Press [4 GHI] for To Do List.
4. Select [MENU] for options. Select from Word, ABC, Symbol, or 123 for entry method.
5. Enter the new list to do through the alphanumeric keys .
6. Press [OK/Message] to lock in your choice. This action opens the Time/Date  screen.
7. Enter the time and date and press [OK/Message] to continue. The To Do List opens.

Summary of Contents for N150

Page 1: ...SCH N150 Series P O RTA B LE C E L LULAR T E L E P H O NE User s Guide Please read this manual before operating your phone and keep it for future reference ...

Page 2: ...hone or result in violation of FCC regulations Do not use the phone with a damaged antenna If a damaged antenna comes into contact with the skin a minor burn may result Please contact your local dealer for replacement antenna Body worn Operation This device was tested for typical body worn operations with the back of the phone kept 1 8 cm from the body To maintain compliance with FCC RF exposure r...

Page 3: ...therwise attempt to create source code from the software No title to or ownership in the Intellectual Property is transferred to you All applicable rights of the Intellectual Property shall remain with SAMSUNG and its suppliers Samsung Telecommunications America STA Inc Headquarters Customer Care Center 1130 E Arapaho Road 1601 E Plano Parkway Suite 150 Richardson TX 75081 Plano TX 75074 Tel 972 7...

Page 4: ...TION OR QUALITY OF THE PRODUCT THE PERFORMANCE OF THE PRODUCT THE WORKMANSHIP OF THE PRODUCT OR THE COMPONENTS CONTAINED THEREIN OR COMPLIANCE OF THE PRODUCT WITH THE REQUIREMENTS OF ANY LAW RULE SPECIFICATION OR CONTRACT PERTAINING THERETO NOTHING CONTAINED IN THE INSTRUCTION MANUAL SHALL BE CONSTRUED TO CREATE AN EXPRESS OR IMPLIED WARRANTY OF ANY KIND WHATSOEVER WITH RESPECT TO THE PRODUCT IN A...

Page 5: ...l 2 Way Short Message Services SMS and Voicemail notification Internet MiniBrowser Pause Dialing for tele services Fast Ringer Mute during Incoming Call Alarm clock Last number redial last 10 Numbers One touch Turbo dialing 9 Locations Two touch Turbo dialing 80 Locations Easy muting of the microphone during conversation Security features including Call Restriction Secret Number capability and Loc...

Page 6: ... on 25 Turning your phone off 26 List of menu functions 27 Using your Phone s Menus 32 Accessing menus by scrolling 32 Returning to the previous menu 33 Accessing menus by using their short cut number 33 Your phone s modes 34 Lock mode 34 Power save mode 34 Standby mode 34 Send Talk mode 35 The top line of the display screen 36 Using the Battery 38 Installing the battery 38 Removing the battery 39...

Page 7: ...ing phone numbers at the end of a call 69 Shortcuts to storing phone numbers 69 Dialing numbers from the phone book 70 Shortcuts to memory dialing 70 Launching the MiniBrowser 72 Exiting the web MiniBrowser 73 The MiniBrowser start and end prompts 73 The MiniBrowser soft keys 74 Navigating the web 74 How the keys work in the MiniBrowser 75 Entering text numbers or symbols 76 Alphabetical text entr...

Page 8: ...er type 96 Voice Calls 97 Messages 97 Voice Mail 98 Page 98 Text 98 Browser Msg 98 Alarm 98 Data fax 98 Schedule 98 Key beep 99 Alerts 99 Minute beep 99 Service 100 Connect 100 Disconnect 101 Fade 101 Roam 102 Privacy 103 Voice volume 103 Roam ringer 104 Power up down 105 Display 106 Display options 106 Backlight 106 Banner 107 Animation 108 My phone 109 To display my phone number 109 To view your...

Page 9: ... answer 128 Answer mode 129 Tone length 129 Set NAM 130 Set system 131 Data fax 131 Receiving a fax 133 Changing your phone back to voice calling 134 Ending a fax or data call 134 Sending a fax or data file 134 Set Force 135 Audio AGC Whispering Mode 136 Games 137 Flying Tight 137 Money or Die 137 Mail kit 137 New messages 137 Text Inbox 138 Receiving a message in standby mode 138 Receiving a mess...

Page 10: ...Vehicle mounted external antenna if available 153 How to order accessories 154 Operating a motor vehicle 154 Following safety guidelines 155 Turning off your phone in dangerous areas 156 Restricting children s access to your phone 156 Turning off your phone before flying 156 Emergency calls 157 Maintaining your phone s peak performance 157 Using your phone near other electronic devices 158 Storing...

Page 11: ...ser Guide Draft Rev 1 2 3 16 01 10 Your consumer package Your consumer package contains the following items Samsung SCH N150 phone with hand strap Samsung standard Li ion battery Samsung travel adapter User guide ...

Page 12: ...SCH N150 User Guide Draft Rev 1 2 3 16 01 11 Front view of the Samsung N150 ...

Page 13: ...ns shown on the LCD liquid crystal display are displayed according to the phone s operating mode For further information see Turning your phone on on page 25 The lower area of the LCD displays the In Use information for example if available the calling party s name and number the call timer mute and call waiting as well as menus sub menus etc End power on off key This key is utilized several ways ...

Page 14: ...vel adapter outlet Located at the bottom of the phone Before using gently pry the cover from the phone to expose the travel adapter outlet Plug in the travel adapter that is supplied with your phone Using your thumb and first finger gently squeeze the two buttons located on either side of the travel adapter and insert into your phone s outlet The yellow arrow on the travel adapter should be facing...

Page 15: ...ou wish to change input mode again press MENU to display the input options then OK Message to change and lock in the option of choice Alphabetical text entry Alphabetical text characters may be entered in the alphabetical Input Mode or ABC mode by pressing the key corresponding to the letter that you want to enter Press the same key repeatedly to change between the characters represented by each k...

Page 16: ...me numeric sequence T9 software provides the most commonly used word with the ability to scroll to the next most commonly used word by pressing the 0 Next key Press the 0 Next key repeatedly to display all of the available words that T9 knows When the word you want displays continue to enter text in the same way or change to another text or character entry mode Note To type words not found in the ...

Page 17: ...Message Digital Mode Vibrate Note If the phone is out of servicethe icon displays If this happens you cannot place or receive calls You can try later when service becomes available For further information see The top line of the display screen on page 36 Answering a call When you receive a call the phone will ring and a phone icon is displayed on the screen If the caller can be identified the call...

Page 18: ...1 Last Call 2 Home Call 3 Rome Call 4 Lifetime 5 Erase Total 2 Phone Book 1 Find Name 2 Add Entry 3 Find Entry 4 RelationSrch 5 Add e mail 3 Web 1 Get In Web 2 Prompt 4 Scheduler 1 Today 2 View Month 3 Jump ToDate 4 To Do List 5 Countdown 6 World Time 7 Calculate 8 Alarm Set 5 Sounds 1 Ringer Vol 1 Calls 2 Messages 3 Alarm 2 Ringer Type 1 Voice Calls 2 Messages 1 Voice Mail 2 Page 3 Text 4 Browser...

Page 19: ...7 Auto Hyphen 8 Version 7 Voice Dial 1 Record 2 Review 3 Erase All 4 Set Active 5 Language 6 Training 7 Undo Train 8 Games 1 1 Flying tight 2 Money or die 9 Setup 1 Auto Retry 2 Auto Answer 3 Answer M de 4 Tone Length 5 Set NAM 6 Set System 7 Data Fax 8 Set Force 9 Whisper Mode 0 Security 1 Lock Mode 2 Restrict 3 Lockcode 4 Emergency 5 Send Pin 6 Clear Mem 7 Reset Phone 8 Voice Privacy OK Message ...

Page 20: ...al 1 Scroll Timer 2 Msg Reminder 2 New Message 1 Call Back 2 Save Message 3 Entry Method 4 Delivery Ack 5 Canned Msg 3 Erase 1 Entire Inbox 2 Entire Outbox 3 All Messages In Use Menu During a call 1 Mute Quit 2 Calls 3 PhoneBook 4 Silent Quit 5 Send Tel 6 My Phone 7 Version 8 Voice Privacy ...

Page 21: ... exit the menu without saving the setting Accessing menus by using their short cut number The menu items are numbered and can be accessed by using their shortcut numbers 1 In standby mode press the MENU key to access the menu options 2 Key in the first digit of the required shortcut number shown on the display repeat this action for each digit displayed as menus are displayed For example Setting t...

Page 22: ...e icons While in standby mode you can enter a phone number press the SEND key to dial it or press the OK Message key to save it in the Phone Book Press the END key at any time to return to the standby mode but be careful if you are on a call when you press the END key you will return to standby mode and disconnect the call The menu is accessed when you are in standby mode by pressing the MENU key ...

Page 23: ...ervice provider has a roaming agreement in place this indicator is on but not flashing In an analog or digital area that is not covered by your phone s service provider this indicator is on New Message This icon appears when a new voice text or page message or net alert is received Digital mode This icon indicates your phone is operating in digital mode Your phone has some features that work only ...

Page 24: ...attery icon is empty indicates the battery no longer has any charge and must be recharged The empty battery icon Two to three minutes before the battery charge level gets too low to operate the phone the battery sensor will let you know by blinking an empty battery icon and sounding a tone If you continue to operate the phone without charging the battery the phone will turn off automatically If th...

Page 25: ...o 113º F 0º C to 45ºC Don t use the battery charger in direct sunlight or in high humidity areas such as a bathroom Never dispose of the battery by incineration Keep the metal contacts on top of the battery clean Don t attempt to disassemble or short circuit the battery The battery may need recharging if it has not been used for a long period of time Replace the battery when it no longer holds an ...

Page 26: ...call s information in the Call logs the last 10 calls you answered are stored in the Incoming call log and the last 10 calls you missed are stored in the Missed call log Missed Your phone keeps a list of calls that were not answered when the phone is on and service is available The phone indicates a missed call by displaying a text notification on the screen Additionally if caller information is a...

Page 27: ...e displays If there is no Phone Book match only the phone number displays 4 When a log is highlighted you can press SEND to be connected to that party OK Message to review information available on that call name and phone number if available and time date stamp When you are viewing this information you can press OK Message for more options Talk Store and Prepend the number 5 Press C to exit the Ca...

Page 28: ...ase total air time 1 Press MENU to display the menu 2 Press 1 for Calls 3 Press 5 JKL for Air Time 4 Press 3 DEF for Roam Call The screen displays the total number of calls and the total air time for calls made from your Roaming service areas since you set this total to zero by using the Erase Total option 5 Press C to return to the previous display screen or press OK Message to quit Lifetime Life...

Page 29: ...y pressing MENU allows you to access the following options Talk Pressing Talk dials the number Add Allows you to add a newphone number to the existing entry Edit Edits the phone number name entry secret setting category relation or ring type Prepend Allows you to prependextra digits to either a feature code ora phone numberbefore dialing Erase Erases the number Name Ring Allows you to select a uni...

Page 30: ...press OK Message to save setting 14 When editing options is complete from the information display screen press OK Message to store entry information to the phone book Find Entry This option allows you to find an entry by location number 1 Press MENU to display the menu 2 Press 2 ABC for the Phone Book 3 Press 3 DEF for Find Entry The Phone Book Look Up screen displays 4 Press the navigation keyto ...

Page 31: ...o store the e mail address and information to the phone book Adding a new phone number to an existing entry To store a new phone number to an existing entry 1 Press MENU to display the menu 2 Press 2 ABC for Phone Book 3 Press 2 ABC for Add Entry Enter the phone number using the keypad and press OK Message You can enter up to 32 digits Press the entry location number or scroll down to the entry yo...

Page 32: ...ne book entry To erase an entry in the Phone Book 1 From standby mode press thenavigation key left and search for the Phone Book entry that you want toerase using one ofthe search methods described under Find Name or Find Entry on page 52 2 Highlight the entry and p ress OK Message to display theentry to erase 3 Press MENU for options 4 Scroll down to the Erase option 5 Press OK Message forErase Y...

Page 33: ...ntry Secret see editing the phone book entry on page 59 When you have made the number Secret the phone does not permit anyone to view information on that particular entry unless the four digit Lock code is entered Setting Speed Dial For each name entered in the Phone Book the option of designating a Speed Dial number is available 2 1 From standby mode press thenavigation key left and search for th...

Page 34: ...entry on page 57 and manual pause dialing see Manual pause dialing on page 58 Note Multiple two second pauses can be entered to extend the length of a pause For example two consecutive two second pauses cause a total pause time of four seconds However keep in mind that pauses count as digits towards the 32 digit dialing maximum Storing pauses in a phone book entry To store a number in your Phone B...

Page 35: ...P indicating a hard pause Enter the number to be sent after the pause by pressing the digit keys and then press SEND After connecting press SEND again to transmit the additional number following the Hard Pause P Scroll and press OK Message for a 2 second Pause T pause The screen displays a T indicating a timed pause The screen prompts for the number to be sent after the pause Enter the number to b...

Page 36: ...ed then press SEND todial Note For the One Touch Two Touch dialing to work as described below the category setting in the phone book must be set to Speed Dialfor the entry One Touch Dialing Memory locations 1 through 9 are special One Touch locations You can dial the phone numbers stored in the Phone Book memory from 1 through 9 simply by pressing one key Forexample for location number 001 Press a...

Page 37: ...you may find that you are billed for several network connections within a single session This is normal and is designed to minimize your bill Note The phone must be in a digital network to use the MiniBrowser When you are in a digital network the icon is displayed Launching the MiniBrowser Note The first time you use the MiniBrowser you will be required to go through a security setup process that ...

Page 38: ...ess OK Message to save your setting or C to cancel The MiniBrowser soft keys At the bottom of the MiniBrowser display is a solid bar which contains browser commands The left and right navigation keys as Soft keys OK HOME below the solid bar are used to execute the commands These two keys are called soft keys because their function changes depending on where you are in the MiniBrowser software Navi...

Page 39: ...a word Symbols or 123 1 Entering text numbers or symbols Press Space to insert a space Press C to clear the last number letter or symbol or Press and hold C to completely clear the input field If you wish to change input mode again press the right navigation key to select the input option 2 The menu key allows you to choose from 4 options alpha This is the text entry mode same asABC mode See Note ...

Page 40: ...ide of brackets and you can normally use the left soft key to select a link when it is highlighted Making a phone call while using a MiniBrowser You may initiate a phone call from the MiniBrowser if the site you are using supports this feature the phone number may be highlighted and the left soft key will appear as Call Pressing the Call soft key will dial the number In most cases you can also use...

Page 41: ... error is made or duplicate information is already saved pressing MENU offers the following options Add New Allows you to add an event Edit Allows you to edit the event Erase Allows you to delete the event 10 Usingthe navigation key scroll through the options and press OK Message to select 11 After the correct information has been entered an alarm screen is displayed Select an alarm to notify you ...

Page 42: ...reen tothe Scheduler menu Jump to Date Jump To Date allows you to specify the calendar date you wish to jump to for viewing and adding events scheduled on that date Once the date is entered you can add edit and erase events in your calendar Using Jump to Date 1 Press MENU to display the menu 2 Press 4 GHI for Scheduler 3 Press 3 DEF for Jump To Date 4 Enter the date of the event and press OK Messa...

Page 43: ...5 JKL for Countdown 4 The screen prompts for new countdown Enter a name foryour new countdown timer 5 Press OK Message when complete 6 Enter the date and time that you want to Countdown to For example if today s date is November 10 2000 and you wish to know how many months days and hours are left before 7 00 PM February 14 2001 enter the time 07 00 PM and the date 02 14 2001 You can press the digi...

Page 44: ...rightto toggle between world times in the following 24 time zones time zones are identified by one or more cities states regions or countries in a time zone Beginning with GMT Alaska San Francisco Denver Arizona Chicago Mexico New York Caracas Buenos Aires Mid Atlantic Cape Verde London Madrid Paris Berlin Athens Helsinki Moscow Abu Dabi Tashkent Alma ata Bangkok Jakarta Hongkong Beijing Seoul Tok...

Page 45: ...o off once or daily at a programmed time Once you set an alarm it is easy to change it s time or to turn it off 1 Press MENU to display the menu 2 Press 4 GHI for Scheduler 3 Press 8 TUV for Alarm Set 4 Press the navigation key to scroll through the alarm options Once Daily or Off Select the alarmoption you want to set by pressing OK Message 5 Press the digit keys to set the alarm time Since your ...

Page 46: ...s the navigation key to change the setting When you reach the lowest setting the phone will vibrate alerting you of the vibrate option Also when ringer volume reaches silence an audible alert notifies you that ringer may be silenced if selected at that level 6 When the desired setting is reached press OK Message to save the setting 7 You can press C to return to the previous menu at any time One t...

Page 47: ... 3 Press 2 ABC for Ringer Type 4 Press 2 ABC for Messages Four options display 1 Voice Mail 2 Page 3 Text and 4 Browser MSG 5 Either press the numeric key or scroll and select the option of choice using the navigation key and OK Message to activate that option 7 Press thenavigation key to scan through the ninemonotone ringer types and four melody tones Each tone plays as you scroll through the opt...

Page 48: ...he setting 6 You can press C to return to the previous menu at any time Alerts Your phone beeps to notify you of an event or action this is called an alert You can easily turn alert beeps on or off The other party does not hear the alerts when you are on a call Minute beep You can set the minute beep option to sound an alert 10 seconds before each elapsed minute to remind you of the length of the ...

Page 49: ...e menu option is set to on the phone sounds an alert when a dropped call occurs during conversation because of a signal fade To set the fade alert On or Off 1 Press MENU to display the menu 2 Press 5 JKL for Sounds 3 Press 4 GHI for Alerts 4 Press 5 JKL for Fade 5 Scroll between On andOff using the navigation key When the desired setting is displayed press OK Message to save 6 To cancel press C to...

Page 50: ...desired setting is reached press OK Message to save the setting 6 You can press C to return to the previous menu at any time Roam Ringer When the Roam Ringer option is set to on the phone sounds an alert when the phone enters or leaves aroam service area To set the roam ringer alert on or off 1 Press MENU to display the menu 2 Press 5 JKL for Sounds 3 Press 6 MNO for Roam Ringer 4 Press the naviga...

Page 51: ...displayed press OK Message to save Banner The Banner option allows you to edit the personal greeting displayed on the standby screen Enter the banner desired using the alphanumeric keys To select banner options 1 Press MENU to display the menu 2 Press 6 MNO for Display 3 Press 2 ABC for Banner 4 Press MENU to select from Input Mode options Word ABC Symbol and 123 5 Scroll through the options When ...

Page 52: ...ode when powered up To set the clock manually 1 Press MENU to display the menu 2 Press 6 MNO for Display 3 Press 6 MNO for Set Time 4 Enter the desireddate andtime in 12 hour display format Press 2 ABC for AM and 7 PQRS for PM at the end of time digit entry 5 Press OK Message to save the setting The entered date and time displays on the standby mode screen 6 Or p ress C to return to the previous m...

Page 53: ...ling 1 Press MENU to display the menu 2 Press 7 PQRS for Voice Dial 3 Press 1 for Record The phone prompts you to record a name 4 Wait for a beep and then say the name The phone stores the name and then prompts you to speak the name again 5 Respond to the prompt by repeating the name after the beep exactly as you did the first time If the name is accepted the phone requests the phone number 6 Ente...

Page 54: ...e previous menu Set Active Voice dialing is always on once you have programmed the phone to accept voice dialing entries and associated the phone numbers To place voice dialing calls press and hold Shift Then say the name into the phone after you hear the voice prompt and the beep You can also initiate a voice dialing call by simply opening the phone s flip cover this option is selected through th...

Page 55: ...the screen The longer you stay alive the higher your score A high score is recorded each time you play Key Commands The following options are displayed prior to the start of the game Press navigation key upwards Fly the plane upwards Press navigation key downwards Fly the plane downwards Press OK Message to start the game Press C or End to exit the game Money or Die To play Money or Die 1 Press ME...

Page 56: ... Guide Draft Rev 1 2 3 16 01 55 Press navigation key upwards Move the character upwards Press navigation key downwards Move the character downwards Press OK Message to start the game Press C or End to exit the game ...

Page 57: ...s and after 5 rings Press OK Message to save your option 5 Pressing C returns you to the previous screen Answer Mode When the Answer Mode option is activated your phone allows you to select a specific answer mode when receiving an incoming call Your phone can be preset to answer when you do any of the following by send key You can answer thecall by pressing SEND by flip open You can answer thecall...

Page 58: ...omatic A or Automatic B 5 When the desired option is displayed press OK Message to save 6 Press C to exit without saving Note Automatic A With this setting your phone will always try your calls using the Preferred Roaming List loaded into your phone first but if your phone cannot find any pre ferred systems then it will attempt to acquire any digitalor analog A system In a wireless service area th...

Page 59: ...ff No voice calls can be received 5 When the desired option is displayed press OK Message to save 6 Press C to exit without saving Receiving a fax To receive a fax 1 Ensure that your phone is connected to your PC and is powered on 2 Press MENU to display the menu 3 Press 9 WXYZ for Setup 4 Press 7 PQRS for Data Fax 5 Scroll and select Fax for Next Call 6 Press OK Message to save The screen display...

Page 60: ...Modeand select from the following options bypressing OK Message Again if selected the phone will revert to and remain in that mode for up to 10 minutes and until a call is made CDMA only Service is limited to CDMA cellular and PCS services and analog roaming are not allowed PCS only Service is limited to CDMA PCS service and CDMA cellularand analog roaming are not allowed Cell Only Service is limi...

Page 61: ...ntered you can send the message at any time by pressing SEND 4 Press MENU to select from Address options Phone Number E mail and Phonebook Phone Number Enter the destination mobile phone or pager number of up to 32 digits using the keypad E mail Enter the destination e mail address using the keypad You can enter only up to 48 characters See Add E mail onpage for entry method Phonebook Access the p...

Page 62: ...ompt Save Do Not Save 14 Press OK Message to confirm setting and return to the New Message menu 15 Press 5 JKL for Action This is an optional field for entry 16 The following four options will display Press SEND to transmit the message Press OK Message to file the message to the Filed Msg folder without sending it Press C to cancel and return to the previous menu Press END to terminate message and...

Page 63: ...amp for the last voice mail received displays along with a notification of the number of new voicemail messages You can press SEND to dial your mailbox directly to review voicemails 3 Or press 3 DEF for Text Inbox A list of messages displays An exclamation point next to an entrynumber indicates an urgent message A check mark next to an entry number indicates that the message has already been read ...

Page 64: ...access the message unlock the phone Text Outbox Your phone stores messages into the Text Outbox of the phone regardless of whether the message was successfully transmitted or not and if not set to Do Not Save in the Save Message setting under Msg Setup You can review resend or delete any message stored in the outbox if desired You can also verify if the message or e mail transmitted is successfull...

Page 65: ... an outgoing message 1 Press OK Message to display the Mail kit menu 2 Press 4 GHI for Text Outbox You can review the delivery status through the indicators next to the message entry number 3 Scroll and select an Outbox entry to review 4 Scroll down to view the delivered date time stamp for the transmitted message updated at the bottom of the display Mail kit memory capacity Your phone can store u...

Page 66: ... ABC to set the Save Message options You can toggle between AutoSave Prompt Save or Do Not Save for the default setting Press OK Message to save the setting When set to Prompt Save the phone will display Store Msg prompt asking if the created message should be saved to the outbox after a message is transmitted u Press 3 DEF for message Entry Method You can toggle between Alphabet and Word predicti...

Page 67: ...cking the phone To lock the phone 1 Press MENU to display the menu 2 Press 0 Next for Security and enter your lock code 3 Press 1 for Lock Phone 4 Scroll through the options never The phone remains unlocked now The phone locks immediately and stays locked until the lock code is entered on power up The phone locks automatically the next time your phone is powered on and stays locked until the lock ...

Page 68: ...ny time even when your phone is locked or restricted This feature is useful for controlling what numbers can be dialed from your phone Note Emergency numbers 911 911 and 911 are hard coded to your phone You can dial these numbers by pressing SEND after number entry at any time even when the phone is locked or restricted If youdial 911 911 or 911 an audible tone isheard and an Emergency prompt disp...

Page 69: ...t Clear All displays alerting you that phone memory will be cleared 4 Press C to cancel the operation 5 Or press OK Message to clear the phone memory After a few seconds Erased message displays and the phone returns to standby mode Reset Phone Reset Phone reboots the phone and returns all feature and memory settings to the factory default settings This also erases all your Phone Book Voice Dial re...

Page 70: ...H N150 User Guide Draft Rev 1 2 3 16 01 69 Note Your service provider must enable this feature to have it properly work Contact your service provider to verify if this feature is available in the network ...

Page 71: ...esses the Phone Book menu options 6 Silent Quit Activatesor deactivates silent keypad feature When set to silent mode your keypad tone is not sent out to the calling party However this should not be used when you access automated services that requires you to select options or press numbers through the keypad 5 Send Tel Send your phone number to the calling party or automated services 6 My Phone D...

Page 72: ...l controls the power level This power can range from 0 006 watts to 0 2 watts in digital mode Specifications are subject to change The information contained in this manual is believed to be correct at the time of printing however Samsung reserves the right to change or modify any of the specifications without notice or obligation to update existing units FCC RF Exposure information The design of y...

Page 73: ...ERY OR PHONEMELT DOWN YOUR WARRANTY OF COURSE WOULD BE NULL AND VOID Body worn operation To maintain compliance with FCC RF exposure guidelines if you wear a handset on your body use a Samsung supplied or approved carrying case holster or other body worn accessory If you do not use a body worn accessory ensure the antenna is at least one inch 2 5 centimeters from your body when transmitting Use of...

Page 74: ...hen it may cause interference or danger All wireless phones may be subject to radio interference which may affect their performance Turning off your phone in dangerous areas To avoid interfering with blasting operations turn off your phone when in a blasting area or in other areas with signs indicating that two way radios should be turned off Construction crews often use remote control RF devices ...

Page 75: ...should service your phone and accessories Using your phone near other electronic devices Most modern electronic equipment is shielded from radio frequency RF signals However some electronic equipment may not be shielded or adequately shielded from RF signals RF signals from wireless telephones may affect such equipment RF signals from your phone may affect systems in your vehicle including imprope...

Page 76: ...ver there is no guarantee that interference will not occur in a particular installation if this equipment does cause harmful interference to radio or television reception which can be determined by turning the equipment off and on the user is encouraged to try to correct the interference by one or more of the following measures 1 Reorient Relocate the receiving antenna 2 Increase the separation be...

Page 77: ...ent Only used approved batteries antennas and chargers The use of any unauthorized accessories may be dangerous and will invalidate the phone warranty if said accessories cause damage or a defect to the phone Although your phone is quite sturdy it is a complex piece of hardware and can be broken Use common sense guidelines to avoid dropping hitting bending or sitting on it FCC Compliance Informati...

Page 78: ...lpful if you need to contact us about your phone in the future Model Serial No User guide proprietary notice CDMA Technology is licensed by QUALCOMM Incorporated under one or more of the following Patents 4 901 3075 109 3905 267 2625 416 797 5 506 8655 544 1965 657 4205 101 501 5 267 2615 414 7965 504 7735 535 239 5 600 7545 778 338 5 228 054 5 337 338 5 710 7845 056 109 5 568 4835 659 569 5 490 1...

Page 79: ...78 MusicMatch Jukebox is a registered trademark of MusicMatch Incorporated Apple and Macintosh are registered trademarks Apple Corporation Amazon com The Weather Channel America Online eCompare Fox Sports com Fidelity Investments Hollywood com ...

Page 80: ...er MSG 98 C Calculator 92 Calendar 86 Call Answer optio n 120 Call Screen 122 Calls Incoming 43 Calls Missed 44 Calls Outgoin g 43 Caring for the battery 42 Charging with the travel adapter 40 Clear MEM 148 CLR Clear key 20 CLR key 75 Connect 100 Countdown 89 D Data fa x 98 Data fa x 131 Dialing in Lock Mode 144 Dialing numbers from the phone book 70 Disconnect 101 Display options 106 Display scre...

Page 81: ... t 112 LED indicator 22 Lifetime 50 links 79 List of menu functions 27 Lock Code Settin g 145 Lock Mode 143 Lock mode 34 Locking the Phone 144 M Mail kit 137 Mail kit Erasing individual messages 142 Mail kit Inbox 138 Mail kit Message memory capacit y 142 Mail kit Message options 140 Mail kit Message ringin g 141 Mail kit Message time 141 Mail kit Messages and lock mode 142 Making a phone call whi...

Page 82: ...m 102 Roam ringer 104 S Schedule 98 Scheduler 81 Scheduler How to schedule an event 83 Scheduler How to view an event 85 Secret phone book numbers 65 Security 143 Security Dialing in lock mode 144 Security Emergency 146 Security Lock code 145 Security Lock mode 143 Security Locking the phone 144 Security Restrict 145 Security Unlocking the phone 144 Send key 22 Send PIN 147 Send Talk mode 35 Sendi...

Page 83: ...5 U Usage guidelines 151 Using your phone s menus 32 V Voice dial 113 Voice dial Language 116 Voice dial Record 114 Voice dial Set active 116 Voice dial Trainin g 116 Voice dial Undo Train 117 Voice mail 98 Voice memo 118 Voice memo Reviewin g 119 Voice memo button 23 Voice Memo Recordin g 118 Voice volume 103 W Web MiniBrowser 71 World Time 91 Y Your consumer package 17 ...

Reviews: