background image

Introduction

_ 39

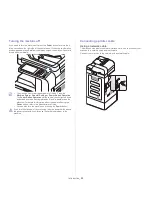
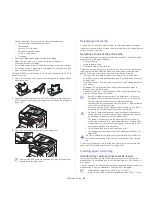
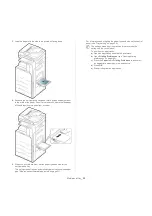
Turning the machine off

If you need to turn the machine off, press the 

Power

 button for more than 

three seconds on the right side of the control panel. When the confirmation 
window appears, press 

Yes

 from the display screen, then wait until power is 

turned off automatically.

The machine has three types of power off mode. Press the 

Machine Setup 

General Settings

 > 

Power Button Operation

The 

Power Button Operation

 option can only be configured by an 

authorized user who has registered an ID and a password on the 
machine. For detailed information about the power off using the 

Power

 button, refer to the Administrator’s Guide.

You can also turn the machine on pressing the 

Power

 button.

If you turn the machine off directly using the main power switch above 
the power receptacle, it could cause the hard disk problem in the 
machine.

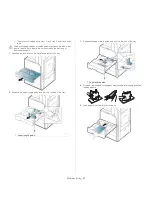
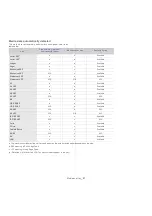
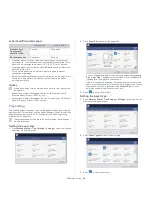
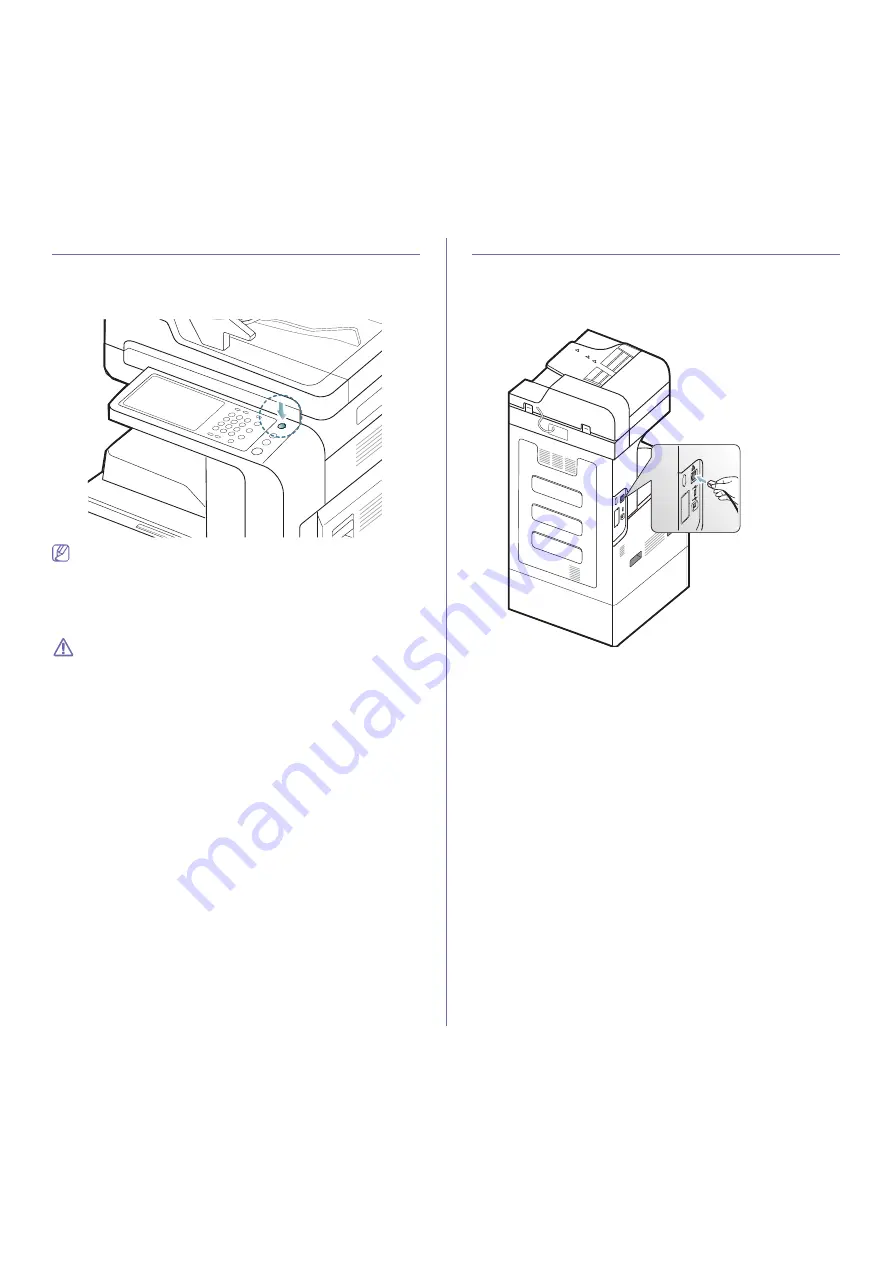
Connecting a printer cable

Using a network cable

This machine has a bulit-in network interface card. You can connect your 
machine to a network using a network cable.
Connect your machine to the network with a network cable:

Summary of Contents for CLX-92x1 Series

Page 1: ...SCX 812x Series CLX 92x1 Series CLX 9301 Series Color Multi Functional Printer User s Guide imagine the possibilities Thank you for purchasing a Samsung product ...

Page 2: ...tered trademarks or trademarks of Microsoft Corporation PostScript 3 is a trademark of Adobe System Inc This product includes software developed at the University of California Irvine for use in the DAV Explorer project http www ics uci edu webdav ABBYY FineReader Engine for Embedded OS 2009 ABBYY ABBYY FineReader the keenest eye in OCR ABBYY FINEREADER and ABBYY FineReader are registered trademar...

Page 3: ...play screen and useful buttons 40 Display screen 40 Counter button 41 Eco button 41 Job Status button 42 Interrupt button 42 Understanding the pop up keyboard 43 Using the manual stapler 44 Viewing the animation for trouble shooting MEDIA AND TRAY 45 45 Loading originals 45 On the scanner glass 45 In the duplex automatic document feeder DADF 46 Selecting print media 46 Guidelines to select the pri...

Page 4: ...kground 76 Erasing backside Images 77 Using a programs setting 77 Saving Programs 77 Using Programs 77 Managing Programs 78 Using previous settings 78 Saving documents 79 Using the Quick Copy menu SCANNING 80 80 Basic scanning method 80 Understanding the scan methods 81 Scanning originals and sending through email scan to email 81 Understanding the Scan to Email screen 83 Sending a scanned image t...

Page 5: ...Erasing backside Images 100 Scan to Edge 101 Quality 101 Scan Preset 101 File Format 102 File Name 102 File Policy 102 Folder Creation 103 Using a programs setting 103 Saving Programs 103 Using Programs 103 Managing Programs 103 Using previous settings 104 Saving documents 105 Scanning originals and sending to your computer scan to PC 105 For a network connected machine 105 Using Samsung Scan and ...

Page 6: ...120 Selecting the size of originals 120 Faxing on both sides of originals 121 Selecting the orientation of originals 121 Changing the resolution 122 Selecting the type of originals 122 Selecting the color mode 122 Changing the darkness 122 Adjusting background 123 Erasing backside images 124 Forwarding a fax to another destination 124 Understanding the Fax Forward Settings options 124 Setting the ...

Page 7: ...river 144 PostScript printer driver 144 Basic printing 144 Canceling a print job 145 Opening printing preferences 145 Print Mode 146 Basic tab 147 Paper tab 148 Graphics tab 150 Finishing tab 151 Advanced tab 152 Eco tab 152 Samsung tab 153 Using a favorite setting 153 Using help 154 Setting Device Options 156 Using special print features 156 Printing multiple pages on one sheet of paper 156 Print...

Page 8: ...reen 173 Box setting 173 New Box 173 Edit Box 174 Delete Box 174 Saving documents 175 Understanding details of the document box screen 176 Using document box features 176 Selecting the job type 176 Previewing the stored data 177 Adding scanned data 178 Viewing detail information 178 Editing stored data 178 Deleting stored data 179 Sending stored data 182 Printing stored data 182 Printing informati...

Page 9: ...path Jam Duplex Return 218 Paper jam at the top of duplex path Jam Duplex 1 218 Paper jam at the inside of duplex path Jam Duplex 2 219 Paper jam bottom of duplex path Jam Duplex Regi 219 Paper jam in exit area Jam Exit Face down 220 Paper jam inside of finisher during ejecting to top bin 221 Paper jam at finisher s exit during ejection to the top bin 221 Paper jam inside of finisher during ejecti...

Page 10: ...le accessories 246 Checking replaceable s lifespan SPECIFICATIONS 247 247 Hardware specifications 247 Environmental specifications 248 Electrical specifications 249 Print media specifications CONTACT SAMSUNG WORLDWIDE 252 GLOSSARY 255 ...

Page 11: ...onment Warning Warning Hazards or unsafe practices that may result in severe personal injury or death Caution Hazards or unsafe practices that may result in minor personal injury or property damage Do not attempt Do not disassemble Do not touch Unplug the power cord from the wall socket Make sure the machine is grounded to prevent electric shock Call the service center for help Follow directions e...

Page 12: ...g the machine from all interface connections and request assistance from qualified service personnel Otherwise this could result in electric shock or fire If the machine exhibits a sudden and distinct change in performance unplug the machine from all interface connections and request assistance from qualified service personnel Otherwise this could result in electric shock or fire Do not forcefully...

Page 13: ...his can diminish performance and could result in electric shock or fire Use only No 26 AWGa or larger telephone line cord if necessary Otherwise it can cause damage to the machine a AWG American Wire Gauge Use the power cord supplied with your machine for safe operation Otherwise it can cause damage to the machine and could result in electric shock or fire Unplug this product from the wall outlet ...

Page 14: ...er dust can be dangerous to humans When storing supplies such as toner cartridges keep them away from children Toner dust can be dangerous to humans Do not burn any of the supplies such as toner cartridge or fuser unit It can cause an explosion or fire Using recycled supplies such as toner can cause damage to the machine In case of damage due to the use of recycled supplies a service fee will be c...

Page 15: ...am divergence CLX 9250 Series Paraller 7 13 degree Prependicular 14 22 degree CLX 9350 Series Paraller 7 11 degree Prependicular 14 22 degree Maximum power or energy output CLX 9250 Series 15 mW CLX 9350 Series 16 mW WARNING Never operate or service the printer with the protective cover removed from Laser Scanner assembly The reflected beam although invisible can damage your eyes When using this p...

Page 16: ...NERGY STAR program see http www energystar gov Recycle or dispose of the packaging material for this product in an environmentally responsible manner This marking on the product accessories or literature indicates that the product and its electronic accessories e g charger headset USB cable should not be disposed of with other household waste at the end of their working life To prevent possible ha...

Page 17: ...pareils numériques de Classe A prescrites dans la norme sur le matériel brouilleur Appareils Numériques ICES 003 édictée par l Industrie et Sciences Canada UNITED STATES OF AMERICA Federal Communications Commission FCC Intentional emitter per FCC Part 15 Low power Radio LAN type devices radio frequency RF wireless communication devices operating in the 2 4 GHz 5 GHz Band may be present embedded in...

Page 18: ... any message via a telephone facsimile machine unless such message clearly contains in a margin at the top or bottom of each transmitted page or on the first page of the transmission the following information 1 the date and time of transmission 2 identification of either business business entity or individual sending the message and 3 telephone number of either the sending machine business busines...

Page 19: ...r of the right to bring a complaint to the Federal Communication Commission pursuant to procedures set out in FCC Rules and Regulations Subpart E of Part 68 You should also know that Your machine is not designed to be connected to a digital PBX system If you intend to use a computer modem or fax modem on the same phone line as your machine you may experience transmission and reception problems wit...

Page 20: ...o the analogue public switched telephone network PSTN in accordance with Directive 1999 5 EC The product has been designed to work with the national PSTNs and compatible PBXs of the European countries In the event of problems you should contact the Euro QA Lab of Samsung Electronics Co Ltd in the first instance The product has been tested against TBR21 To assist in the use and application of termi...

Page 21: ...Ireland Italy Latvia Lithuania Luxembourg Malta The Netherlands Poland Portugal Slovakia Slovenia Spain Sweden and the U K EEA EFTA countries Iceland Liechtenstein Norway and Switzerland European States with restrictions on use EU In France the frequency range is restricted to 2446 5 2483 5 MHz for devices above 10 mW transmitting power such as wireless EEA EFTA countries No limitations at this ti...

Page 22: ...ation regulations require wireless devices to be turned off while traveling in an airplane IEEE 802 11 also known as wireless Ethernet and Bluetooth communication devices are examples of devices that provide wireless communication In environments where the risk of interference to other devices or services is harmful or perceived as harmful the option to use a wireless device may be restricted or e...

Page 23: ...e not just the SSL code The SSL documentation included with this distribution is covered by the same copyright terms except that the holder is Tim Hudson tjh cryptsoft com Copyright remains Eric Young s and as such any Copyright notices in the code are not to be removed If this package is used in a product Eric Young should be given attribution as the author of the parts of the library used This c...

Page 24: ...Regulatory information_ 24 China only ...

Page 25: ...our machine depending on its options or models The procedures in this user s guide are mainly based on the operating system of Windows XP Conventions Some terms in this guide are used interchangeably Document is synonymous with original Paper is synonymous with media or print media Machine refers to printer or MFP The following table offers the conventions of this guide Convention Description Exam...

Page 26: ...accessories Machine Driver Help This help guide provides you with help information on the printer driver and instructions for setting up the printing optionsG see the User s Guide Samsung website If you have Internet access you can get help support machine drivers manuals and order information from the Samsung website www samsung com Downloadable softwares You can download useful softwares from th...

Page 27: ... your documents with words such as Confidential see Using watermarks on page 157 You can use preprinted forms and letterhead with plain paper see Using overlay on page 158 To save paper you can print multiple pages on one single sheet of paper see Printing multiple pages on one sheet of paper on page 156 This machine automatically conserves electricity by substantially reducing power consumption w...

Page 28: ...s Features by models include Included o Optional Blank Not available FEATURES CLX 9301 Series CLX 9251 Series CLX 9201 Series SCX 8128 Series SCX 8123 Series USB Memory Interface Duplex Automatic Document Feeder Hard Disk o Network Interface Ethernet 10 100 Base TX wired LAN Duplex 2 sided printing 500 sheet Standard Finisher o o o o o Cabinet Stand o o o o o Dual Cassette Feeder o o o o o Working...

Page 29: ...n and paper clip holder Using the USB keyboard Viewing the animation for trouble shooting Machine overview Front view 1 4 3 7 5 6 10 13 1 12 11 9 8 2 1 Duplex automatic document feeder cover 8 Optional dual cassette feeder tray 3 tray 4 a 2 Duplex automatic document feeder width guides 9 Standard tray tray 1 tray 2 3 Duplex automatic document feeder input tray 10 Front door 4 Duplex automatic docu...

Page 30: ...Introduction_ 30 Front view 2 1 Scanner glass 4 Multi purpose tray paper width guide 2 White sheet 5 USB port 2 EA 3 Multi purpose tray 1 2 3 4 5 ...

Page 31: ...Introduction_ 31 Rear view 1 Duplexing automatic document feeder cable 3 USB host port 2 Network port 4 USB port ...

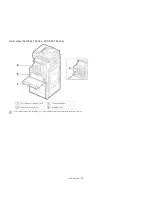
Page 32: ...Inner view CLX 92x1 Series CLX 9301 Series If you want to see the imaging unit you need to remove the waste toner container 1 LSU window cleaning stick 3 Toner cartridges 2 Waste toner container 4 Imaging units 2 1 3 4 ...

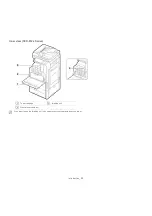
Page 33: ...Introduction_ 33 Inner view SCX 812x Series If you want to see the imaging unit you need to remove the waste toner container 1 Toner cartridge 3 Imaging unit 2 Waste toner container 2 1 3 4 ...

Page 34: ..._ 34 View with Standard finisher optional 1 Standard finisher front door 6 Top door 2 Manual stapler 7 Standard finisher Front door handle 3 Manual stapler button 8 Bridge unit 4 Finishing tray 9 Staple 5 Top tray ...

Page 35: ...Introduction_ 35 View with Cabinet stand and High capacity feeder optional 1 Cabinet Stand ...

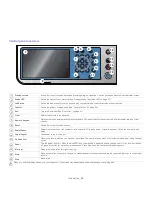
Page 36: ...can also enter the number value for document copies or other options 8 Reset Resets the current machine s setup 9 Redial Pause Redials the recently sent fax number or received caller ID in ready mode or inserts a pause into a fax number in edit mode 10 Log in Logout Allows user to log in or log out 11 On Hook Dial When you press this button you can hear a dial tone Then enter a fax number It is si...

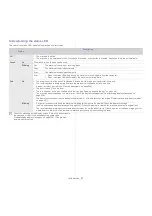
Page 37: ...d of its lifespan Remove the old imaging unit and install a new one The toner cartridge is totally empty Remove the old toner cartridge and install a new one A paper jam has occurred see Clearing paper jams on page 209 The door is open Close the door There is no paper in the tray Load paper in the tray see Loading paper in the tray on page 46 The machine has stopped due to a major error Check the ...

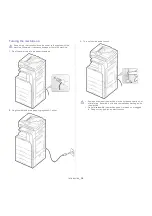
Page 38: ...he power cord into the power receptacle 2 Plug the other end into a properly grounded AC outlet 3 Turn on the main power switch Some parts inside of the machine may be hot when power is on or after printing Be careful not to burn yourself when working inside the machine Do not disassemble the machine when it is turned on or plugged in Doing so may give you an electric shock ...

Page 39: ...ion can only be configured by an authorized user who has registered an ID and a password on the machine For detailed information about the power off using the Power button refer to the Administrator s Guide You can also turn the machine on pressing the Power button If you turn the machine off directly using the main power switch above the power receptacle it could cause the hard disk problem in th...

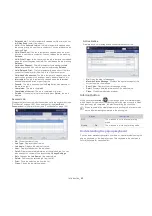
Page 40: ...g originals and sending to your computer scan to PC on page 105 Scan to Shared Folder Enters the Scan to Shared Folder menu see Scanning originals and sending to your computer scan to PC on page 105 Quick Copy Enters the Quick Copy menu see Using the Quick Copy menu on page 79 ID Copy Enters the ID Copy menu see Using the Quick Copy menu on page 79 USB Enters the USB menu When USB memory is insert...

Page 41: ... the many jobs are queued The selected job cannot be promoted in front of the progressing job You cannot use the Promote button depending on the state of the job If the Promote button is inactivated when you select a job the job you selected is considerably progressed Job Hold Holds a selected job from the list You cannot use the Job Hold button depending on the state of the job If the Job Hold bu...

Page 42: ...tial on page 145 You need to enter the User ID and Password set in the printer driver see Confidential on page 145 No Gives the order of jobs Job Type Displays type of the job Job Name Displays the name of the job User Displays the name of the job owner Detail Displays detailed information of the selected job You can also change the number of copies pressing Change Settings Edit Changes the Job Na...

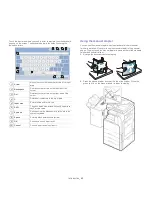
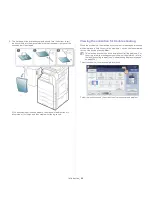
Page 43: ...re stapling 2 Press the manual stapler button at the top of the finisher When the green light in on the manual stapler is ready to stapling 1 Arrow Moves the cursor between characters in the input area 2 Backspace Deletes the characters on the left side of the cursor 3 Del Deletes the characters on the right side of the cursor 4 C Deletes all characters in the input area 5 Input area Enters letter...

Page 44: ...he animation for trouble shooting When the problems in the machine occur some error messages are shown with animations to help you solve the problems You can see the animation to shoot the trouble pressing View This machine does not show the animations of all the problems For the errors of which messages are not shown with animation refer to the troubleshooting chapter see Understanding display me...

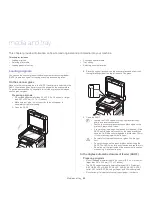
Page 45: ... the scanner glass and align it with the registration guide at the top left corner of the glass 3 Close the DADF Leaving the DADF open while copying may affect copy quality and toner consumption Dust on the scanner glass may cause black spots on the printout Always keep it clean If you are copying a page from a book or magazine lift the DADF until its hinges are caught by the stopper and then clos...

Page 46: ...on page 249 Desired outcome The print media you choose should be appropriate for your project Brightness Some print media are whiter than others and produce sharper more vibrant images Surface smoothness The smoothness of the print media affects how crisp the printing looks on the paper Some print media may meet all of the guidelines in this user s guide and still not produce satisfactory results ...

Page 47: ... the warranty or service agreements 1 Squeeze the lock lever on the handle and pull out the tray 2 Squeeze the paper length guide and pull it to the end of the tray 3 Squeeze the paper width guide and pull it to the end of the tray 4 Flex and fan the edge of the paper stack to separate the pages before loading papers 5 Load paper with the print side facing up 1 Paper length guide 1 1 Paper width g...

Page 48: ...f the paper the guide may bend the paper Do not push the paper guide too far causing the media to wrap If you do not adjust the paper width guide it may cause paper jams Do not overload the tray Otherwise it may cause paper jams Make sure that the paper is below the maximum paper capacity guide inside the tray 8 Fix the the paper length guide using the locking switch Release the locking switch to ...

Page 49: ...chine driver override the settings on the control panel To print from an application a Open an application and start the print menu b Open Printing Preferences See Opening printing preferences on page 141 c Press the Paper tab in Printing Preferences and select an appropriate paper type size and source d Press OK e Start printing from an application Multi purpose tray The multi purpose tray can ho...

Page 50: ...tomatically detect various sized paper see Media sizes automatically detected on page 51 For information about setting the paper type and size on the control panel see Tray setting on page 54 The settings made from the machine driver override the settings on the control panel To print from an application a Open an application and start the print menu b Open Printing Preferences see Opening printin...

Page 51: ...vailable Executive LEF N A o Available Statement SEF Available Statement LEF N A N A N A A3 Available A4 SEF Available A4 LEF Available A5 SEF o Available A5 LEF N A N A B4 Available JIS B5 SEF Available JIS B5 LEF N A Available A6 SEF N A N A A6 LEF N A N A N A ISO B5 SEF o o Available ISO B5 LEF N A o N A Folio o Available Oficio o o Available Tabloid Extra o Available SRA3 N A o N A 8K o o Avai...

Page 52: ...Thin CardStock 105 to 163 g m2 28 to 43 lb cardstock Thick CardStock 170 to 216 g m2 45 to 57 lb cardstock Thin Glossy 106 to 169 g m2 28 to 45 lb glossy paper Thick Glossy 170 to 253 g m2 45 to 67 lb glossy paper Envelope Successful printing on envelopes depends upon the quality of the envelopes To print an envelope place it with the flap side up When selecting envelopes consider the following fa...

Page 53: ... paper with the side to be printed on facing down To avoid damaging the machine use only labels designed for use in laser machines When selecting labels consider the following factors Adhesives The adhesive material should be stable at your machine s fusing temperature about 170 C 338 F for 0 1 second Arrangement Only use labels with no exposed backing between them Labels can peel off sheets that ...

Page 54: ...screen For computer printing select the paper size and type in the application program you use on your computer see Opening printing preferences on page 145 The settings made from the machine driver override the settings on the display screen Setting the paper size 1 Press Machine Setup Tray Settings Settings select the tray you want from the display screen 2 Press Paper Size and select the paper ...

Page 55: ... Settings Auto Continue 2 Press On 3 Press to save the selection Paper substitution When the requested paper for a print job is not available in the tray this feature allows you to substitute similar paper size For example if the requested ledger sized paper is not available in the tray this machine substitutes A3 for the requested paper When the paper is substituted some image loss may occur 1 Pr...

Page 56: ... can detect some paper sizes and types automatically If you want to set the paper size and type or the machine cannot detect them you can set the size and type directly in the confirmation window 1 Press Machine Setup Tray Settings Settings select the tray you want from the display screen 2 Press Tray Confirmation Message 3 Press On 4 Press to save the selection ...

Page 57: ...ze of a copied image see Reducing or enlarging copies on page 62 Duplex Sets the machine to print copies on both sides of the paper see Copying multiple sides on page 62 Color Mode Selects a color mode for making copies see Selecting the color mode CLX 9201 9301 Series only on page 63 Output Sets the machine s various output options see Deciding the form of copy output on page 64 Darkness Adjusts ...

Page 58: ...ook Copy Allows you to copy the left or and right pages of book on separate output paper see Book copying on page 73 Watermark Allows you to print a watermark on printouts see Watermark on page 74 Stamp Allows you to print with some information see Stamp on page 74 Back Returns to the Basic tab Image tab You can move to next or previous page using up down arrows on the bottom left Original Type Im...

Page 59: ...e 45 3 Adjust the settings for each copy such as Paper Supply Reduce Enlarge Duplex and more in the Basic tab see Changing the settings for each copy on page 61 4 Set the copy features in the Advanced or Image tabs if necessary see Using special copy features on page 65 5 Enter the number of copies using the numeric keypad on the control panel if necessary 6 Press Start from the control panel to b...

Page 60: ...mmended but it could cause original document jams A3 and A4 A3 and B4 A4 and B4 B4 and B5 Letter and Legal Letter and Ledger 1 Press Copy from the display screen 2 Place the different sized originals face up in the DADF When you place them in the DADF align and gently push them to the rear side of the DADF width guide 3 Press the Advanced tab Original Size Mixed Size from the display screen Mixed ...

Page 61: ...button on the control panelU Selecting the paper supply tray Paper Supply sets the tray containing the paper to be used for printing The machine prints the scanned image on the paper in the selected tray You can see the icons that show paper sizes and the remaining amount of paper in each tray Press the Basic tab Paper Supply then press the appropriate paper tray Auto Automatically detects the pap...

Page 62: ...wo sided originals on both sides of the paper or divide two sided originals into multiple one sided copies Check the available paper using the DuplexGfeature You can only use this feature with Letter SEF Letter LEF Ledger Legal Executive SEF Statement SEF A3 A4 SEF A4 LEF A5 SEF B4 JIS B5 SEF ISO B5 SEF Tabloid Extra 8K 16K and Oficio 63 to 163 g m2 16 43 lb bond only When you use this option ID C...

Page 63: ... and then select an appropriate color setting Full Color Select this setting to print the same as the original image color Refer to the sample images below Depending on the circumstances and quality of originals the printout s quality could be different from the sample image s B W Select this setting to print the copy in black and white regardless whether the scanned document is in color or in bla...

Page 64: ...ossed in sets This feature is available only when the standard or booklet finisher is not installed This feature is available only with Letter and A4 sized print media Before using this feature you have to load the paper in the trays with SEF Short edge feed and LEF Long edge feed For example direction of paper feeding in tray 1 is SEF and direction of paper feeding in tray 2 is LEF Off Disables t...

Page 65: ...Depending on the circumstances and quality of originals the printout s quality could be different from the sample image s Using special copy features On the Advanced or Image tab of the Copy screen you can select specific copy features Selecting the size of originals Copies can be produced after specifying the document scanning size if the document size cannot be detected automatically or if you w...

Reviews: