28
Member of Exel group
DRT7133
D - 2023/01
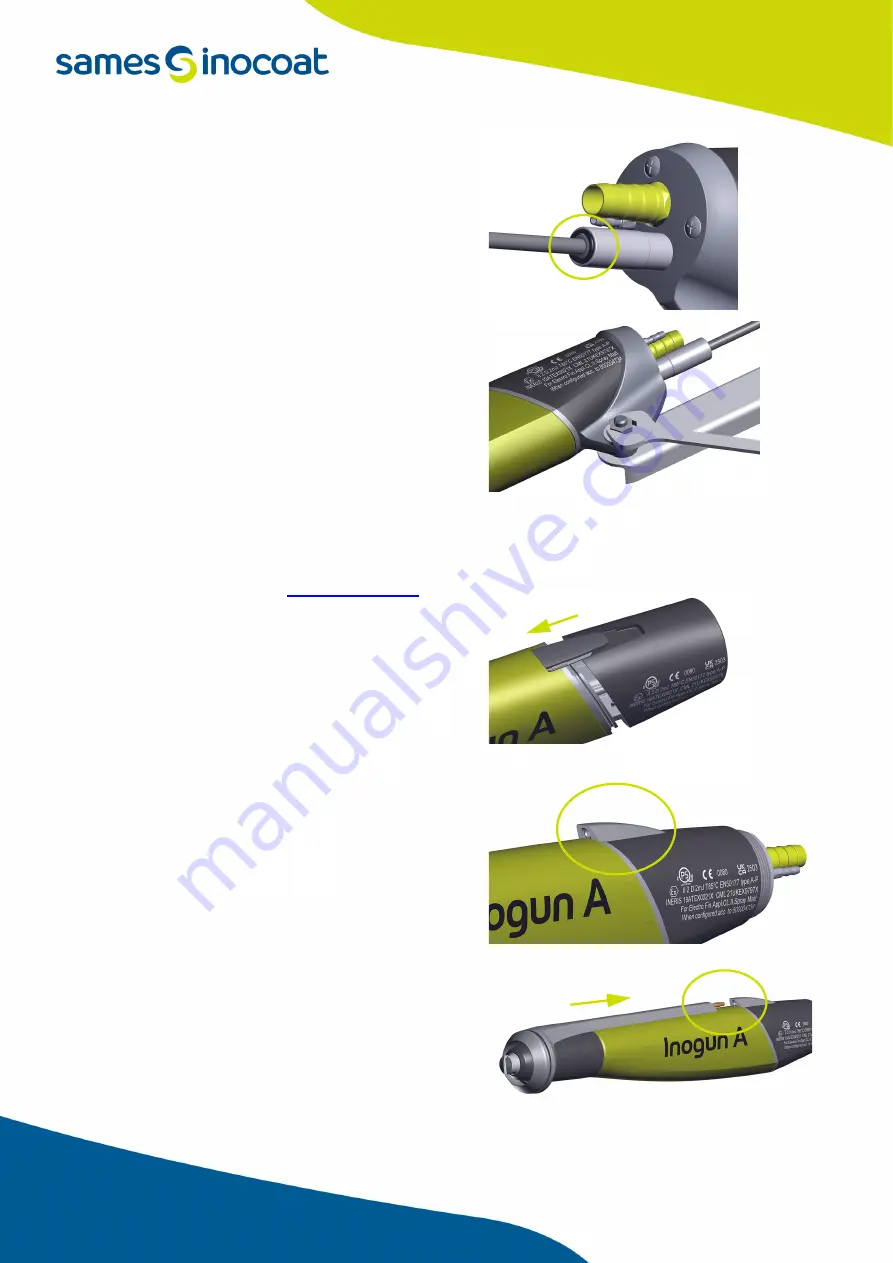
• Push the seal back into the groove of the connector to
hold it in position.
• Screw the rear support onto the support tube using a
13 mm open-end wrench.
• Connect the air and powder hoses to the projector.
5.2.3. Installation of the counter electrode for the
standard Inogun A
version
• Remove the holding flange (
• Separate the rear body from the projector to release
the cap.
• Install the counter electrode connection instead. Push
back the rear body thus equipped and replace the
holding flange.
• Place the counter electrode on the projector equipped
with the deflector and nozzle nut and connect it.
Summary of Contents for inocoat Inogun A
Page 1: ...Instruction manual DRT7133 D 2023 01 Inogun A FCC Standard and Robotic Versions...
Page 78: ...78 Member of Exel group DRT7133 D 2023 01 10 Appendices 10 1 Preventive maintenance plan...
Page 82: ...79 DRT7133 D 2023 01 Member of Exel group 10 2 EU and UK declarations of conformity...
Page 87: ...Sames 13 Chemin de Malacher 38240 Meylan France 33 0 4 76 41 60 60...


