


36
Deploying the Access Point
Step 2: Complete the Power Connections
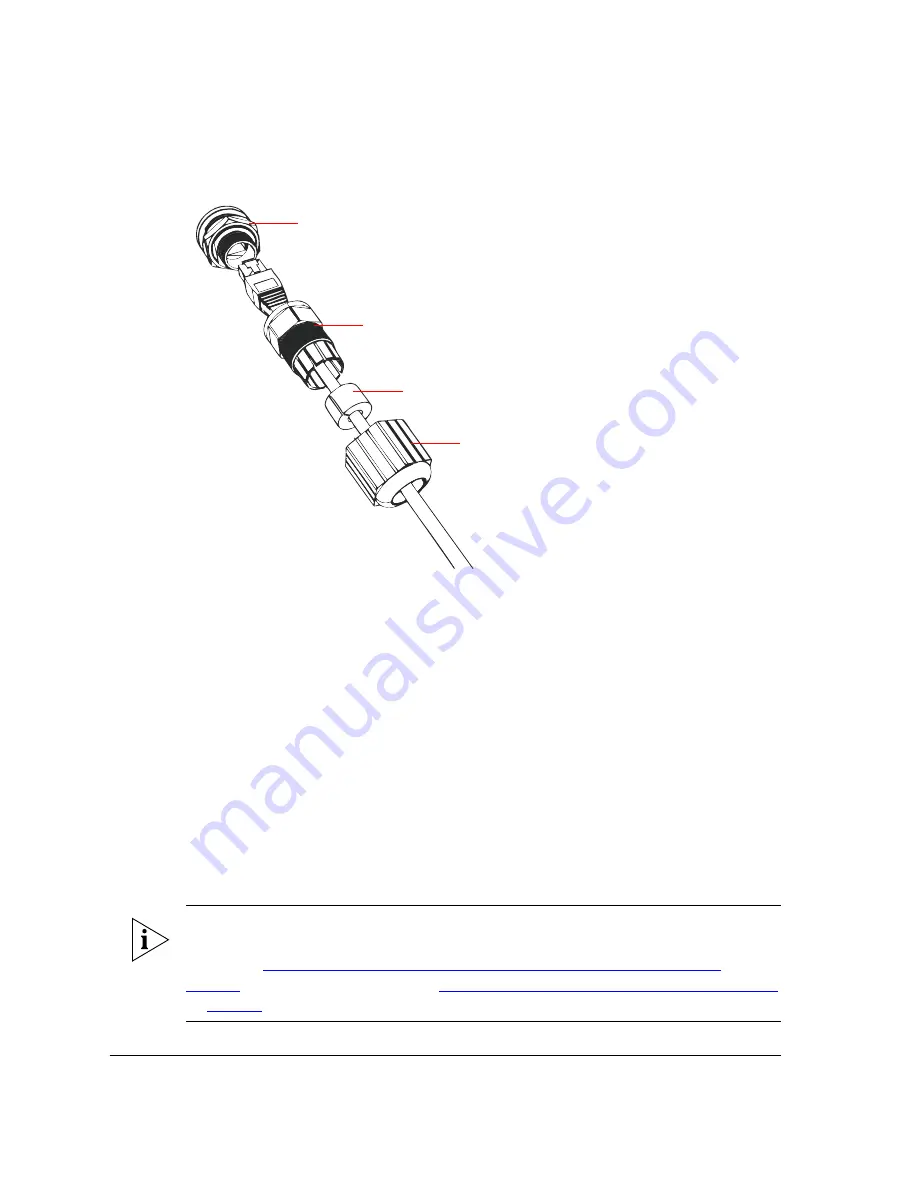
Figure 27.
RJ-45 waterproof connector assembly
3.
Connect the RJ-45 cable to the
PoE IN
port on the AP.
4.
Screw the clamping ring assembly onto the RJ-45 connector.
5.
Push the rubber-O ring into the clamping ring assembly. Make sure that the clamping
ring assembly fully encloses the rubber-O ring.
6.
Push the sealing nut forward and tighten it to seal the assembly.
If you are using both the
PoE IN
and
PoE OUT
ports, assemble the second waterproof
connector by repeating the same procedure.
You have completed connecting the RJ-45 cable and sealing the connection.
Step 2: Complete the Power Connections
The Access Point supports both PoE and DC power and it can be connected to both power
sources at the same time. If you want use both power sources, complete the power
connections in this step.
NOTE:
If you want to use PoE only or DC power only (not both), you do not need to
complete this step. You already configured one power connection earlier when you
completed
“Step 2: Connect the Access Point to the Administrative Computer”
on
page 23
. You may continue directly to
“Step 3: Connect the Access Point to the Network”
on
page 40
.
Sealing nut
Rubber-O ring
Clamping ring assembly
RJ-45 connector (PoE IN/PoE OUT port on the AP)
Summary of Contents for ZoneFlex 7762-T
Page 2: ......
Page 62: ...58 What to Do Next Read Related Documentation...


