6
x
Control unit
FA ROTEX A1 BGe - 02/2014
27
6.5 Changing the sensors
Sensors inside the unit (fig. 6-8, fig. 6-9) can be changed without
having to open the boiler control panel.
6.5.1 Changing flow / return flow temperature sensor
1. Remove the sound insulation hood and the boiler panelling.
Remove the heat insulation shells for changing the flow
temperature sensor (see chapter 9.2.1).
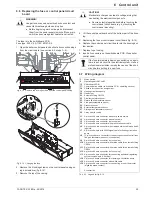
2. Pull out the connectors on the flow temperature sensor/ return
flow temperature sensor (fig. 6-10).
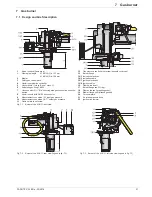
3. Unscrew the flow /return flow temperature sensor using an
open-jaw wrench SW 15 (fig. 6-11).
4. Screw in the new flow /return flow temperature sensor and
plug in the cable with connector.
The connectors are shape-coded. Do not force the connector!
WARNING!
Live parts can cause an electric shock on contact and
cause life-threatening burns and injuries.
Ɣ
Before beginning work on the ROTEX A1,
disconnect therom the power supply (switch off
fuse, main switch) and secure against uninten-
tional restart.
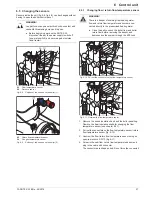
22
Flow temperature sensor
25
Pressure sensor
Fig. 6-8
Position of the sensors on the boiler (1)
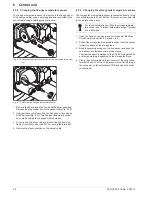
23
Return flow temperature sensor
24
Flue gas temperature sensor
Fig. 6-9
Position of the sensors on the boiler (2)
WARNING!
There is a danger of scalding from heating water.
flow and return flow temperature sensors are con-
nected directly to the pressurised heating water.
Ɣ
Close the ball cocks on the boiler flow and boiler
return flow before removing the sensor, and
depressurise the system through the KFE cock.
Fig. 6-10 Pull out the connector on the flow temperature sensor
Fig. 6-11 Unscrew the flow temperature sensor


