51
Upgrade Label
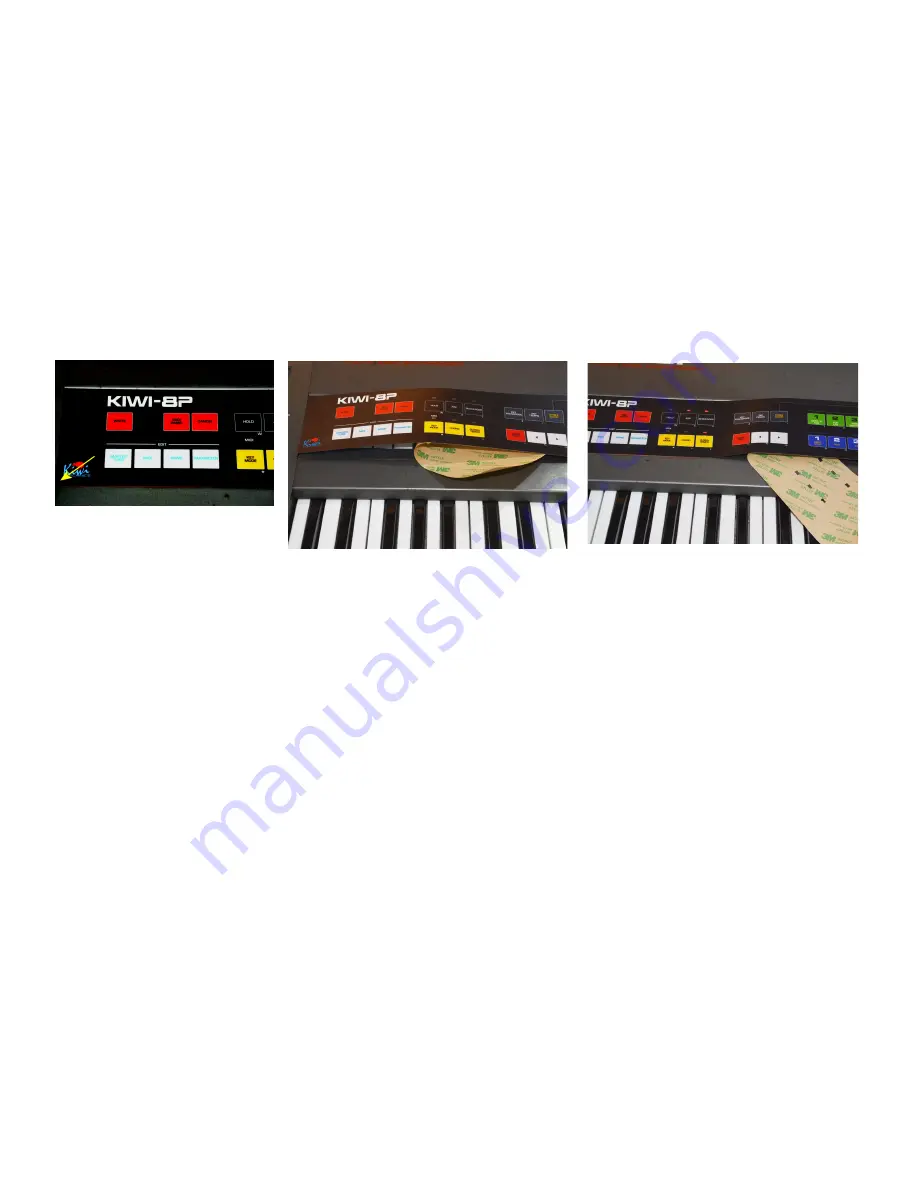
The Kiwitechnics Kiwi-8P Upgrade comes with a label that is placed over the existing front panel label on the JX-8P.
It is recommended that you lay the label on a flat surface to let it relax from being rolled into the shipping box. This may
take a while (days) so be patient. You can still use the upgrade without it applied as it can be a reference.
Once the label is flat it is applied by pealing back some of the backing starting at the left hand end and lining up the part of
the label with the backing still on up with the existing 8P label. The start point for lining up is the lower left hand corner
nearest to the joystick (yellow arrow in photo). It should be up against the left and lower sides of the recessed part of the
JX-8P. When it is lined up press down the part that you have removed the backing from and then pull out the rest of the
backing paper as you press down the label. If it goes wrong the label will still be able to be removed without damage for
another attempt. Keep it close to the bottom edge of the recess as you work along the synth.
Aftertouch Strip repair
The Aftertouch strip in the 8P slowly reduces it effectiveness over time requiring a much harder key press to operate.
This is due to the materials in the strip oxidising over time. The AT strip is difficult to access and involves a
complete keyboard and AT Bar strip down and not a job to be taken lightly. Also the strip will likely oxidise
again so the repair has limited success. To avoid this difficult and costly work an AT multiplication
parameter has been built into the Kiwi-8P upgrade. This will make the AT more sensitive by a factor of x2, x4
or x8. This works in conjunction with the AT level slider on the front panel to fine tune the AT amount
desired.
www.kiwitechnics.com
JX-8P Upgrade User Manual v130


