15
Making Settings in the Menus
Heres how to make settings using the menus. Perform these steps from
the main screen. For a list of the menu items, refer to the next page.
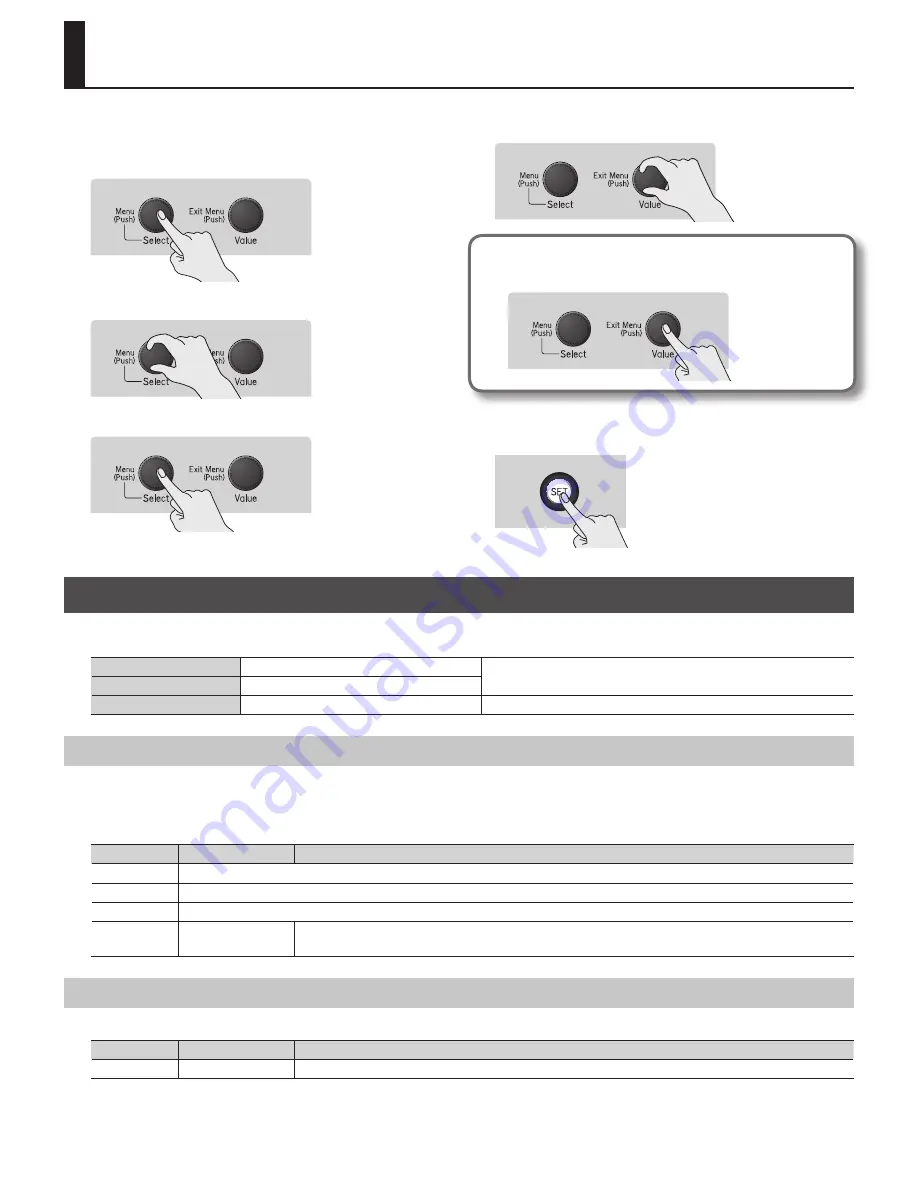
1.
Press the [Select/Menu] knob to access the menu .
2.
Turn the [Select/Menu] knob to select the item .
3.
Press the [Select/Menu] knob to enter the item .
4.
Turn the [Value/Exit Menu] knob to change the item’s setting .
To cancel the setting / to return to the previous menu...
Press the [Value/Exit Menu] knob.
5.
If a Yes/No confirmation screen appears, press the [SET]
piston to put the setting into effect .
Menu List
The settings shown below will revert to their default values when the organ’s power is turned off; however, with a number of the settings, you can have
their content saved in memory even after the power is turned off.
Setting items marked with [S]
Can be stored in the SYSTEM group.
Refer to “Storing Your Settings (Customize)” (p. 24).
Setting items marked with [V]
Can be stored in the VOICING group.
Setting items marked with [P]
Settings can be stored on an individual piston basis.
Refer to “Storing or Recalling a Registration” (p. 26).
Demo
Listen to demo songs
ѥ
ѥ
All rights reserved. Unauthorized use of this material for purposes other than private, personal enjoyment is a violation of applicable laws.
ѥ
ѥ
No data for the music that is played will be output from the MIDI OUT connector.
Menu item
Value
Explanation
Group
Demo song group
Song
Demo song
Tempo
Tempo of the demo song
Reverb Volume
[S]
SONG, 0–127
Adjusts the reverb volume of the demo songs.
If this is set to “SONG,” the reverb volume will automatically fit with the demo song.
USB Memory
Selecting a USB Memory folder
Menu item
Value
Explanation
Folder
A–Z
Selecting a USB Memory folder


