Rlide R2 PRO Manual Download Page 96


94


k.


After staking out, you can press [ENT] to 
record the stakeout point. PT defaults to 
the last recorded PT+1, you can input 
code if necessary. Press [ENT] to record 
the point.                                                       

[ENT] 

 N: 

10.000m 


 E: 

10.000m 


 Z: 

  6.180m 


ST:  221 


CD: 


List 

Stac 


Explanation for the Alignment Stake-Out screen: 

 CH: 

1.000 


 O/S: 

0.000m 


 dVD: 

  0.000m 


* Press [MENU] Slope SO


LOFS 

ROFS 

+CHG 

-CHG 

LOFS

This key is used to stake out left chainage. Press it to display the offset and the height 

difference of the left chainage. 

ROFS

This key is used to stake out right chainage. Press it to display the offset and the height 

difference of the right chainage. 

+CHG

The key is used to increase the chainage. 

-CHG

The key is used to increase the chainage. 


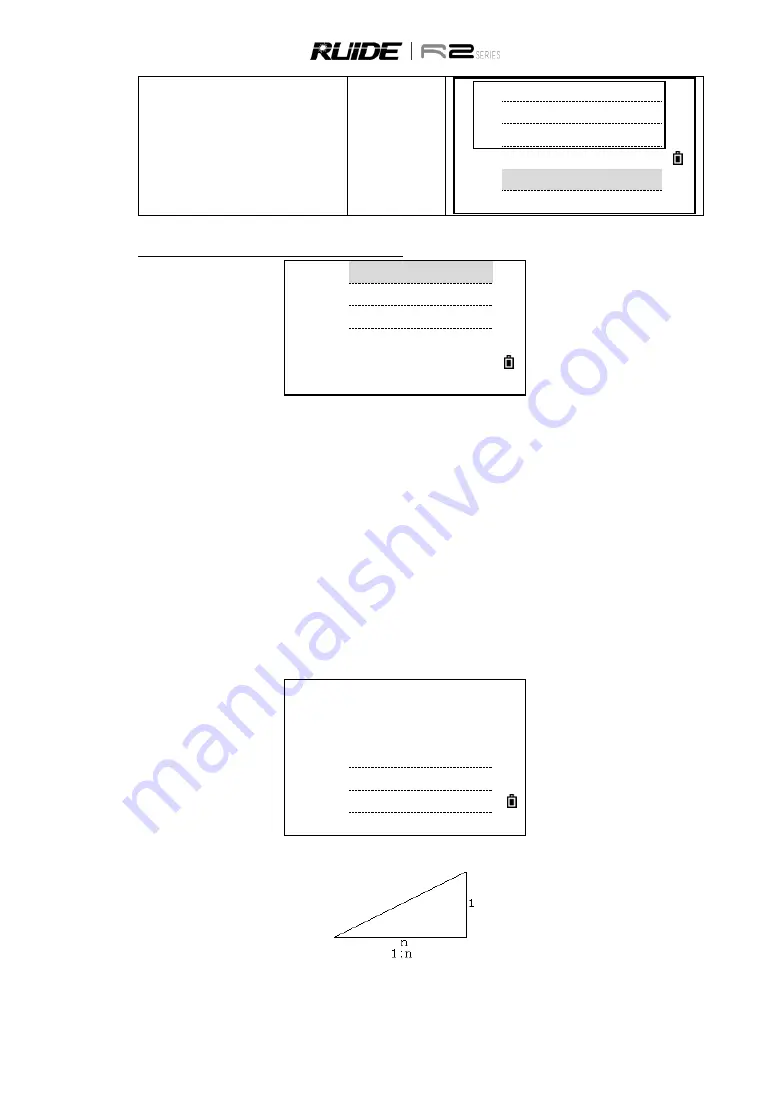
7.7.10 Slope Stake-out 

Slope Stake Out can be launched as part of the Alignment Stake-Out. It is a must to define horizontal and 
vertical alignments in Road menu previously. In stake-out main screen, press [menu] to enter into slope 
stake-out function. 
Slope stake-out screen


Slope 

SO 


(1:N) 


Cut L: 

0.000 


Fill L: 

0.000 


Cut R: 

0.000 


Fill R: 

0.000 


The fill/ cut value that are input here is a ratio. 


The fill/dig data can be entered through left and right slopes. In terms of fill/dig, use positive symbol to input 
the required slope, the software selects an appropriate slope in the list according to the actual position of 
the point.   

Summary of Contents for R2 PRO

Page 1: ...SETS 58 6 2MEASURINGANGLEOFFSETS 59 6 3TWO PRISMPOLE 61 6 4 HALINE 62 6 5INPUTHD 63 6 6CALCULATEACORNERPOINT 64 6 7COLUMN 65 6 8EXTENDTHESLOPEDISTANCE 66 7 KEY 68 7 12POINTREFLINE 68 7 2REFERENCEARC 6...

Page 2: ...bletheinstrumentbyyourselfevenif youfindtheinstrumentabnormal SAFETY GUIDE INTEGRATEDDISTANCEMETER VISIBLELASER Warning ThetotalstationisequippedwithanEDMofalasergrade of3R a Itisverifiedbythefollowin...

Page 3: ...cially beware of the surfaceofplanemirrorandconcavemirror Harmful distance means the maximum distance between the start point and the point which the laser is weakenedtoadegreethatdoesn tharmpeople Th...

Page 4: ...Screen 4 ObjectiveLens 12 ATMOSenseDetector 5 CarryingHandle 13 Keyboard 6 TelescopeFocusingRing 14 Tribrach 7 TelescopeEyepiece 15 CircularVial 8 VerticalClampScrew 16 PlateVial ACCESSORIES CarryingC...

Page 5: ...50 VA 273 13 45 SD PT 1 HT 1 000m BasicMeasurementMenu 1 3 KEYPAD 1 4 SOFT KEYS Key Function PWR PowerON OFF IlluminationON OFF MENU DisplaystheFunctionMenu MENU 1 Job 6 1Sec 2 Cogo 7 Adjust 3 Set 8 T...

Page 6: ...ntinuousanglemeasuring OrF1 F2anglemeasuring Ormaintainsthe horizontalangle DisplaystheStationSetupmenu Or inputsthenumber7 letterA B andC Displaysthestake outmenu Pressitfor1secondtodisplaythesetting...

Page 7: ...easuring AbbreviationList HA horizontalangle VA verticalangle SD slidedistance AZ azimuthangle HD horizontaldistance VD verticaldistance HL Horizontalangle left 360 HA V ratioofslope N Northcoordinate...

Page 8: ...t Inthewindowopenedasabove press orpress 1 2 3 4 5 correspondingtotheitems tochoosethesettingsforswitch Whenanitemisselected thefunctioncorrespondingtothekeycanbe launchedON OFFbypressingthecorrespond...

Page 9: ...yonthesameplumbline c Steponthetripodtomakesureifitiswellstationedontheground 2 Fixtheinstrumentonthetripod Place the instrument carefully on the tripod head and slide the instrument by loosening the...

Page 10: ...justthreelegscrewsoftheinstrumenttomakeopticalplummet collimatepreciselytothestationpoint 3 Usecircularvialtoroughlyleveltheinstrument Adjustlengthofthreelegsoftripod makethecircularvialbubbleoftheins...

Page 11: ...harging However do not leave the charger pluggedintothepowerafterrechargingiscompleted Be sure to recharge the battery at a temperature from 0 to 45 C Recharging may be abnormal beyond specifiedtemper...

Page 12: ...iece lens or focusisnotwelladjustedandaccuracywillbeinfluenced Youshouldadjusttheeyepiecetubecarefullyto eliminatetheparallax 2 7 INPUTTING MODE Allcharacterscanbeinputinthescreen Press todeleteonecha...

Page 13: ...000m CD RUIDE List Stac e After inputting press REC ENT to confirm 2 REC ENT 1 ThemaximumlengthofcharacterofpointIDorpointnumberis16 2 IfthepointIDiswrong press ESC andinputagain 2 7 2EditCharacters C...

Page 14: ...etic itisnamedbyadding1 Whenthe cursorisinthePTfield thereareseveralwaystospecifyapointorinputcoordinates Here takestation PtIDforexample 2 8 1EnteranExistingPoint STEP OPERATION DISPLAY a Input PtID...

Page 15: ...ocurrentproject InputCD REC ENT N 10 000m E 10 000m Z 10 000m PT AD2 CD RUIDE Return The cursor moves to next item Input STN ST AD2 1 HI 1 000m CD RUIDE List Sta 2 8 3SearchViaWildcard Wildcard canber...

Page 16: ...splayed on the screen N 10 000m E 10 000m Z 10 000m PT 2 CD d Press REC ENT to return This point is called up The cursor moves to next item Input STN ST 1 1 HI 1 000m CD RUIDE List Stac 2 8 4EnteraPoi...

Page 17: ...red toinput coordinate asshown on the right Input the coordinate and press REC ENT tomovethecursorto the code item Input the code press REC ENT tosaveandquit A N 10 000m E 10 000m Z 5 000m PT 1 CD RUI...

Page 18: ...ess REC ENT to move the cursor to the code item Input the code press REC ENT tosaveandquit A N 10 000m E 10 000m Z 5 000m PT 1 CD RUIDE B N E Z PT 2 CD RUI E e ReturntoPTinputtingscreen Movethe cursor...

Page 19: ...eassoftkey STEP OPERATION DISPLAY a Press Meas inPTinputtingscreen Meas Input P1 P1 1 P2 Meas List Stac b Anobservationscreenappears Press MSR1 MSR2 tostarta measurement Tochangetheheightof thetarget...

Page 20: ...xisintheXdirectionandXYdirections STEP OPERATION DISPLAY a Press 0 to enter to automatic compensationfunction 1 Tilt X X 0 21 50 Y Over X OFF b Tiltcompensationvalueisdisplayed Ifthevalueiswithin 5 it...

Page 21: ...HA 30 21 50 VA 273 13 45 SD PT 1 HT 1 000m b Takethemeasurementmodespecified on MSR1 forexample Press or tomovetotheitemthatneedsto bemodified andpress or to changetheoptions 1 MSR1 MSR2 for1 second M...

Page 22: ...T Keyincludestheinputtingfunctionoftargetheight temperature pressure targetselectionandnote Itisavailableonanyobservationscreen 3 3 1SettheHeightoftheTarget Tochangetheheightofthetarget HT ortemperatu...

Page 23: ...temperature value C IfthepressureunitismmHg 1hPa 0 75mmHg Whendisregardingatmospherecorrection setPPMvalueto0 StandardatmosphericconditionofTotalStationR2Series i e theatmosphericconditionthatthe atmo...

Page 24: ...ureandpressurevalue 3 3 3SelectTargetSet Atargetsetspecifiessettingsforthetargettype theprismconstant andheightoftarget Whenyouchangetheselectedtargetset allthethreesettingsarechanged Youcanusethisfun...

Page 25: ...A 273 13 45 SD PT 1 HT 1 000m 1 Type prism nonprism reflectorsheet Constant 999 999mm HT 9999 999 9999 999mm HT canbeleftblankinthetargetset inputthenumberbeyondthemaxinstrumentheight thecurrentHTvalu...

Page 26: ...ecenteroftargetprism press MSR1 or MSR2 MSR1 MSR2 Display 1 4 HA 30 21 50 VA 273 13 45 SD PT 1 HT 1 000m b Whiletheinstrumentistakinga measurement theprismconstantis displayedinasmallfont Display 1 4...

Page 27: ...cific Changingofanyitemwillcreate anewjoborshutoffalljobs ThemaximumcapacityofR2Serialisdefinedbythedatatype Upto10000 pointscanbecollectedat most 3 5ANGLE MEASUREMENT ToopentheAnglemenu press ANG int...

Page 28: ...0 00 00 VA 273 13 45 SD PT 1 HT 1 000m 3 5 2EntertheHorizontalAngle STEP OPERATION DISPLAY a InAngle menu press 2 to enter into the functionofhorizontalangleinputting 2 Angle HA 273 13 45 1 0SE 4 F1...

Page 29: ...ION DISPLAY a InAnglemenupress 3 toentertothe repeathorizontalanglemeasurement function 3 Angle HA 273 13 45 1 0SET 4 F1 F2 2 Input 5 Hold 3 Rept b SystemsetstheinitialvalueofHRas0 RePt N 00 HR 0 00 0...

Page 30: ...ght First sight thebacksightandthenpress ENT Sightthe Backsight ENT RePt N 03 HR 138 11 24 HR X 46 03 48 HA HOLD Sight BS Press ENT b Sight the foresight press MSR1 or MSR2 tostartsurveying Sightthe f...

Page 31: ...F1 F2 2 Sightthesame target ENT F1 F2 Obs dHA 0 00 00 dVA 15 40 00 dSD Abrt CP OK d If you are satisfied with the result press OK andotherwisepress Abrt Screen returnstoBMS OK or Abrt Display 1 4 HA 2...

Page 32: ...ad on the instrument The code is selected by entering a two digit number by pressing MSR1 the measurement is triggeredandthemeasureddataandcodesaved A total of 256 quick codes can be assigned Each cod...

Page 33: ...heresultandQuickCodearedisplayed If the quick code corresponding to the code doesn t exist in internal memory it willdisplay Codenoexist 1 CD 10 1 4 HA 20 00 00 VA 273 13 45 SD PT 1 HT 1 000m d Whilef...

Page 34: ...tion of using known point to set station 1 Stn Setup 1 Known 2 Rese 3 QuickStn 4 Z Coord 5 BS Check b Input point name and press ENT 1 Inputpointname ENT Input STN ST 1 A HI 0 000m CD List Stac c Inpu...

Page 35: ...1 Enter the point name andpress ENT 1 1 Enterpoint name Input BS PT BS A HI 0 000m CD List Stac b Therearetwoconditions measuringand notmeasuringthebacksightpoint Input BS PT BS 3 1 HI 0 000m CD Stac...

Page 36: ...2 Stn Setup 1 2 AZ 0 00 00 HD SD Use F2 Obs BS Press MSR ENT f Press DSP todisplayaQAscreen QualityAssessment TorecordaCPrecordwhichstoresthe averagedHA VA andSDfromthe F1 F2data pressthe CP softkey T...

Page 37: ...ce 2 screen would display Turn to F1 As show in the right graph Rotate the telescope and alidade and sight the BS pointinFace 1 Stn Setup 1 2 AZ 20 00 00 HD SD Obs BS MSR ENT F2 e Procedurerecordsthes...

Page 38: ...in the AZ field the azimuth is automaticallysetto0 00 00 Enterthe azimuthangleto theBSpoint Input Azimuth AZ f Sight the backsight point on F1 and press ENT The screen displays as the right graph Ent...

Page 39: ...artsautomaticallywhenenoughmeasurementsaretaken Youcandeletepoorobservationsandrecalculateifnecessary Iftheanglebetweenknownpoint1andknownpointisextremelyacuteorextremelyoblique theresulting solution...

Page 40: ...t MSR1 MSR2 RESE Sight 01 HA 30 21 50 HD SD Press MSR ENT F2 1 Turn to F1 g Themeasuringresultisdisplayed press ENT Tomeasurethebacksightpointon F2 press F2 softkey Rotatethe telescopeandalidade andsi...

Page 41: ...k Whentheinstrumenthasenoughdata itcalculatesthestation STN coordinates Asshownintherightgraph A Ifmorethan2pointsareavailable a standarddeviationscreenappears As shownintherightgraphB A RESE dHD 0 00...

Page 42: ...0 00 10 dVD 1 590m dHD 3 227m PT 1 HT 1 620m Add Del Dsp C RESE N 50 002m E 11 025m Z 0 199m Press ENT Next Add View Dsp Rec m Press ENT or Rec torecordthe stationwhentheresultsareOK as shownintherig...

Page 43: ...asured thenStn Zis calculatedusingangle onlymeasurementstoknownpointswith3Dcoordinates 4 3 QUICKSTATION Settingupthestationquicklywithoutcoordinates Thestationpoint ST inthisfunctiondefaultstoanewpoin...

Page 44: ...h To complete the station setup sight the BSandpress ENT ENT 1 AbouttheSplitSTsetting pleasereferto 11 3setting 2 Whenyoupress ENT intheAZfield bothHAandAZareresettothevalueyouhaveentered 4 4 HEIGHTTR...

Page 45: ...1 800m CD List Stac e Enter height of target prism and press ENT Enterheightof targetprism ENT Input PT PT 1 1 HI 1 800m CD List Stac f Sight the center of prism press MSR1 or MSR2 tostartsurvey If t...

Page 46: ...isplayed press OK toconfirm Toremeasure press Abrt OK or Abrt Stn Setup dHA 0 00 00 dVA 0 00 02 dSD 0 001m Press ENT Rec Abrt CP OK k Theupdatedstationcoordinatesare displayed theheightZisupdated You...

Page 47: ...httheBSpoint andpress Redo or ENT toresetthehorizontalangletothe HAsetinlaststationsetup Press Abrt or ESC tocancelthe processandreturntothebasic measurementscreen SighttheBS point Redo ENT BS Check H...

Page 48: ...out Otherwise the screendisplaysastherightgraph 8 Station not set 1 Continue 2 Stn Setup Press ESC Abrt b Press Continue to display ST HI and BS set in last operation Shown as the rightgraphA Press OK...

Page 49: ...Sightthetargetandpress MSR1 or MSR2 tostartmeasuring MSR1 MSR2 SO dHA 0 00 00 HD 1 000m Sight Press MSR OK g Whenthemeasurementiscompleted thedifferencesbetweenthetarget positionandthestakeoutpointar...

Page 50: ...treturnstothe observationscreen Youcancontinue observation orpress ESC toinput anotherangleanddistanceforstakeout HA HD HD 1 dVD HA 1 Ifyoupress ENT withoutenteringHA thecurrentHAisused 2 Onceameasure...

Page 51: ...ontaldistance measurementoftargetprism Press MSR1 or MSR2 for1secondto changethemeasuremode Press or movingtotheitem neededtorectify press or to change TGT Prism non prism reflectorsheet Const Enterth...

Page 52: ...current ori SS 788898 CO Temp 20 0 CO User current ori Del Edit Srch SO 6 8 dN 0 002m dE 0 001m dZ 0 001m Press ENT Rec Thispagedisplayscoordinatedeviation value press ENT torecorddata SO 7 8 rSD 0 0...

Page 53: ...To List Stac B Specify the point by code or radius from theinstrument AsshowningraphB C Specify a stakeout list by range input To input points by range press the Fr To softkey in the PTfield as shown...

Page 54: ...ror IN OUTIn Out Longitudinalerror CUT FILCut Fill PT 1 8 dHA 0 00 00 STP 0 000m IN 3 971m FIL 0 743m Press ENT Rec i Ask the rodman to adjust the target position When the target is on the intended po...

Page 55: ...theAddConstantfieldin MENU 3 Set 6 SO tospecifyanintegerthatisaddedtothepoint numberbeingstakedtogenerateanewnumberforrecordingthestakedpoint Forexample whenyoustakeoutPT3withanAddConstantof1000 thede...

Page 56: ...rthefirst stake fromtheinstrument appears Sighttheprismandpress MSR1 MSR2 Sightthefirst stakeoutpoint ENT PartLine 1 3 HD 0 667m L Out Prev Next e Whenthemeasurementiscompleted thedifferencesbetweenth...

Page 57: ...oucaninput codeifnecessary Press ENT torecord thepoint ENT N 10 000m E 10 000m Z 6 180m PT 221 CD List Stac j Afterrecordingthepoint thedisplay returnstotheSOscreen Press Prev Next or tostakeout other...

Page 58: ...edAZiscloseto0 00 00 Sight thetargetandpress MSR1 MSR2 dAZ Azimutherrortotargetpoint HD Distancetotargetpoint MSR1 MSR2 Ref Line 1 8 dAZ 23 41 23 HD 17 071m Sight Press MSR OK f Aftermeasuring thedevi...

Page 59: ...odtoinputPtID pleasereferto 2 8METHODTOINPUTPTID Allobservationresultsdisplayin8pages press or DSP toswitchbetweendisplayscreens Detailed introductionpleasereferto HA HDSO 5 5 GUIDE LIGHT OnlyAvailabl...

Page 60: ...ation Shown as the rightgraphA Press OK toconfirm Press STN to enter Stn Setup menu Select one method to set station Press Abrt toquittheprogram STN Check ST 1 1 HI 1 800m BS 2 Abrt OK c After the pro...

Page 61: ...P OPERATION DISPLAY a In Offset menu press 2 to enter angle offsetfunction 2 Offset 1 O S Dist 2 O S Ang 3 O S 2D 4 HA Line 5 Input HD b Ifyouhavenottakenadistance measurementbeforeenteringthis functi...

Page 62: ...ngleoffsetinthebasicmeasurementscreen STEP OPERATION DISPLAY a Inbasicmeasurementscreen press MSR1 or MSR2 MSR1 MSR2 Display 1 5 HA 1 21 50 VA 273 13 45 SD 2 309m PT 222 HT 1 000m b After taking a dis...

Page 63: ...4 VA 91 11 47 SD Sight Press MSR OK d Enterthedistancebetweenthesecond prismandthetargetpoint Alternatively ifyoudon tneedQAinformation you canleavethedistancebetweenthefirst andthesecondprismblank In...

Page 64: ...1 1 5 HA 15 42 13 VA 94 01 13 SD Sight Press MSR OK c Programentermeasuringthesecond pointautomatically Sightthesecond prismandpress MSR1 MSR2 Sightthesecond prism MSR1 MSR2 HA Line No 2 1 5 HA 83 19...

Page 65: ...NPUTHD Thisfunctionisusefulwhentheinstrumentisveryclosetothepointanditisdifficulttotakea measurementusingtheEDM STEP OPERATION DISPLAY a In Offset menupress 5 toentertoInput HDfunction 5 Offset 1 O S...

Page 66: ...tonthesamewall andpress MSR1 MSR2 Sightasecond point MSR1 MSR2 CornerPt No 2 1 5 HA 96 06 38 VA 56 36 52 SD Sight Press MSR OK d Sight the third point on the second wall andpress MSR1 MSR2 Sightthethi...

Page 67: ...on the surface of the columnandpress MSR1 MSR2 Sightanypoint onthesurfaceof thecolumn MSR1 MSR2 HA 47 42 13 VA 94 01 13 SD HT 1 000m Sight Press MSR HT OK c Press ENT Ifyouuseaprismattached to the sur...

Page 68: ...f Indialogbox iftheresultissatisfying press OK otherwisepress Redo OK or Redo N 29 369m E 25 566m Z 14 177m Rd 5 369m Redo OK g EnteraPT andCD valueandpress ENT Thetargetpointiscalculatedand recorded...

Page 69: ...13 VA 90 56 15 SD HT 1 000m Sight Press MSR HT OK c EntertheslopedistanceYoucan enteranyvaluefrom 99 99 through 99 99m Press ENT to recordthepoint Entertheslope distance Input dSD HA 47 25 14 VA 94 56...

Page 70: ...d point for the reference line InputP2 Input P2 P1 1 1 P2 Meas List Stac d Sight the target and press MSR1 or MSR2 tostartmeasurement MSR1 MSR2 2 Pt Ref L 1 5 STA O S dZ Sight Press MSR e Aftermeasuri...

Page 71: ...EFERENCEARC Measuringdistanceandoffsetvaluesonthearc curve STEP OPERATION DISPLAY a In Program menu press 2 to enter Ref Arcfunction 2 Program 1 2 Pt Ref L 2 Ref Arc 3 MlmRadial 4 Mlm Cont 5 REM b Ent...

Page 72: ...t Stac B Define Arc Rad 1 AZ2 Rad Counter cw Rad Clockwise C UseRad Lentodefinearc Input radial and arc length Similarly in the radius Rad field enter a positive value for a clockwise curve Enter a ne...

Page 73: ...m CD List Stac 1 AboutmethodtoinputPtID pleasereferto 2 8METHODTOINPUTPTID 2 P2canbeanypointonthetangentlinethatistoexitthecurve 3 Press or DSP toviewotherpages 7 3 REMOTE DISTANCE MEASUREMENT Thisfun...

Page 74: ...2 280m Sight Press MSR Press ENT Rec d Sightthe2nd pointpress MSR1 MSR 2 thedistancesbetween1st and2nd pointaredisplayed rSD Slopedistancebetweentwopoints rVD Verticaldistancebetweentwo points rHD Hor...

Page 75: ...aredisplayed Sightthethird point MSR1 MSR2 MlmRadial 1 2 rSD 2 287m rVD 0 174m rHD 2 280m Sight Press MSR Press ENT Rec g Press ENT torecordthedistances betweenthefirstandsecondpoint RepeatStepdandeto...

Page 76: ...401m Sight Press MSR Press ENT Rec e Press or todisplaynextpage rAZ Azimuth from first point to second point rV Percentageofgrade rGD Verticalgrade rHD rVD Thesecondpage MlmRadial 1 2 rAZ 77 51 02 rV...

Page 77: ...7 4 REMOTE ELEVATION MEASUREMENT REM 1 TargetPoint 2 Vh 3 SlopeDistance 4 BasePoint STEP OPERATION DISPLAY a In Program press 5 to enter REM function 5 Program 1 2 Pt Ref L 2 Ref Arc 3 MlmRadial 4 Mlm...

Page 78: ...0m Vh 3 572m Press ENT update HT f Youcanpress ENT toupdatetheheight oftarget ENT REM HT 1 977m Vh 0 000m Press ENT update HT 7 5 2 PT REFERENCE PLANE V PLANE Measuringdistanceandoffsetvaluesonthevert...

Page 79: ...3 STA 3 815m dZ 0 153m STA is P1 P2 line to P1 dist 2 3 V Plane 2 3 N 0 711m E 3 860m Z 0 516m INT of collimator and plane is XYZ Press to display other pages As shownintherightgraph V Plane 3 3 HA 7...

Page 80: ...1 V Plane 2 S Plane 3 Roads b Inputthefirstpointtodefinetheslope plane InputP1 InputP1 P1 1 P2 P3 Meas L st Stac c Inputthesecondpoint InputP2 InputP2 P1 1 1 P2 P3 Meas List Stac d Inputthethirdpoint...

Page 81: ...is XYZ 3 3 S Plane 3 3 HA 78 45 19 VA 167 30 26 Press ENT Rec f To record the point press ENT on any screen InputPTandCDandthenpress ENT in the dialog box shown as the rightgraph ENT HA 78 45 19 VA 16...

Page 82: ...ate of start point Enter these details andpress ENT todisplaythemainlineinputtingscreen Define HZ AL CH 1 000 AZ 78 45 19 Str Arc Trns Pt Thescreendisplays currentchainage theazimuthangleofthetangento...

Page 83: ...NT tomovetothenextitem Inputchainage ofstartpoint N Ecoordinates ENT Start Pt 01 CH 0 000 N 0 000m E 0 000m e The display enters to the Define HZ alignmentmainmenu Define HZ AL 01 CH 1 000 AZ 78 45 19...

Page 84: ...e the new azimuth angle can be input manually Define HZ AL 02 CH 11 000 AZ 25 00 00 Str Arc Trns Pt Arc Press ARC in Define HZAL menu to define the arc Acurve consists of arc length and radius The rul...

Page 85: ...eissameastheruleofradiusvalue Similarly thearclengthcan tbenegative STEP OPERATION DISPLAY a In Define HZ AL screen press Trns to enterintodefiningtransitionscreen Trns Define HZ AL 01 CH 1 000 AZ 0 0...

Page 86: ...userinputA1 A2fromaccordingtothelengthsL1 L2ofspiral thefollowingformulasare usedto calculateA1andA2 A1 L1 Radius A2 L2 Radius STEP OPERATION DISPLAY a In Define HZ AL screen press Pt to entertodefini...

Page 87: ...o record the edited data and enter to the inputting screen of next point To quit without saving data press ESC STEP OPERATION DISPLAY a InHZAlignmentselect EditHZAL 2 HZ Alignment 1 Define HZ AL 2 Edi...

Page 88: ...lect options of each item After finishing setting press ENT Comm Receive HZ AL Abrt Comm Strt Press Comm Comm Baud 1200 Data L 8 Parity None Stop 1 c Aftersetting press Strt toreceive Strt Receive HZ...

Page 89: ...L 3 Receive HZ AL 4 Delete HZ AL 7 7 5DefineVerticalAlignment Averticalalignmentconsistsofaseriesofintersections includingachainage heightandcurvelength The lengthofstartpointandendpointmustbezero Cha...

Page 90: ...ayreturnstoDefineVTALscreento continueinputtingthenextalignment Define VT AL 01 CH 0 000 ELEV 0 000m Len 0 000m 7 7 6EditVerticalAlignmentData It is able to be applied to edit vertical alignment data...

Page 91: ...erticalalignmentdataininternalmemorycanbedeleted Operationisshownbelow STEP OPERATION DISPLAY a InVTAlignmentselect DeleteVTAL 4 VT Alignment 1 Define VT AL 2 Edit VT AL 3 Receive VT AL 4 Delete VT AL...

Page 92: ...CH Input STN ST 1 HI 1 000m CD CH List Stac c Input the chainage and press ENT Make sure the input chainage is on the designed horizontal alignment Press PT toentertosettingupstationbypoint function...

Page 93: ...mputedigand fill The methodtodefineissimilartothatofhorizontalalignment Rulesofalignmentstake outdata Offsetleft Horizontaldistancebetweentheleftchainageandcentralline right Horizontaldistancebetweent...

Page 94: ...eethe introductiontoStake OutMainMenu behind Hereshowsthestake outdataofcentral lineofstartchainage CH 1 000 O S 0 000m dVD 0 000m Press MENU Slope SO LOFS ROFS CHG CHG d Steps Stakeoutpointsonthecent...

Page 95: ...nhorizontalangleto thetargetpoint R L Right Left Lateralerror IN OUT In Out Longitudinalerror CUT FIL Cut Fill Stake out Roads 1 8 dHA 0 00 00 STP 0 000m IN 13 971m FIL 0 743m Press ENT Rec i Ask the...

Page 96: ...ay the offset and the height differenceoftherightchainage CHG Thekeyisusedtoincreasethechainage CHG Thekeyisusedtoincreasethechainage 7 7 10SlopeStake out SlopeStakeOut can be launchedas part of theAl...

Page 97: ...stakedout Press MENU tostart MENU CH 1 000 O S 0 000m dVD 0 000m Press MENU Slope SO LOFS ROFS CHG CHG b Inputtheratioofleftandrightslopestobe filled or digged After finishing inputting oneitem press...

Page 98: ...t Press MSR e The method to stake out slope is similar to that of point stake out When both second line and third line are zero it indicatesthatthestake outpointisfound Slope SO R 12 667m Out 9 212m H...

Page 99: ...rs InputCod A CD List Stac c 1 A Input the CD manually The input code will be entered into Stac in chronologicalorder B Select code from List window to input To add delete oredit code in the List plea...

Page 100: ...oBMS ENT Display 1 5 HA 30 21 50 VA 273 13 45 SD PT 1 HT 1 000m e Press Rec Ent toseeifthedefault codeisthesettingyoujustdo Rec Pt PT 26 A HT 1 000m CD RUIDE List Stac 1 AboutmethodtoinputCode pleaser...

Page 101: ...Line etc thedatainthecurrentjobisdisplayed Hold DAT foronesecondinthebasicmeasurementscreenoranobservationscreentodisplaytheData Typescreen Throughthisscreenyoucanchangethetypeofdatathatisassignedto D...

Page 102: ...21 50 VA 273 13 45 SD PT 1 HT 1 000m b Press tohighlightthefunction andthenpress ENT 1 2 If an item on the list has an arrow beside and if you select this item the whole menu is assigned to the USR k...

Page 103: ...17 01 26 New Del Ctrl Info c Selecttheitemby andthen press Ent toopenthejob 2 JobMgr RUIDE 17 01 20 MQ 17 01 25 R2 1207 17 01 25 SURVEY 17 01 26 New Del Ctrl Info d Programsetstheitemascurrentitem an...

Page 104: ...se job set Abrt Set OK 1 Within8characters 2 Ifitisnotnecessarytochangelastsetting thecurrentsettingwillpasstothenewjobwhilepressing Enter or OK tocreateanewjob JobSettings Thefollowing12settingsarese...

Page 105: ...etethejob To cancelthedeleteoperation press ESC or Abrt andreturntotheprevious screen ENT or OK JobMgr RUIDE 17 01 20 MQ 17 01 25 SURVEY 17 01 26 New Del Ctrl Info 11 1 4SettheControlJob Ifyousearchfo...

Page 106: ...ntroljobselected highlightthecurrentcontroljobinthejob listandpressthe Ctrl softkey Ctrl Job OFF A Job R2 1207 Close Ctrl job Abrt OK 11 1 5DisplayJobInformation STEP OPERATION DISPLAY a Highlight the...

Page 107: ...1 Sec 2 Cogo 7 Adjust 3 Set 8 Time 4 Data 9 Format 5 Comm 10 Info b DisplaytheCogomenu COGO 1 Inverse 2 AZ Dist 3 Area 4 LineOff 5 InputXYZ c Press 1 enteringPT PTmenu 1 Inverse 1 PT PT 2 3PT Ang d S...

Page 108: ...N E Z ST 2 CD C N E Z This Pt not save D By pressing MSR as the D graph shows Press MSR1 or MSR2 to measure a point as the first point of the line E Press list tousethepointinthememory Toselectthepoin...

Page 109: ...xt To quit press End thescreenreturnstoInverse menu 1 Gd Grade HD VD V 100 Gd rSD SlopedistancePT1toPT2 11 2 1 23PTAngle The3ptanglecalculatestheanglebetweentwolinesdefinedbythreepoints PT1isthebasepo...

Page 110: ...s 3PT Angle 1 2 AZ 45 00 00 HD1 2 000m HD2 2 818m End Dsp Next Page2 3PT Angle 2 2 HD3 2 000m HD1 P1 P2 HD HD2 P1 P3 HD HD3 P2 P3 HD End Dsp Next f To continue 3 Pt Angle function press Next To quit p...

Page 111: ...ecording point screen with the calculated coordinates appears PT defaultstothelastrecordedPT 1 Input codeandpress ENT tostorethepoint N 3 879m E 2 684m Z 4 000m PT 2 CD List Stac 1 Toinput120 35 05 ty...

Page 112: ...D field the value 0 0000isused Input AZ HD dVD ENT Input AZ 1 AZ HD dVD e Whenyoupress ENT inthedVDfield anewpointiscalculated ThePTname defaultstothelastrecordedPT 1 Press ENT torecordthepoint N 3 87...

Page 113: ...from the previous bearing line This is a convenientwaytoenterStorepoints 11 2 3CalculateArea STEP OPERATION DISPLAY a In Cogo menu press numeric key 3 or use ENT to enter to Area calculatingfunction...

Page 114: ...helot 11 2 4LineandOffset Calculatecoordinatesfromlineandoffset STEP OPERATION DISPLAY a In Cogo menu press numeric key 4 or use ENT toenterintolineandoff function 4 COGO 1 Inverse 2 AZ Dist 3 Area 4...

Page 115: ...Z g Tocalculatethecoordinatesofthepoint press ENT inthedVDitem Youcan changetheZcoordinatehere N 1 826m E 2 719m Z 2 000m PT 10 CD h Torecordthepoint press ENT inthe CDfield Thecoordinatesarestoredas...

Page 116: ...ldtosavethepoint asmanuallyinputrecord Thedisplay returnstothepointinputscreen The defaultPTisincrementedtothenext value ENT N 10 000m E 10 000m Z 10 000m PT 10 CD List Stac 11 3 SETTINGS STEP OPERATI...

Page 117: ...gramwillaskwhether toselectorcreateajob Angle Job set to be changed Close current job Abrt OK f ThedisplayreturnstoSettingsmenu Settings 1 Angle 6 So 2 Dist 7 Unit 3 XYZ 8 Record 4 Power 9 Other 5 Com...

Page 118: ...rd StoreDB RAW XYZ RAW XYZ Thissettingdetermineswhetherrawand orcoordinatedataisstoredwhenyourecord SS CP orSOrecordsintheBasicMeasurementScreen BMS orStakeoutscreen RECData MEM COMM SetthisitemtoCOMt...

Page 119: ...RAW Data F1 10 F2 10 CP 9 V SS 5 Del Edit Srch d To see detailed information for the selected records press ENT Press ESC to return to the record list 2 3 ENT HA 47 25 14 VA 94 56 15 SD 3 345m PT 5 H...

Page 120: ...ionis recordedas 0 0 0 11 4 1 2SORecords SO Stakeoutshots Theseareshotsrecordedinstakeoutfunctions Press DSP toswitchbetweenthe screens dN dE dZstorethedifferencebetweenthestakeoutshot sactualposition...

Page 121: ...ighlight the record that you want to delete Orindatascreenwhichappears afterpressing ENT Press Del Del RAW Data F1 10 F2 10 CP 9 V SS 5 Del Edit Srch Press ENT HA 47 25 14 VA 94 56 15 SD 3 345m PT 5 H...

Page 122: ...h Press ENT HA 47 25 14 VA 94 56 15 SD 3 345m PT 5 HT 1 000m Del Edit Dsp b Input the new data manually or select data from List or Stac and then press ENT Inputnewdata ENT PT HT CD Amend Press ENT Li...

Page 123: ...a point by name enter the name inthePTfieldandpress ENT twice B Youcanusethewildcard inPTorCD field forexample Input30 youcan find300 301 302 3000A 3010 etc C Tosearchbypointtype press to movetotheTyp...

Page 124: ...tamenupress 2 XYZData thencoordinatedataisdisplayedinalist withthenewestrecordatthe bottomofthescreen Use toscrollthroughtherecords Use tomoveupordownone page press ENT toseemoredetailedinformation Th...

Page 125: ...heformatofthedataisthesameasothercoordinaterecords 3 Allcoordinaterecordscontain N E Z PT and CD fields 11 4 6DeletCoordinateRecords STEP OPERATION DISPLAY a In XYZ Data screen use to highlight the re...

Page 126: ...new data manually and press ENT Inputnewdata ENT N 10 000m E 10 000m Z 10 000m PT 5 CD c After editing data press ENT in CD field the program displays as the right graph To rewrite the data press OK o...

Page 127: ...duse or tochangetheselectedpoint All MP UP CC RE A Search XYZ Type All PT 9 HT List Stac B Search XYZ Type All PT HT List Stac C Search XYZ Type All PT HT c Ifmorethanonepointmatchesthe searchcriteria...

Page 128: ...hen youpress ENT intheCDfield thepoint isstoredasanMPrecord Inputnewdata ENT N 10 000m E Z PT 6 CD c Afteryouhaverecordingapoint the nextpointinputscreenisshownwiththe updateddefaultYoucanrecordNE NEZ...

Page 129: ...4 11DeleteStationRecords WhenyoudeleteaSTrecord alltheobservationdatafromthestationisalsodeleted STEP OPERATION DISPLAY a In Stn Data list use to highlight therecord that you want to delete Or in data...

Page 130: ...pressing ENT Press Edit Edit Stn Data ST 10 ST 15 ST 16 ST 19 Del Edit Srch Press ENT ST 19 HI 1 600m BS 20 AZ 0 00 00 Press ENT View Del Edit Dsp b Programdisplaysastherightgraph Input the new data...

Page 131: ...ch Stn Type ST PT HT List Stac A Search Stn Type ST PT 9 HT List Stac B Search Stn Type ST PT HT List Stac c Ifmorethanonepointmatchesthe searchcriteria thematchingpointsare displayedinalist Use or v...

Page 132: ...es 11 4 14 1DeletePoints Codes STEP OPERATION DISPLAY a In Data menu press numeric key 4 to openPTlist 4 View Edit 1 Raw Data 2 XYZ Data 3 ST SS SO CP 4 PT List 5 Cod List b Thepointlistisshown Use3so...

Page 133: ...NT InputPT Code ENT Edit PT Max 16 char c Aconfirmationscreenappears Press ENT or OK toacceptthe changesandupdatethelist Press CE tocancelediting ENT or OK Edit 1 RUIDE Rewrite CE OK STEP OPERATION DI...

Page 134: ...youcaninputthecodecontentinthisfield Forexampleifyouinput 12 in CD field andinput RUIDE in Rec itmeansyouinputRUIDEasacode withtheserialnumber12 InQuick Codefunctionyoucaninputserialnumber CD tocallup...

Page 135: ...onst item usenumerickeysto inputvalues Intheotheritems use tochangethesettings 1 Meas1 TGT Prism Const 30mm Mode Fine s Rec All e Aftersetting press ENT toreturnto1 Sec Keymenu ENT 1 Sec key 1 MSR Set...

Page 136: ...ERATION DISPLAY a In 1Sec Keymenu press 3 toenterto User setting 3 1 Sec key 1 MSR 2 Disp Appoint 3 User Function 4 SO USR Key 5 Data b There are two USR keys The function that is assigned to each key...

Page 137: ...ta 1 YoucanalsoaccesstheUsersettingsscreenbyholdingdown USR foronesecond 2 Theasterisk indicatesthefunctionthatiscurrentlyassignedtothekey 11 5 4 SO KeySettings STEP OPERATION DISPLAY a In 1Sec Keymen...

Page 138: ...use and then ENT toconfirm Press Data again thesetDatatypewilldisplay ENT Data type 1 Raw Data 2 XYZ Data 3 ST SS SO CP d The display returns to 1Sec Key menu 1 Sec key 1 MSR 2 Disp Set 3 User Data Ty...

Page 139: ...ememory withthejobsandjobsettingsunchanged DeleteAllJob Deleteallfilesinthememory Initialization Deletealldataandfiles andreturntoinitialsetting 11 8 INFORMATION Informationofinstrumenttype numberandv...

Page 140: ...movehalfoftheoffsetback 4 Rotatetheinstrument180 checkadjustmentresult 5 Repeatthestepsaboveuntiltheplateleveliscenteredinalldirections 12 2 CIRCULARVIAL Check No adjustment is required if the bubble...

Page 141: ...RITYBETWEENLINE OFSIGHTAND HORIZONTALAXIS 2C Check 1 Set objectAat about 100 meters away the same height as the instrument and make the vertical angle with 3 Thenlevelandcentertheinstrumentandturnonth...

Page 142: ...s set and returns to Adjustment menu automatically Adjustments 1 VO Adjustments 2 Collimation 3 Inst Constant 4 VADJ Set B OpticsAdjustment professionalmaintenancemanonly 1 Use the tangent screw to ad...

Page 143: ...again meaningthattheverticalindexdifferencecompensationfunctionisworking Adjust Ifthecompensationfunctionisnotworking sendtheinstrumentbacktothefactoryforrepair 12 6ADJUSTMENTOFVERTICALINDEX DIFFERENC...

Page 144: ...itepaperwithtwocrisscrosslinesonitrightbelow theinstrument 2 Adjust thefocusofthe opticalplummet andmovethepaperso that the intersection point ofthelineson thepapercomestothecenterofthefieldofview 3 A...

Page 145: ...ettheinstrumentonPointBandcenteritaccurately measuretheHorizontalDistanceofBCaccurately 4 ThentheInstrumentConstantcanbeobtained K AC AB BC Kshouldbenearto0 If K 5mm theinstrumentshouldbestrictlyinspe...

Page 146: ...chelectriccollimationandmake thelightpathofEDMunblocked Inthebrightzonefindthecenterofemittingphotoelectricaxis 4 Check the center of reticle to coincide with the center of emitting photoelectric axis...

Page 147: ...x theHorizontalClampScrew Rotatethetelescopeupwardto make Dnear thehorizontal hair Flex theprismpoleLeg e tomaketheDinthecenterofreticle ThenbothPointCandDareonthecentralline ofreticle Settheinstrumen...

Page 148: ...3s Normal 0 2s MeteorologicCorrection AutoSensing PrismConstant ManualInput ANGLEMEASUREMENT Method AbsoluteEncoding DetectingSystem H 2sides V 2sides Min Reading 1 5 Accuracy 2 DiameterofCircle 79mm...

Page 149: ...TORAGE INTERFACE InternalMemory 10 000pointsor 20 000coordinates DataInterface R232 SDCard Mini USB GENERAL LaserClass EDM ClassIIIA Laser Plummet ClassII WorkingTemperature 20 C 50 C BatteryType Rech...

Page 150: ...ngfiles SystemError006 Errorindeletingfiles SystemError007 Errorinangleboard Changeanewboard SystemError034 UpperverticalCCDerror 1 Change a good angle board to checkwhetheritworks 2 Ifno changethisCC...

Page 151: ...Projectioncorrection OFF Projectioncorrection CO C Rcorrection ON C Rcorrection CO TiltCorrection OFF Tiltcorrection CO RTS JOB Created2007 03 0222 37 25 JOBcreatingtime MP 1 10 000 10 000 1 000 VM MP...

Page 152: ...004 997 311 998 236 100 354 PT 3 CODE LIST The code list which is put in the code store should be guaranteed that every line has one code which includesserialnumberandcode andeverylineisendedbycarriag...

Page 153: ...STRAIGHT148 300 54 679 Example2 START1000 000 1050 000 1100 000 PT1750 000 1300 000 100 000 80 800 PT1400 000 1750 000 200 000 PT1800 000 2000 000 5 VERTICALCURVE Input vertical curve data from comput...

Page 154: ...plainedbelow AlignmentElement Parameter Straight Bearing Distance TransitionCurve Radius LengthofTransitionCurve Arc Radius LengthofArc PT N E radius A1 A2 Note WhendownloadingfromcomputerorselectingP...

Page 155: ...00 1100 000CRLF PT 1750 000 1300 000 100 000 80 000 80 000CRLF PT 1400 000 1750 000 200 000 0 000 0 000 CRLF PT 1800 000 1800 000 2000 000CRLF 2 CALCULATION ROADALIGNMENTELEMENTS 1 Calculationofthelen...

Page 156: ...0 E 7560 1320 42 3 32 0 32 0 32 0 32 0 7 5 3 0 0000025 0 00078019 0 10666667 0 64 6 777 Thisexampleissymmetryspiraltransition N1 N2 E1 E2 4 Calculationofshiftvalue R cos 1 R E R 18 cos 1 100 777 6 R 2...

Page 157: ...82 468 cos74 03 16 6 1249 872m EKA1 1750 182 468 sin74 03 16 6 1574 553m 8 CalculationofArcLength 2 1 LA R L R 111 55 47 2 18 20 06 100 75 15 35 180 131 353m 9 CalculationofthecoordinateKA2 2 2 1 2 co...

Page 158: ...P BC 2 2 sin TL E E IP BC 3 2 cos TL N N IP EC 3 2 sin TL E E IP EC Here 2 BearingfromIP1toIP2 322 07 30 1 3 BearingfromIP2toEP 57 59 40 6 NBC 1750 221 615 cos322 07 30 1 1575 068m EBC 1400 221 615 si...

Page 159: ...e betweenBPandKA1 Bearing 74 03 16 6 Distance 545 543m Transitionclothoid betweenKA1andKE1 Radius 100m signisturnleftcurvetowardtheendpoint Length 64m ARC betweenKE1andKE2 Radius 100m signisturnleftcu...

Reviews: