


4. Setting the Printer Driver
45
The procedure for registering the screen frame
size is indicated below.
1
In the [Devices and Printers] dialog box,
double-click the [RISO GOCCOPRO
QS2536] icon.
2
In the [RISO GOCCOPRO QS2536] dialog
box, click [Printer], and select [Properties].
3
In the [RISO GOCCOPRO QS2536
Properties] dialog box, click [Frame size
entry] on the [Environment] tab.
4
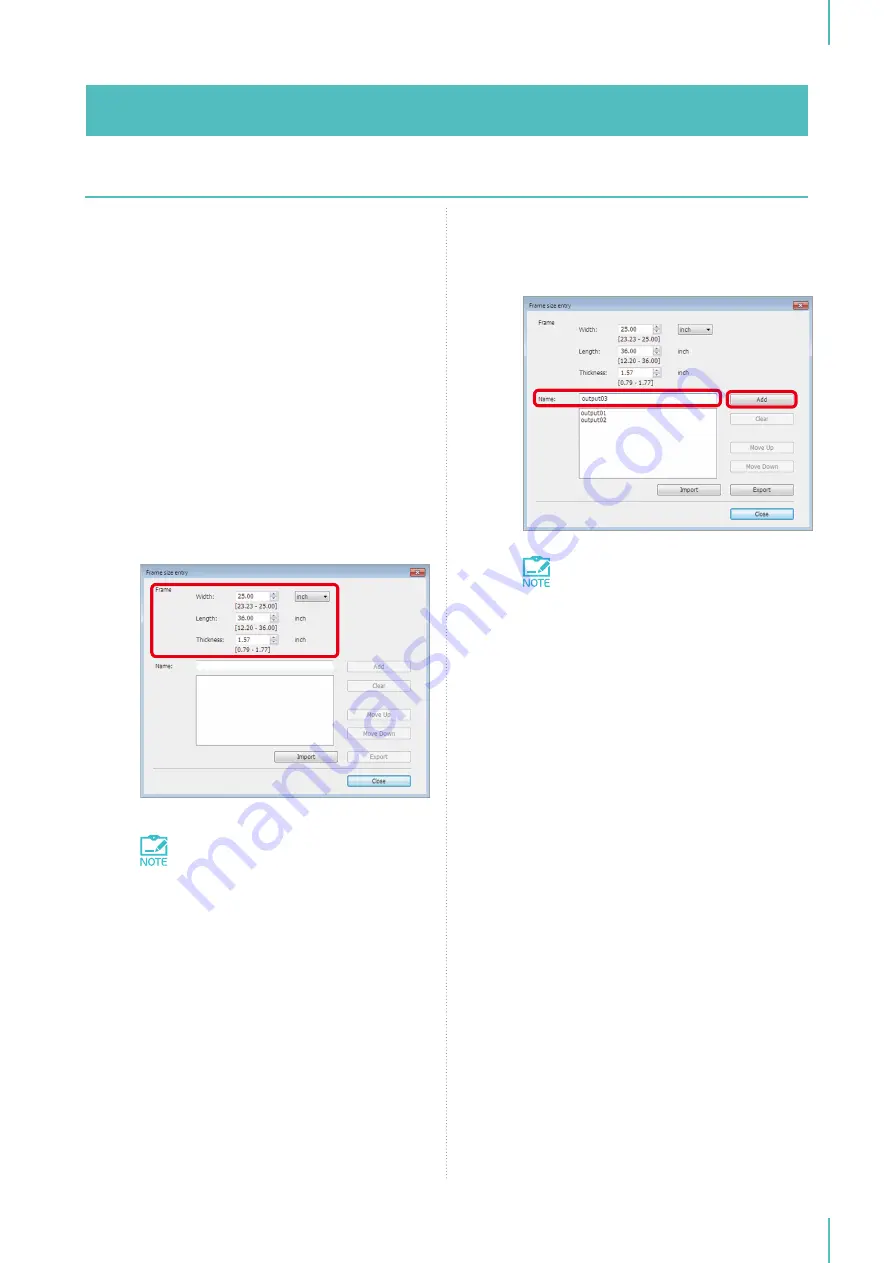
In the [Frame size entry] dialog box, set
the screen frame size.
Configure the settings according to the
screen frame to use.
The unit of measurement can be
switched. Enter the value in incre-
ments of 1 mm (0.01").
5
Register a name for the screen frame size.
Enter a name, and click [Add].
The registered name is shown in the list.
y
To erase a registered screen frame
size, select the screen frame size
and click [Clear].
y
To change the order in which a
registered screen frame size is dis-
played, select the screen frame size
and click [Move Up] or [Move Down].
6
When the settings have been made, click
[Close].
7
In the [RISO GOCCOPRO QS2536
Properties] dialog box, click [OK] on the
[Environment] tab.
Summary of Contents for GOCCOPRO QS2536
Page 1: ......
Page 2: ......
Page 12: ...10...
Page 22: ...MEMO...
Page 58: ...MEMO...
Page 65: ...63 Cleaning the Machine 64 Thermal Print Head 64 Main Unit Exterior 65 6 Maintenance...
Page 68: ...MEMO...
Page 82: ...MEMO...
Page 85: ...83...
Page 99: ...97...
Page 113: ...111...
Page 127: ......
Page 128: ......


