background image

82

Calibration

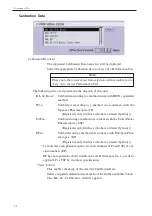
The Calibration Result

The actual calibration parameters will be displayed.

Click on the “Show” button and select “Show Management Information” to display man-

agement information.

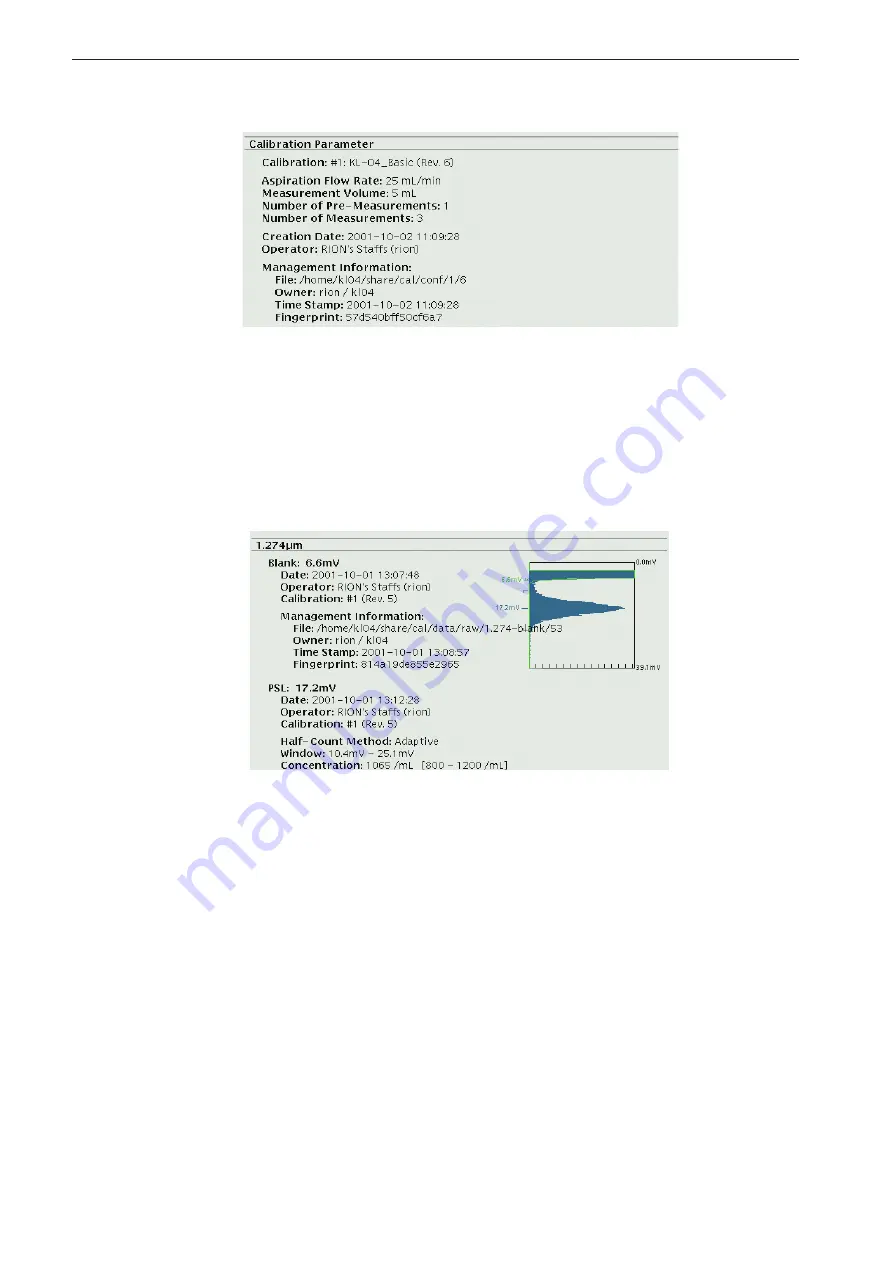
The calibration result for an individual particle size

The Blank Measurement, and the Calibration result for each calibrated particle size, will 

be displayed with a graph.

Click on the “Show” button and select “Show Management Information” to display the 

management information.

Summary of Contents for KL-04

Page 1: ...3 20 41 Higashimotomachi Kokubunji Tokyo 185 8533 Japan http www rion co jp english INSTRUCTION MANUAL LIGHT OBSCURATION PARTICLE COUNTER KL 04...

Page 2: ......

Page 3: ...s of the unit Controls and Features Briefly identifies and explains the buttons lamps connectors and all other parts of the unit on the front left side and rear panel Preparation Describes how to conn...

Page 4: ...how to use the virtual keyboard and how to take a snapshot of the screen Audit Trail Describes the audit trail function Maintenance Describes the inspection and maintenance of the unit and how to chan...

Page 5: ...y understood and observed Caution WARNING Important Disregarding instructions printed here incurs the risk of death or se vere injury to persons Disregarding instructions printed here incurs the risk...

Page 6: ...iv...

Page 7: ...containing such fluid Liquid with a temperature of less than 15 C or more than 30 C When using different types of sample fluid where mixing can lead to reactions such as thermal build up hardening or...

Page 8: ...from the system and come into contact with body parts clothing etc When attaching or detaching tubes connectors etc always use appropriate protec tive tools and wear dual layer gloves Double check al...

Page 9: ...particle detector mechanism uses a laser but it is fully shielded so that the beam cannot exit from the enclosure The identification label shown at right is affixed to the rear of the unit Caution us...

Page 10: ...viii...

Page 11: ...wer with minimum excessive electrical noise or voltage fluctuation which meets the conditions in the specifications Excessive electrical noise voltage fluctuation or external noise can cause the unit...

Page 12: ...x...

Page 13: ...and Mouse 14 Connecting Power Cord 15 Connecting the Printer Local Printer 16 Connecting to a Network LAN Cable 17 Connecting the External Display 18 Electromagnetic Stirrer Option 19 Controls and fe...

Page 14: ...ent Parameter Setting 53 Change Measurement Parameters 55 Measurement Parameters 56 Performance Test 63 Performance Test Sequence 63 The Performance Test Result 66 Performance Test Parameter Setting 6...

Page 15: ...Changed 130 Maintenance 131 Syringe Replacement 131 Handling the Syringe 135 Cleaning main unit 135 Noise Level Check and Flow Cell Cleaning 136 Cleaning Using a Cell Cleaning Brush 138 Periodic Main...

Page 16: ...xiv...

Page 17: ...g to other flow control systems Able to set 20 channels of measurable particle size range Built in hard disk can save several years of measurement data Built in tape drive enables backups and restorat...

Page 18: ...nt is shown on the chart below In the chart when the quality control method is a basic measurement the unit is calibrated based on the method decided by RION Co Ltd upon shipment The data used there i...

Page 19: ...ted to judge if the condition of the unit is appropriate However it is possible to confirm the condition of the unit by setting up a Performance Test parameter with a name dif ferent from the formal P...

Page 20: ...ge 110 Start Up Refer to page 32 Login Refer to page 34 Calibration Refer to page 77 Logout Refer to page 39 Do you want to check the performance of the unit before starting a measurement Measurements...

Page 21: ...ife between individual diodes Some may fail already after several thousand operation hours Particle Size Detection The unit is calibrated at the factory using particles of known diameter and refractiv...

Page 22: ...ore measurement data using a tape cartridge Locking screw 2 Fixes the position of the sample stand Useful to set a large sample container Sample stand To hold the sample container at adjustable height...

Page 23: ...it during draining Syringe A pump which draws up and discharges sample fluids Provision for accurate capac ity precision and measurement flow rate is provided through controlling the speed of the plun...

Page 24: ...board provided LCD switch Turns the backlight of the built in liquid crystal display ON or OFF DISPLAY connector Connects to a display Connects to the built in display when shipped from factory ETHERN...

Page 25: ...9 Preparation Installing the Sample Container Plate Push the sample container plate into the sample stand to secure as per the diagram be low Sample container plate Sample stand...

Page 26: ...urning the end plug counter clockwise 2 Loosen the nut of the sampling tube by turning it counterclockwise and remove the plug from the sampling tube Important Store the end plug and plug together in...

Page 27: ...mpling tube Slide the tip of the sampling tube onto the INLET connector and turn the nut clockwise to secure it Important Please do not over tighten the nut The INLET can be dam aged if the nut is ove...

Page 28: ...eed to be mounted according to the following procedure 1 Open the syringe cover and insert the packing in the valve OUTLET Note The packing is provided in both the sampling tube set and the drain tube...

Page 29: ...htly fasten the connector to secure it Important Please do not over tighten the connector The valve can be damaged if the connector is over tightened 3 Push the drain tube into the tube guide to secur...

Page 30: ...vided to the MOUSE connector on the rear panel of the unit Important The keyboard and the mouse must be connected before turning on the power of the unit If the power is turned on before connecting th...

Page 31: ...NING To reduce risk of electrical shock connect the power cord to a grounded AC outlet Before connecting the power cord ensure that the AC outlet meets the conditions in the specifications and has min...

Page 32: ...up is completed when the unit is shipped from the factory Simply connecting to a printer allows printouts to be made A network printer can also be connected with the unit However an enquiry must be m...

Page 33: ...ion Connecting to a Network LAN Cable 1 Connect a LAN cable to the ETHERNET connector on the rear panel of the unit Note Make sure the ETHERNET connector correspondents to 10BASE T To network ETHERNET...

Page 34: ...ble of the built in display from the DISPLAY connector on the rear panel 2 Connect the cable of the external display to the DISPLAY connector on the rear panel 3 Turn the LCD switch OFF on the rear pa...

Page 35: ...netic stirrer Installed in the sample stand of the KL 04 Control cable The plug connects to the control cable connector on the controller with Controller Turns the power supply ON or OFF and adjusts t...

Page 36: ...How to install 1 Put the control cable downward through the hole of the sample stand and set the electromagnetic stirrer in the sample stand 2 Push the sample container plate down on the sample stand...

Page 37: ...er to the control cable connector of the controller Caution The controller must not come into contact with any fluid If the controller is in contact with fluid an electric shock as well as malfunction...

Page 38: ...ng of the fluid and damage to the sample con tainer Also the level of fluid in the sample container must be controlled to prevent it from overflowing when the stirring bar is revolving at high speed T...

Page 39: ...d bubbles can form in the sample fluid which can affect measurement results Also if the magnetic coupling between the electromagnetic stirrer and the stirring bar is not strong or fails the stirring b...

Page 40: ...the windows overlap each another and it may become con fusing to use It is convenient to divide and arrange the windows on separate screens The Virtual Desktop controls how windows are arranged on the...

Page 41: ...Virtual Desktop where the window is not displayed Click the arrow or the home button The left button click is described as click in this instruction manual Note The screen will be moved in the direct...

Page 42: ...windows without a header The window menu contains the following commands example Close Displays the window as an icon Full Size Maximizes the window size Move Moves the window by dragging to the new p...

Page 43: ...is closed when the pop up window is open the pop up window will also be closed The pop up window contains the following commands example Dismiss Closes the pop up window Move Moves the window by drag...

Page 44: ...ppears Also the window hiding the other window can be moved to the back to display the hidden part by selecting Back on the window menu Most windows can overlap in any order However some of the pop up...

Page 45: ...window does not have resize corners the size of the window cannot be changed Also some of the window sizes cannot be changed even though it has resize corners Selecting Window A window can be selecte...

Page 46: ...ration on windows can be refused by the unit depending on its operational condition In this case appropriate steps must be taken after confirming the operational condition Displaying a window as an ic...

Page 47: ...p windows have only a button with a label such as OK If so the pop up window can be closed by clicking the button If the pop up window does not have any buttons to close it click the right button on t...

Page 48: ...ance Login by selecting Failsafe from the menu which starts the unit in maintenance mode In general it is set to Default login from the moment the power is turned on If you have logged in using Failsa...

Page 49: ...required display language Note When the display language is changed a message appears to ask whether the selected language is to be set as default Click the Yes button to set the selected language fr...

Page 50: ...nd the password After the Firmware version number is displayed on the screen Virtual Desktop the KL 04 Controller window and the KL 04 Measurement window appear Virtual Desktop This refers to the inte...

Page 51: ...Start New Window window or Find Window on the front of the display hidden by overlapping Start New Window window Click to display KL 04 Start New Window window Please read the following page 36 for K...

Page 52: ...ndow from the Workspace which can be opened by clicking the right mouse button on the areas in which windows are not open Function Click each button on the KL 04 Start New Window window to open the fo...

Page 53: ...ion details See page 41 Set Clock button The KL 04 Set Clock window appears Click to set the clock See page 112 System Administration button The Administration Tasks window appears Click for network a...

Page 54: ...se the Lan guage menu on the login screen Please refer to Power ON page 32 for the setting Password Registration and Change To register or change a password follow the sequence below 1 Display the KL...

Page 55: ...ndow appears Click the OK button to close the window and repeat the sequence from No 4 Completion Logout Method 1 Click the Logout button on the KL 04 Controller window A logout confirmation pop up wi...

Page 56: ...out by all registered operators Measurement is therefore not included in the list of tasks for which access privileges can be set see page 45 Operator Registration No Operator icon is registered on th...

Page 57: ...t 8 Check the left hand side of the Operator Management from Permitted Manage ment Tasks For other task items check when required then set access authoriza tion accordingly Note See page 45 for the ta...

Page 58: ...appears 3 Click an operator name shown to the right of Operator An Operators list will be displayed Click Add New Operator from the list Note Right click on the operator name to change the display 4...

Page 59: ...on the KL 04 Start New Window window The KL 04 Operator Management window appears 3 Click an operator name shown to the right of Operator An Operators list appears Select an operator name from the li...

Page 60: ...letters figures The Full name together with the Login name will be displayed on the result screens of Calibration Performance Test or Measurement and the printouts The Login name is short with less th...

Page 61: ...er setting tasks Set Performance Test Parameter Permit the Performance Test Parameter setting tasks Set Calibration Parameter Permit the Calibration Parameter setting tasks Modify Measurement Descript...

Page 62: ...ent is permitted this is accessible Set Clock Permit authorization for the setting of the system clock System Administration This will permit network setting and printer setting tasks Audit Trail Perm...

Page 63: ...ery measurement is set the sample is drained after each measurement In the following sample operation example the total of Pre Suction Volume 2 mL plus the total measurement volume 5 mL 4 times 20 mL...

Page 64: ...e KL 04 Start New Window window display method 2 Click the Measurement button from the Usual Operations menu on the KL 04 Start New Window window The KL 04 Measurement window appears Note When the KL...

Page 65: ...ART button on the front of the unit 8 If the Blank Measurement exceeds the target value return to step 6 If it is less than the target value set out a measuring sample 9 Measure the sample For this ei...

Page 66: ...lick the Show button to display the menu and then click Show Differential Value from the menu to display it Management Information Click the Show button to display the menu and then click Show Managem...

Page 67: ...he Measurement Data Selector window appears 2 Select required measured data year and month from the Year Month list and the date from the Date list The selected Measurement Data appears on the KL 04 M...

Page 68: ...the Measurement Data Measurement Data List Select the Measurement Data to display Delete Data button Delete the selected Measurement Data Deletion of the Measurement Data may only be performed by the...

Page 69: ...ndow The KL 04 Measurement Parameter window appears 3 Click a Measurement Parameter name shown to the right of Measurement to show the Measurement Modes list Click on Add New Setting from the list Imp...

Page 70: ...hecks in the Measurement Parameter space Note See page 56 Measurement Parameter for the explanations of each Measurement Parameter 6 Click the Register button 7 When a separate Measurement Parameter i...

Page 71: ...play method 2 Click the Measurement Parameter button from View Set Operating Parameters menu on the KL 04 Start New Window window The KL 04 Measurement Parameter window appears 3 Click the Measurement...

Page 72: ...yringe Syringe Volume mL This is to set the volume of the syringe which is installed on this unit The allowable setting range is 5 to 25 mL 1 mL step The standard syringe volume is 25 mL Important Ple...

Page 73: ...L min step Tare Volume mL To purge the last sample or to stabilize the flow rate normally set a slightly higher volume than the dead volume approx 0 3 mL inside the sampling tube between the sample an...

Page 74: ...e Blank Measurement is a preliminary measurement in order to check sample s and the flow channel condition in situations such as immediately after purging or when purging a former sample Number of Mea...

Page 75: ...t Clear the numeric value in the KL 04 Measurement window at the measurement starting Note When this item is not checked the number when entered in the No filed on the KL 04 Measurement window increas...

Page 76: ...ted States Phar macopeia USP Standards Registered only for those who have ordered Option s EPxx For measurement in accordance with the European Pharma copeia EP Standards Registered only for those who...

Page 77: ...3 to 100 m 0 1 m step Set Upper Limit This is to set the permitted upper threshold of particle number Upper Limit particles Check to enable the setting of the Set Upper Limit The particle counts set...

Page 78: ...Edit Channel Setting window Note The Edit Channel Setting window setting is the same as the set ting on the Add New Channel window See the previous Add New Channel window for further details of the s...

Page 79: ...rated result on the unit as satisfactory after carrying out a maximum of four 4 types of Performance Test including an Option Please carry out the Performance Test regularly in order to check if the s...

Page 80: ...s the Show button on the KL 04 Performance Test win dow Select the required Perfor mance Test Parameter name from the displayed menu The KL 04 Performance Test Parameter window appears Please check th...

Page 81: ...repare the sample s then click a button for the required test item e g 10 350 m shown on the list After the test is completed the test results will be displayed to the right of the items Note The test...

Page 82: ...Result Management Information Click the Show button to display the menu and then click Show Management Informa tion from the menu to display it Performance Test Parameter Calibration Data Approval Re...

Page 83: ...ation Parameters menu on the KL 04 Start New Window window The KL 04 Performance Test Parameter window appears 3 Click the Performance Test Parameter name shown to the right of Performance Test then c...

Page 84: ...setting 1 An operator with access privileges to Set Performance Test Parameter must log in and then display the KL 04 Start New Window window Note See page 34 for the login method and see page 36 for...

Page 85: ...for the standard installation is 25 mL If set differently correct measurement may not be possible Measurement Aspiration Flow Rate mL min This refers to the Syringe suction velocity and is designed to...

Page 86: ...me cases when a sample inside a sampling tube is changed from stationary to suction condition particles previously stuck on the walls inside the flow channel will come off and subsequently the particl...

Page 87: ...0 to 10 times Number of Measurements times This refers to setting the Number of Measurements The allowable set ting range is between 1 to 100 times Drain After Every Measurement Drain a sample from th...

Page 88: ...Pharmacopeia JP Registered only for those who have ordered Option s USPxx Calibrated using a method in accordance with the United States Pharmacopeia USP Registered only for those who have ordered Op...

Page 89: ...t If the Effective Period for the set Calibrated Data has expired an error occurs during the measurement which disables the measurement PSL General PSL General List A window for the registered test pa...

Page 90: ...This sets the maximum number concentration of the count test sus pension The allowable setting range is 101 to 10000 particles mL 1 particle mL step Test Method This selects a test method Note JP will...

Page 91: ...e to delete Permissible Sensor Resolution Set the Permissible Sensor Resolution The allowable setting range is 1 to 50 1 step 100 Cumulative Count Threshold m Set 100 Cumulative Count Threshold The al...

Page 92: ...1 1 to 100 0 m 0 1 m step Minimum Concentration mL Set the minimum number concentration of the test suspension The allow able setting range is 100 to 9999 particles mL 1 particle mL step Maximum Conce...

Page 93: ...urement To enable measurement based on calibration data it is first necessary to carry out the Performance Test and to register the Performance Test data Note The Calibration Parameters such as JPxx r...

Page 94: ...follows 1 An operator with access privileges to Calibration must log in and then display the KL 04 Start New Window window Note See page 34 for the login method and see page 36 for the KL 04 Start Ne...

Page 95: ...er The KL 04 Calibration Parameter window will appear Check the details Upon completing the check press the Quit button to close the window 5 Select Calibrate from the list by pressing Operation Items...

Page 96: ...ank is a sample of pure water without any PSL particles measurement then click the Blank button displayed on the left hand side of the same row to select the particle size e g 10 350 m from the Calibr...

Page 97: ...ce from No 6 to No 8 for the number of calibrating particle sizes Upon completion of the calibration click the Register button to register the calibration result If the result is rejected this means t...

Page 98: ...Management Information to display man agement information The calibration result for an individual particle size The Blank Measurement and the Calibration result for each calibrated particle size wil...

Page 99: ...on Curve Click on the Show button and select Show Calibration Curve to display the calibra tion curve Management Information Click on the Show button and select Show Management Information to display...

Page 100: ...n method and see page 36 for the KL 04 Start New Window window display method 2 Click the Calibration button from the Usual Operations menu on the KL 04 Start New Window window The KL 04 Calibration w...

Page 101: ...n Param eters menu on the KL 04 Start New Window window The KL 04 Calibration Parameter window will appear 3 Click the calibrated Parameter name shown to the right of Calibration A Cali bration Modes...

Page 102: ...or with access privileges to Set Calibration Parameter must log in and then display the KL 04 Start New Window window Note See page 34 for the login method and see page 36 for the KL 04 Start New Wind...

Page 103: ...e space below Calibration Rev The latest Revision Number the number of changes will be dis played The selected setting details for the Revision will be displayed when a number is selected The number i...

Page 104: ...ate Take the sample s viscosity etc into consideration when setting it The allowable setting range is between 5 to 100 mL min 1 mL min step Tare Volume mL In cases when a sample is replaced or for the...

Page 105: ...ncluded in the calculation of the mean value The acceptable setting range is between 0 to 10 times Number of Measurements times Set the number of Measuring Repetitions The allowable setting range is b...

Page 106: ...enty 20 Click to display the Add New PSL window Average Diameter m This is to set the PSL size for the calibration particles to be added The allowable setting size range is between 1 000 to 150 000 m...

Page 107: ...on particles The Add New PSL window closes then a PSL size list is added to the PSL list Edit button Use this to change the particle sizes or Maximum Concentration set ting Select a required PSL size...

Page 108: ...ected to a network is available However please contact the system administrator to clarify the status as the particular environment may differ depending on the network See Settings for a Printer Conne...

Page 109: ...6 put a check mark in the Show Signature Section check box Click the Print button to start printing Note Right click to alter Paper Size and Destination The selected item changes with each click If a...

Page 110: ...w and then proceed with printing The error window will not appear the next time However the temporary error window will appear for each operator separately Printing from KL 04 Measurement window When...

Page 111: ...computer where the FTP client is installed Make the network connection either via a hub using straight cables or directly using a cross wired cable There are no special requirements regarding power o...

Page 112: ...Drain Flow Rate 100 mL min Tare Volume 0 1 mL Measurement Volume 10 mL Number of Pre Measurements 1 times Number of Measurements 3 times Drain After Every Measurement No Calculate Particles per Unit...

Page 113: ...1 times Number of Measurements 3 times Drain After Every Measurement No Flush Aspiration Flow Rate 100 mL min Drain Flow Rate 100 mL min Flush Volume 10 mL Repeat 1 times Calibration Data Calibration...

Page 114: ...L min Drain Flow Rate 100 mL min Tare Volume 0 1 mL Measurement Volume 5 mL Number of Pre Measurements 1 times Number of Measurements 3 times Drain After Every Measurement No Flush Aspiration Flow Rat...

Page 115: ...4 316 Channel 2 1 m 5 m 10 m 15 m 20 m 25 m 50 m Average 1 mL Judgement Cumu Diff Limit Result 0 0 0 0 0 0 0 0 3 PASS 0 0 0 0 0 1 0 1 1 2 1 1 25 PASS 11 9 10 7 70 6 58 7 Channel 2 1 m 5 m 10 m 15 m 20...

Page 116: ...ata Calibration Data 1 KL 04_Basic Rev 8 Aspiration Flow Rate 25 mL min Creation Date 2001 10 02 11 09 49 Operator RION s Staffs rion Management Information File home kl04 share cal data 1 8 Owner rio...

Page 117: ...Information File home kl04 share cal conf 1 6 Owner rion kl04 Time Stamp 2001 10 02 11 09 28 Fingerprint 1 274 m 17 2mV 6 6mV 0 0mV 39 1mV Blank 6 6mV Date 2001 10 01 13 07 48 Operator RION s Staffs r...

Page 118: ...rd Performance Test Calibration Set Measurement Parameter Set Performance Test Parameter Set Calibration Parameter Backup Restore Operator Management Change Other Operator s Password Set Clock System...

Page 119: ...host 2006 04 03 09 11 14 JST 9 0 root system power off 2006 04 03 09 48 44 JST 9 0 root system power on 2006 04 03 09 49 06 JST 9 0 test operator log in localhost 2006 04 03 09 51 03 JST 9 0 test oper...

Page 120: ...es on a floppy disk to enable the measured data to work on word processing software or spread sheet software 1 Insert a floppy disk into the front floppy disk drive 2 Select the List of Data from the...

Page 121: ...ed on the same day 6 Press the Floppy button to select Write Selected Data to Floppy Disk from the list of operations Once the export is completed a message appears Note File names will be automatical...

Page 122: ...LE Characters entered in the Sample of KL 04 Measurement window NUMBER Number s entered in the No of KL 04 Measurement window MEMO Letters input to Memo of KL 04 Measurement window MEASUREMENT Measure...

Page 123: ...B data cartridge from Imation Corporation Specify one of these models when purchasing tape cartridges Be sure to use a separate tape cartridge for each KL 04 unit If you restore backup data from a tap...

Page 124: ...ri ate backup file type All Operator s Files Check this for backups of various parameters or various data files When not checked only the measured data of the actual operator will be backed up System...

Page 125: ...verwrite Existing Files Select this when you do not want to overwrite a file with the same title on the main computer hard disk Note If the content of a measurement data file has changed after a backu...

Page 126: ...See page 34 for the login method and see page 36 for the KL 04 Start New Window window display method 2 Click the Set Clock button from the Management Tasks menu on the KL 04 Start New Window window...

Page 127: ...ending a logout 6 Click the Dismiss button to close the message 7 Log out then log in again Important After setting the clock you should quickly log out and then log in again Otherwise the audit trail...

Page 128: ...esignated space Offset hours Input the time difference between the setting region and the UTC Note At the time of shipment the Japanese Time Zone is set as JST with minus 9 hours for the offset Date I...

Page 129: ...leges to System Administration must log in and then display the KL 04 Start New Window window Note See page 34 for the login method and see page 36 for the KL 04 Start New Window window display method...

Page 130: ...on the back of the unit OFF After ensuring the power is fully OFF turn the POWER switch ON 5 Click on the Interfaces button to change this unit s previously registered ad dress 6 Select eth0 from the...

Page 131: ...etc hosts window appears 9 Input the IP address inputted in step 7 to the IP space and the host name inputted in step 4 to the Name space If required input a nickname to the Nicknames space then clic...

Page 132: ...r on a Network and its setting 1 An operator with access privileges to System Administration must log in and then display the KL 04 Start New Window window Note See page 34 for the login method and se...

Page 133: ...appears 6 Input a random printer name to Names name1 name2 space and a host name for the printer to be connected to the Remote Host space then input a Remote Queue name in the Remote Queue space Note...

Page 134: ...k the OK button 10 Select Network Configuration from the Administration Tasks window The Network Configurator window appears 11 Click the Hosts button then click the Add button The Edit etc hosts wind...

Page 135: ...e page 36 for the KL 04 Start New Window window display method 2 Click the Virtual Keyboard button from the Unsupported menu on the KL 04 Start New Window window The xvkbd Virtual Keyboard window appe...

Page 136: ...04 Start New Window window Note See page 34 for the login method and see page 36 for the KL 04 Start New Window window display method 2 Click the Screen Snapshot button from Unsupported menu on the K...

Page 137: ...the Save button The TkSnapshot Save window appears 7 Enter a name for the image file to Save as then select a file format from For mat then click the Save button Note See the next page for explanation...

Page 138: ...nt captured window images Click to show the TkSnapshot Print window Select or click on required items then click the Print button Snap Type To capture areas for taking images Window To capture only on...

Page 139: ...d Snap button To capture screen images View button To view a screen image captured immediately before The TkSnapshot Save Window Current Directory This is to input a screen image store location The in...

Page 140: ...ined according to the file name extension inputted in Save as When no extension is entered it will be stored as a XWD format Note When the file format specified in Format is different from the extensi...

Page 141: ...4 continuously records operation history data when who which operation These data can be displayed searched by time period operator class event and the display contents can be printed Access to this f...

Page 142: ...put file print target file name Log in operator log in localhost Log out operator log out localhost Power on system power on Power off system power off Add operator operator_mgr create newly created o...

Page 143: ...nd time zone Operator name Registered operator name Class Operation category Event Operation Note Changed item measurement data file name etc The recording format is as follows Example log in event No...

Page 144: ...ow 3 In the Audit Trail Select window select the display conditions using the time stamp fields Start Year Month Day and End Year Month Day and the buttons for Operator Class and Event Then click the...

Page 145: ...smiss button This is shown when there are more than 2 000 records that match the search con ditions Narrow down the search by specifying more restrictive conditions Close the window by clicking the Di...

Page 146: ...is carried out multiple times the audit trail information is also retained in multiple levels When an item with an asterisk is included the same recorded content will be shown in the audit trail multi...

Page 147: ...ion or when sample liquid is leaking while draining please replace the syringe 1 Click the FLUSH button to start the operation 2 When the plunger has drawn 15 to 20 mL open the syringe cover then stop...

Page 148: ...e lower side of the syringe with the other hand 6 While pressing the syringe lightly with one hand lower the syringe outer chamber by turning it left with the other hand The syringe will be removed fr...

Page 149: ...pin on the left hand side and the C shaped open area to the front 9 Insert the screw area of the new syringe into the syringe fixing hole on the valve While pressing the syringe lightly with one hand...

Page 150: ...the wall surface in which the syringe is to be fixed Once it is fixed tighten the screw while making sure that the pin is in the correct location Important Please do not over tighten This may cause da...

Page 151: ...of measuring sample or the measuring frequency A Cleaning by detergent or bleach 1 Immerse the syringe in diluted detergent or diluted bleach for approx 30 minutes 2 Clean it fully using pure water su...

Page 152: ...rst replace it with a suitable liquid which does not cause a reaction then replace that liquid with pure water 2 Run pure water over the unit to clean it 3 An operator with access privileges to Calibr...

Page 153: ...the factory option When the letters figures on the KL 04 Controller window change to black the cleaning is complete If the letters figures on the KL 04 Controller window remain orange repeat the clean...

Page 154: ...clean the flow cell using a cell cleaning brush follow the steps described below 1 Remove the sampling tube from the unit while the sample fluid system is still filled with pure water Important If a c...

Page 155: ...t with another cell cleaning brush If the cell cleaning brush is inserted with excessive force it may cause damage to the fluid system Please do not insert it by more than approximately 70 mm from the...

Page 156: ...ctive period If standardization Calibration Performance Test of units at each region is required from us please contact the supplier Transport Before returning the unit for maintenance or servicing pu...

Page 157: ...or a sample mixed with air bubbles or contamination or condensation has occurred on the particle detection flow cell area If this is encountered during measurement the Bad Sensing Condition warning me...

Page 158: ...erforming regular backups is important because the risk of mechanical failure of the hard disk increases It may therefore be advisable to replace the hard disk in some instances Please contact the sup...

Page 159: ...flow rate specified for measurement In such a case measurement cannot be carried out Change the setting so that the aspiration flow rate values for the Measurement Parameter and Performance Test Data...

Page 160: ...Tape on the KL 04 Backup Restore window see page 108 If this does not remove the problem cleaning may be required or the tape or tape drive may have developed a problem or may have reached the end of...

Page 161: ...ctive index 1 6 in pure water Minimum particle size 1 3 m Measurable particle size 1 3 to 100 m when using PSL particles in pure water Particle size division Selectable arbitrarily from 1 to 20 channe...

Page 162: ...USP Calibration Particle size calibration using the calibrated particles of 1 3 to 100 m which are traceable and NIST standard reference materials However our own specified method will be carried out...

Page 163: ...face to connect to a display Analogue RGB 15 pin high density D sub female type connector Resolution 640 480 pixels Scanning frequency vertical 60 Hz horizontal 31 5 kHz Connected to the built in disp...

Page 164: ...ard 1 Power cord 1 Tape cartridge 1 Cell cleaning brushes includes case 2 Screw M4 10 for mounting electromagnetic stirrer 1 Instruction manual 1 Instruction manual for Administrator 1 Liquid Borne Pa...

Page 165: ...149 Specifications Unit mm Dimensional Drawings Rear View 280 400 360 363 369 236 Top View Front View Left Side View Right Side View...

Page 166: ...No 31947 06 11 Printed in Japan...

Reviews: