background image

65

M

OR

E


ON

 P

HOT
O

GR

APH
Y

Pre-AF

If 

On

 is selected when 

Multi AF

 or 

Spot AF

 is selected for 

Focus

 (page 59), the camera will continue to focus even 

when the shutter-release button is not pressed halfway 
(the focus range, however, is narrower than for normal fo-
cus).  This may decrease the time needed to focus when a 
picture is taken, potentially improving shutter response.

 Cautions

• Pre-AF is not available when 

MF

Snap

, or 

 is selected for 

Fo-

cus

.

•  Using pre-AF increases the drain on the battery.

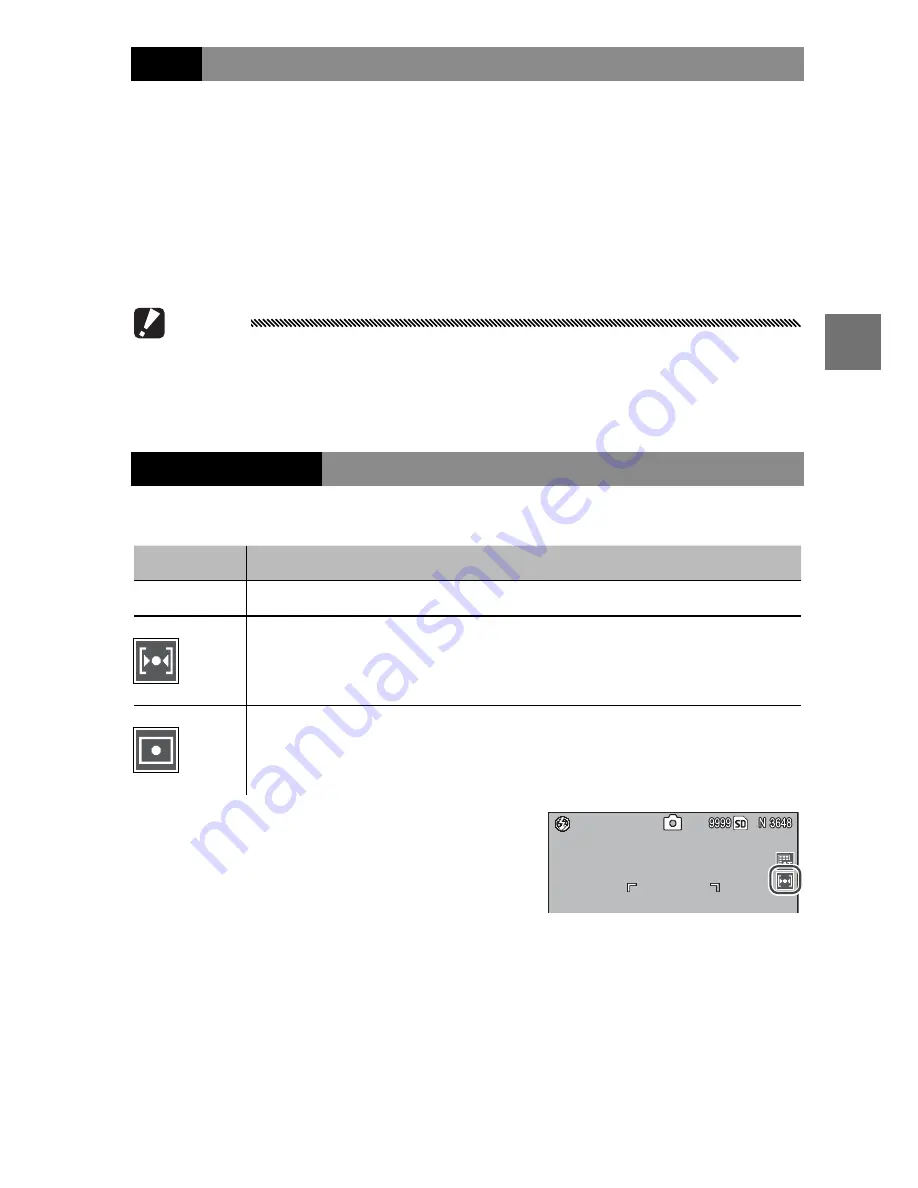
Exposure Metering

Choose how the camera measures exposure.

Option

Option

Description

Description

Multi

The camera meters exposure in 256 areas of the frame.

Center

The camera meters the entire frame but assigns the great-
est weight to the center.  Use when the subject in the cen-
ter of the frame is brighter or darker than the background.

Spot

The camera meters only the subject in the center of the 
frame, ensuring that it is correctly exposed even when it is 
markedly brighter or darker than the background.

Settings of 

Center

 and 

Spot

 are 

shown by an icon in the picture 
display.

Summary of Contents for gr digital III

Page 1: ...ying the camera for use taking photographs and playing them back pages 9 38 Reference Read this section for information on topics not covered in Basic Photography andPlayback It covers advanced shooting and playback options and describes how to print photographs customize camera settings and copy pictures to a computer pages 39 173 The rechargeable battery needs to be charged before use The batter...

Page 2: ... Connect the camera to a computer or printer DB 65 rechargeable battery BJ 6 battery charger Hot shoe cover The cover comes mountedonthecamera hot shoe A V cable Connect the camera to a TV CD Contains software and a Software User Guide Camera User Guide this manual SafetyPrecautions Hand strap Tip AttachingtheHandStrap Pass the small loop through the strap eyelet on the camera body and pass the la...

Page 3: ...d the other device Interference is particularly likely if the camera is used in close proximity to a radio or television This can be resolved by moving the camera as far as possible from the other device reorienting the radio or television antenna or plugging the radio or television into a differ ent outlet 2009 RICOH CO LTD All rights reserved This publication may not be reproduced in whole or in...

Page 4: ...is booklet this booklet This guide describes how to use your camera and install the supplied software The English version of the manual is also available in pdf format on the supplied CD SoftwareUserGuide SoftwareUserGuide pdf file pdf file The Software User Guide describes how to copy pictures from your camera to a computer for display and editing It is avail able in several languages each in its...

Page 5: ...ayback 9 9 Read this section before using your camera for the first time First Steps 10 Charging the Battery 10 Inserting the Battery 12 Inserting Memory Cards 13 Turning the Camera on and Off 14 Basic Setup 16 Taking Photographs 17 Holding the Camera 17 Taking a Photograph 18 Digital Zoom 22 Close ups Macro Mode 23 Flash Photography 24 The Self Timer 26 The Tilt Indicator 27 Viewing and Deleting ...

Page 6: ...vies 87 3 Recording Movies 87 3 Viewing Movies 90 More on Playback 91 The Playback Menu 91 Viewing Pictures on TV 104 Printing Photographs 106 Connecting the Camera 106 Printing 108 The Setup Menu 112 Key Custom Settings Setup Menu Options 114 Copying Pictures to a Computer 136 Windows 136 Macintosh 148 Technical Notes 150 Troubleshooting 150 Specifications 158 Optional Accessories 162 Using the C...

Page 7: ...1 F IRST TIME USER R EAD THIS 1 Before You Begin Read this section before using your camera for the first time Introduction 2 ...

Page 8: ...duct Parts of the Camera Parts of the Camera For more information refer to the page number to the right of each item Front 1 10 11 8 9 2 3 4 5 6 7 13 12 1 1 Up down dial 5 2 2 Mode dial 4 3 3 Shutter release button 17 18 19 4 4 POWER button 14 15 17 5 5 Hot shoe ii 164 6 6 Flash cover 24 7 7 Strap eyelet ii 8 8 Flash OPEN switch 24 9 9 Ring cap 163 10 10 Microphone 87 11 11 AF auxiliary light 26 1...

Page 9: ...1 32 122 7 7 9 thumbnail display button 22 31 32 122 8 8 F flash button 5 24 9 9 C D button 47 54 91 112 10 10 O DISP button 36 11 11 N macro button 5 23 12 12 Fn1 function 1 button 5 121 13 13 6 playback button 15 29 91 14 14 t self timer Fn2 function 2 D delete button 26 33 35 121 15 15 Connector cover 104 107 16 16 DC power cable cover 165 17 17 Speaker 27 90 125 126 18 18 Release lever 12 13 1...

Page 10: ... my settings Recall settings saved using Reg My Settings pages 53 114 116 A aperturepriority You choose an aperture and let the camera adjust the shutter speed for optimal ex posure page 42 4 scene Opti mize settings for the current subject or scene or shoot mov ies pages 46 52 S shutter priority You choose a shutter speed and let the camera adjust aper ture for optimal ex posure page 43 P program...

Page 11: ...hutter speed and aperture in P A S and M modes Up down dial ADJ lever You can assign frequently used shooting menu items to the ADJ lever for easy access To display a shooting menu item center the ADJ lever and press it in you can then use the lever and up down dial to select an option as de scribed on page 116 Note The M Mode Dial Options and Playback Mode Dial Options items in the setup menu can...

Page 12: ...0 Focus mode full press snap 59 64 11 11 White balance white balance compensation 79 82 12 12 Metering 65 13 13 Image setting 66 14 14 Bracketing 70 15 15 Histogram 37 38 16 16 Noise reduction 74 17 17 Date imprint 76 18 18 Battery level 8 19 19 Autoexposure lock 121 20 20 Self timer 26 21 21 Macro mode 23 22 22 Zoom 22 23 23 Depth of field 59 24 24 Focus bar 59 25 25 Interval timer shooting 75 26...

Page 13: ...7 Source 13 8 8 Picture quality 57 9 9 Picture size 57 10 10 Date of recording 16 11 11 Aperture 40 42 44 12 12 ISO 84 13 13 Exposure compensation 77 14 14 Shutter speed 40 43 44 15 15 Battery level 8 16 16 Length elapsed time 17 17 Progress indicator 18 18 White balance 79 19 19 White balance compensation 82 Notes The picture display may also display warnings and messages Additional information c...

Page 14: ...icator may not appear or may appear only briefly with NiMH bat teries Check the battery type before use Icon Icon Description Description green Battery fully charged green Battery partially dis charged orange Low battery Charge or replace as soon as pos sible may be displayed when the camera is powered by an AC adapter This is normal and does not indicate a malfunction ...

Page 15: ...9 F IRST TIME USER R EAD THIS 9 First Steps 10 Taking Photographs 17 Viewing and Deleting Photographs 29 Basic Photography and Playback Read this section before using your camera for the first time ...

Page 16: ...ry label up with the and labels ori ented to match the labels on the charger Caution Be sure the battery is in the correct orientation 2Plug the charger in The charger lamp will light while the battery charges An exhausted battery will re charge in about two hours at 25 C Note If the charger lamp blinks a battery or charger fault may have occurred Unplug the charger and remove the battery 3Remove ...

Page 17: ...e repeated after the camera has been turned off and then on again Cautions RechargeableLi ionbatteries Use only genuine DB 65 or DB 60 bat teries Do not use batteries not specifically designated by Ricoh for use in this camera Alkaline batteries Battery life varies with make and storage condi tions Capacity drops at low temperatures NiMH batteries NiMH batteries are not charged at purchase and gra...

Page 18: ... inserted 3Close the battery card cover Close q and latch w the cover Caution Be sure the cover is latched 1 2 RemovingtheBattery Unlatch and open the battery card cover then press and release the latch and remove the battery by hand being careful not to drop it Tip InsertingandRemovingAAABatteries Insert in the orientation shown press the cover closed and slide the release lever to the closed pos...

Page 19: ... inserted the card will be used instead Before inserting or removing a memory card be sure the camera is off To insert a memory card 1Open the battery card cover Unlatch q and open w the cover 1 2 2Insert the card Holding the memory card in the orientation shown slide it in until it clicks into place 3Close the battery card cover Close q and latch w the cover 1 2 RemovingMemoryCards Unlatch and op...

Page 20: ...the card only to prevent accidental loss of data and be sure to un lock the card before shooting Notes Format memory cards before first use or after they have been used in a computer or other device page 124 Be sure to back up any important data before formatting See page 161 for information on memory card capacity Pictures can be copied to memory cards from internal memory page 97 Turning the Cam...

Page 21: ... if the flash is on Changes to continuous page 68 interval page 75 and self timer page 26 settings are lost when the camera is turned off Turning the camera off restores settings for MY modes to the values saved with Reg My Settings Other settings are unaf fected Playback Mode Press the 6 button for about a second to turn the camera on in playback mode Press the 6 button again to exit to shooting ...

Page 22: ...uage Press or to high light a language and press C D to select 2Set the clock Press or to highlight the year month day hour minute or date format and press or to change Af ter checking that the date is correct press C D A confirmation dialog will be displayed press C D again to set the clock Default date and time Notes If you leave the battery in the camera for at least two hours the battery can b...

Page 23: ...urn the camera on and rotate the mode dial to 5 Holding the Camera Holding the Camera Hold the camera as shown below 1Hold the camera in both hands Hold the camera in both hands with your elbows light ly pressed against your body Caution Be sure your fingers or hair or the camera strap do not obstruct the lens or flash 2Get ready to shoot Put your finger on the shut ter release button ...

Page 24: ...us frame blinks red and the autofocus flash lamp blinks green If the camera is able to focus the focus frames up to nine that contain objects that are in fo cus are shown in green Autofocus flash lamp Focus frame 2Take the picture Gently press the shutter release button the rest of the way down to take the picture The photograph you have just taken will be displayed in the picture display as it is...

Page 25: ...unable to focus Blinks red Blinks green The camera may be unable to focus on the following Objects that lack contrast such as the sky a wall that is only one color or the hood of a car Flat objects containing only horizontal lines Fast moving objects Objects that are poorly lit Objects with bright reflections or backlighting Flickering objects such as fluorescent lights Point light sources such as...

Page 26: ... picture display Hold the camera steady and try focusing again or attempt one of the following remedies Turning the flash on or using auto flash see page 24 Choosing a higher ISO page 84 Using the self timer page 26 Notes If the flash will fire when the picture is taken a pre flash will be emitted to assist focus and exposure You can choose how long pictures are displayed in the picture display af...

Page 27: ... the picture dis play and press the shutter release button halfway to focus 2Recompose the photograph Keeping the shutter release button pressed halfway to lock focus recompose the photograph Final composition Main subject 3Take the picture Gently press the shutter release button the rest of the way down to take the picture Caution If the distance between the camera and subject changes while focus...

Page 28: ...icture using the 8 and 9 buttons The zoom ratio is shown in the picture display 3Focus Press the shutter release but ton halfway to focus 4Take the picture Gently press the shutter release button the rest of the way down to take the picture Notes If an option with a size of 3 648 2 736 is selected for Picture Quality Size Auto Resize can be selected for Digital Zoom Image page 133 Digital zoom is ...

Page 29: ... in the center of the picture display N will then appear at the top of the dis play 2Focus Frame the subject in the pic ture display and press the shutter release button half way to focus 3Take the picture Gently press the shutter re lease button the rest of the way down to take the picture To exit macro mode press the N button again Note If an option other than MF or Spot AF is selected for Focus...

Page 30: ...ts taken with the flash Flash On The flash fires with every shot Flash Synchro Combines the flash with slow shutter speeds Use when taking portraits that include details of the background indoors or at night Use of a tripod is recommended to prevent blur Manual Flash The flash fires with every shot flash output is fixed at the level selected for Manual Flash Amount page 73 Note The flash has a ran...

Page 31: ...stops blinking 3Focus and shoot If the flash is required it will emit a pre flash before each shot to help with focus and exposure Notes To close the flash when it is not in use gently press the center of the flash cover down until it latches The flash turns off automatically in dynamic range double shot movie continuous and bracketing modes The built in flash turns off automatically when an optio...

Page 32: ...ume it is assigned to the t button The self timer can only be used when assigned to a button page 119 1Choose a self timer mode Press the t button once to select the ten second timer and again to select the two second timer The current selection is displayed in the picture display Pressing the button a third time turns the timer off Note The selected self timer mode remains in effect until a new m...

Page 33: ...nge when the camera is tilted the amount and direction of rotation needed to bring it level is shown by the position of the indicator in the display the indicator turns red if the angle is too great to be shown The indicator turns green when the camera is level either in the normal shooting orientation or rotated 90 to shoot pictures in tall orien tation Tilt is not shown if the display is off ind...

Page 34: ...The tilt indicator is not displayed when the camera is upside down movies are being recorded or the interval timer is on Muting the camera speaker pages 125 126 also mutes the beep that sounds to indicate that the camera is level The tilt indicator is intended as a guide only and should not be used as a spirit level or in other applications in which a high de gree of precision is required Accuracy...

Page 35: ... last photograph viewed Tip IftheCameraIsOff If the camera is off press the 6 button for about a second to turn the camera on and start playback Press to view photographs in the order recorded to view in reverse order Press to skip ahead ten frames to go back ten frames Back one photo Back ten photos Ahead one photo Ahead ten photos Press the 6 button again to exit to shooting mode ...

Page 36: ...es Tip ViewingPicturesinShootingMode Photographs are displayed in the picture display immediately af ter shooting You can choose how long pictures are displayed us ing the LCD Confirmation Time option in the setup menu page 126 Tip ViewingthePicturesinInternalMemory If a memory card is inserted the pictures on the memory card will be displayed the pictures in internal memory can not be viewed even...

Page 37: ...ws can be used to select images for display or deletion Single frame 20 frames 81 frames In multi frame views press and to highlight photographs In 20 frame view press 8 or press the ADJ lever in to view the highlighted frame full frame In 81 frame view press 8 to return to 20 frame view or press the ADJ lever in to display the highlighted photo full frame ...

Page 38: ...If picture is displayed at maximum magnification pressing C D cancels zoom View other areas of the image ADJ lever Press left or right to view other images at same zoom ratio 9 Cancel zoom Notes Maximum magnification varies with image size Image size pixels Image size pixels Maximum magnification Maximum magnification 2 048 1 536 or larger 16 1 280 960 6 7 640 480 3 4 Playback zoom is not availabl...

Page 39: ...e cur rent image is not one you wish to delete press or to display the desired photo 3Highlight Delete One Press or to highlight Delete One 4Press C D A message is displayed during deletion The options shown above will then be displayed repeat Steps 2 and 3 to delete additional photographs or highlight Cancel and press C D to exit Deleting All Files To delete all files press the D but ton to displ...

Page 40: ... 2Select Sel Indiv or Sel Range To select images one at a time highlight Sel Indiv press C D and proceed to Step 3 To select one or more ranges consisting of two im ages and all photographs be tween them highlight Sel Range press C D and proceed to Step 3 1 To exit at any time without deleting files press DISP 3Select photographs Press or tohighlight photos and press C D to select Selected picture...

Page 41: ...is marked with a D icon If you selected the wrong image press DISP and try again 3 2 Press or to high light the last image and press C D to select The se lected image and other images in the selected range will be marked with D icons Repeat Steps 3 1 3 2 to select additional ranges or press the ADJ lever in to return to Step 3 and select or deselect indi vidual photographs 4Press D A confirmation ...

Page 42: ...ors Monitor off No indicators Tip TheFramingGrid See page 128 for information on choosing a framing grid The grid lines do not appear in the final photograph Notes If Display or Display Sound is selected for Level Setting a tilt indicator appears when indicators are displayed When the picture display is off pressing any of following turns the picture display on the ADJ lever the C D O DISP and 6 b...

Page 43: ...e highlights display mark washed out areas in which details may have been lost to overexposure Check highlights after shooting in direct sunlight or in other conditions in which parts of the image may be overexposed If it seems im portant details may have been lost choose a lower exposure com pensation value and shoot again page 77 Note that the display is intended only as a guide and may not be e...

Page 44: ... right indicates that the image may be overexposed while a histogram in which pixels are clustered on the left indicates that the image may be underexposed Overexposed Underexposed If the image appears to be incorrectly exposed you may be able to use exposure compensation to correct exposure in subsequent photographs of the same subject page 77 note that exposure compensation may be insufficient t...

Page 45: ...Photography 40 Movies 87 More on Playback 91 Printing Photographs 106 The Setup Menu 112 Copying Pictures to a Computer 136 Technical Notes 150 Reference Read this section for more information on camera functions ...

Page 46: ...ombinations of shutter speed and aperture all of which produced the same exposure 1Choose mode P Rotate the mode dial to P The shooting mode is shown by an icon in the display 2Measure exposure Press the shutter release but ton halfway to measure ex posure The current shutter speed and aperture appear in the display 3Choose shutter speed and aperture Remove your finger from the shutter release but...

Page 47: ...er release but ton 4Take the photograph Gently press the shutter release button all the way down to take the photograph Note TheExposureProgram The exposure program ISO 100 flash off is shown below The shaded area gives the combinations of shutter speed and aperture available at each exposure value EV Aperture Shutter speed seconds ...

Page 48: ... to A The current aperture is dis played in orange 2Choose an aperture Rotate the up down dial to choose an aperture Your se lection only takes effect when the photo is taken the effect can not be previewed in the picture display 3Press the shutter release button halfway Press the shutter release but ton halfway to set focus and exposure The shutter speed selected by the camera will be displayed i...

Page 49: ... shutter speed is dis played in orange 2Choose shutter speed Rotate the up down dial to choose a shutter speed 3Press the shutter release button halfway Press the shutter release but ton halfway to set focus and exposure The aperture se lected by the camera will be displayed in the picture dis play 4Take the photograph Gently press the shutter release button the rest of the way down to shoot Note ...

Page 50: ...te the up down dial to choose an aperture and press the ADJ lever left or right to select a shutter speed if de sired the roles of the two controls can be reversed see page 123 The effects can be previewed in the picture display and are reflected in the exposure indi cator if the image would be under or over exposed by more than 2EV the effects can not be previewed and the indicator will turn oran...

Page 51: ...t available in manual exposure mode If AE Lock is selected for Set Fn1 Button or Set Fn2 But ton in the setup menu pressing the affected button in manual exposure mode will set shutter speed or aperture to a value close to that needed for optimal exposure Similarly if Exposure Comp is selected for Zoom Button in the setup menu pressing the 8 and 9 buttons will not display exposure compensation opt...

Page 52: ...s that are partly in the shade on a sunny day and other high contrast scenes page 48 A tripod is required results are not guaranteed with subjects that are in motion Skew Correct Mode Reduce the effects of perspective when photograph ing rectangular objects such as message boards or business cards page 51 Text Mode Make black and white photographs of text or draw ings on notepaper or a white board...

Page 53: ...de See page 52 Movie mode See page 87 Tip UsingtheMenus Toaccesstheshootingandsetupmenus in 4 mode press the C D button to display the scene mode menu and press to highlight the mode tab Press or to highlight the shooting menu tab page 54 key custom set tings tab page 112 or setup menu tab page 112 and press to place the cursor in the selected menu See pages 55 56 for information on the shooting m...

Page 54: ...ts may be blurred Flicker from fluorescent lights may affect colors and brightness Tip DynamicRange Dynamic range refers to the range of tones that can be expressed by the camera which is narrower than that visible to the naked eye In high contrast scenes this may result in loss of detail in high lights and shadows Dynamic range double shot creates a smooth transition from highlights to shadows fo...

Page 55: ... bine them to create a single image with an enhanced dy namic range ShootingMenuOptions The following shooting menu options are available only in dynamic range double shot mode Dynamic Range Expansion Choose amount by which dy namic range is enhanced Plus Normal Shooting Choose On to record two copies of each photo one with normal exposure and another with enhanced dynamic range Copy with enhanced...

Page 56: ...ange Expansion or Plus Normal Shooting and press to display options for the highlighted item 3Select an option Press or to highlight an option and press C D to select Tip PlusNormalShooting When photographs taken with On selected for Plus Normal Shooting are displayed in the picture display af ter shooting both the enhanced and unmodified copies appear with histo grams showing tone distribution If...

Page 57: ...etect a suit able subject an error message will be displayed and the photograph will be recorded without modification Caution SkewCorrectMode The camera records two images each time the shutter is released the unmodified photograph and a copy that has been processed to correct perspective No photograph will be taken if memory is insufficient to record two images The camera may be unable to correct...

Page 58: ...light an option and press the ADJ lever or C D to select the highlighted option and clear the menu from the display Tip AdjustingContrast Contrast can also be adjusted using the Density option in the shooting menu page 56 2Take the photograph Press the shutter release button halfway to focus then gently press it the rest of the way down to take the photograph ...

Page 59: ...Y3 The shooting mode saved us ing Reg My Settings will be displayed in the picture dis play Note Menu settings can be freely adjusted in MY modes The settings saved with Reg My Settings are restored when an other mode is selected or the camera is turned off Tip ChoosingaShootingMode To choose a shooting mode in MY mode without changing other settings use the Switch Shooting Mode option in the shoo...

Page 60: ...e In 4 mode pressing C D displays the mode menu press to highlight the mode tab to display the shooting menu and to place the cursor in the menu Scroll bar shows position in menu 2Select a menu item Press or to highlight a menu item and press to display options for the high lighted item 3Select an option Press or to highlight an option Press C D to select and exit to shooting mode or press to sele...

Page 61: ...in 73 Noise Reduction Off 74 Option Option Default Default Page Page Noise Reduction ISO Over ISO 401 74 Interval Shooting 75 Date Imprint Off 76 ExposureCompensation1 0 0 77 White Balance Multi PAUTO 79 White Balance Compensation A 0 G 0 82 ISO Setting Auto 84 Restore Defaults2 85 Auto Aperture Shift3 Off 85 Switch Shooting Mode4 86 1 Not available in mode M 2 5 mode only 3 Mode A only 4 Mode MY1...

Page 62: ...i PAUTO 79 White Balance Compensation A 0 G 0 82 ISO Setting Auto 84 4Mode SkewCorrect Option Option Default Default Page Page Picture Quality Size N1280 1M 57 Focus Multi AF 59 Snap Focus Distance 2 5m 64 Full Press Snap On 64 Pre AF Off 65 Exposure Metering Multi 65 Image Settings Standard 66 Option Option Default Default Page Page Flash Exposure Compensation 0 0 72 Flash Synchro Settings 1st Cu...

Page 63: ...8 10M Fine 3 648 2 7363 Produces images that can be printed at larger sizes or cropped on a computer N3648 10M Normal F3 2 9M 2 Fine 3 648 2 432 N3 2 9M 2 Normal F1 1 7M 2 Fine 2 736 2 736 N1 1 7M 2 Normal N3264 8M 3 264 2 448 N2592 5M 2 592 1 944 Produces images suitable for printing N2048 3M 2 048 1 5363 N1280 1M 4 1 280 960 Allows more photos to be stored N640 VGA 4 640 480 Produces small image...

Page 64: ...e quality images RAW images are not com pressed This increases file size but avoids the loss of quality associ ated with JPEG compression Note the following when shooting RAW images Some settings can not be used as detailed in the section for the affected setting Image Settings and Date Imprint options ap ply only to JPEG copies and have no effect on the DNG images The size and quality of the JPEG...

Page 65: ...rent selection is shown by an icon in the picture display Tip DepthofField Depth of field is the distance in front of and behind the focus point that appears to be in focus Small apertures high f numbers in crease depth of field bringing more of the scene into focus large apertures low f numbers decrease depth of field emphasizing the main subject by blurring the foreground and background At setti...

Page 66: ... focus Select MF in the Focus menu The focus mode and focus bar page 59 are displayed in the picture display 2Choose the focus distance Press to increase the focus distance to decrease To zoom in on the subject in the center of the picture dis play and check focus press and hold the C D button Press and hold the button again to return to the normal shooting display 3Take the picture See the sectio...

Page 67: ...ng options and press C D to select Option Option Description Description AE AF Spot metering and spot autofocus choose the focus and exposure target AF Spot autofocus choose the focus target Exposure is me tered using the option selected for Exposure metering page 65 AE Spot metering choose the metering target Focus is set using the option selected for Focus page 59 Off Target selection off 2Posit...

Page 68: ...t is select ed Note that target will be reset if you choose a new option in the target selection menu or select manual focus When the mode dial is rotated to 4 the focus target for macro mode can be selected by pressing the ADJ lever in select ing U and then using the and buttons to position the cross hairs as described on page 63 The Fn buttons can be used for focus target selection in macro mode...

Page 69: ...ion the cross hairs over your subject and press C D to exit without moving the target press DISP Press the shutter release button halfway to focus on the selected target and then gently press the shutter release but ton the rest of the way down to take the picture Note that if the ADJ lever has been used to select the focus target the Fn buttons can not be used for target selection until the targe...

Page 70: ...pot AF is selected for Focus page 59 Option Option Description Description Off The camera focuses normally On If the shutter release is pressed all the way down in one mo tion the camera will take a picture at the focus distance se lected for Snap Focus Distance Choose when quick shutter response is required On Auto HiISO As for On except that ISO sensitivity is automatically set to Auto Hi page 8...

Page 71: ...Fo cus Using pre AF increases the drain on the battery Exposure Metering Choose how the camera measures exposure Option Option Description Description Multi The camera meters exposure in 256 areas of the frame Center The camera meters the entire frame but assigns the great est weight to the center Use when the subject in the cen ter of the frame is brighter or darker than the background Spot The c...

Page 72: ... sepia red green blue or purple tint Vividness contrast and sharpness can be adjusted manually Setting1 Setting2 Make individual adjustments to vividness contrast sharpness colors and hue to create custom set tings that can be recalled as desired Note Contrast has no effect in dynamic range double shot mode At settings other than Standard the current selection is shown by an icon in the picture di...

Page 73: ...harp ness as described above To adjust individual colors highlight Colors and press Press and to high light an option and press and to change Press C D to exit when settings are complete 2Press C D Press C D to return to the Image Settings menu when settings are complete 3Exit to shooting mode Press C D to exit to shooting mode or press and then press C D The option currently selected for Image Se...

Page 74: ...se button is pressed the camera shoots up to 16 frames at about 7 5 frames per second and joins them to form a single image 3 648 2 736 pixels in size About 2s are required to shoot the entire sequence M Cont memory reversal continuous The camera shoots while the shutter release button is pressed but only the last 16 frames about the last two seconds of shooting are recorded creating a single imag...

Page 75: ... of Multi P AUTO page 79 ISO settings of ISO 100 or ISO 64 will be set to Auto while S Cont or M Cont are in effect Tip ViewingS ContandM ContImageswithPlaybackZoom Zoom can be used to view the indi vidual frames of S Cont and M Cont images during playback Pressing the 8 button while an image taken with either of these options is displayed in single frame playback displays the first frame in the s...

Page 76: ... the white balance currently selected in the shooting menu page 79 and a third with a cool blueish cast Choose when you find it difficult to select the correct white balance Display after shooting CL BKT Record photos in both black and white and color or in black and white color and tinted monochrome page 71 The current selection is shown by an icon in the picture display Notes Bracketing is not a...

Page 77: ...d using the tint selected for B W TE in the Im age Settings menu pages 66 67 B W TE copy Tip Contrast Sharpness andColorDepth The contrast sharpness and vividness of the images in the brack eting sequence are determined by the options selected in the Im age Settings menu pages 66 67 The black and white copy is recorded at the settings most recently selected for Black White the tinted monochrome co...

Page 78: ...ing menu displays the slider shown at right press or to choose a flash exposure compen sation value and press C D Flash exposure compensation is displayed in the picture display except when the flash is off Note See page 24 for information on using the flash Caution Flash exposure compensation may have no effect outside the range of the flash page 24 ...

Page 79: ...ions In manual mode flash level is not automatically adjusted accord ing to lighting conditions Do not direct the flash at a person operating a motor vehicle or use the flash close to the subject s eyes Particular care should be observed when photographing infants Flash Synchro Settings Choose how the flash synchronizes with the shutter 1st Curtain The flash fires at the beginning of the expo sure...

Page 80: ...ise reduc tion is on Notes When a RAW quality option is selected for Picture Quality Size noise reduction applies only to the JPEG copy not to the DNG file The time needed to record photographs varies with the option selected for Noise Reduction Noise Reduction ISO Select the minimum ISO sensitivity at which noise reduc tion applies when Weak or Strong is selected for Noise Reduction Choose from A...

Page 81: ... mode Interval will be displayed in the picture display 2Start shooting Press the shutter release button Photographs will be taken automatically at the selected interval 3End shooting Press C D to end shooting when all the de sired photographs have been taken Cautions The interval timer is not available in 4 mode The interval resets to zero when the camera is turned off If the time needed to recor...

Page 82: ...de continuous shooting turns off automatically Date Imprint Imprint the date YY MM DD or date and time YY MM DD hh mm on photographs as they are taken An indicator is displayed in the bottom right corner of the picture display when date imprint is on Notes Date imprint is not available when the clock is not set Set the clock page 16 before using date imprint The date can not be imprinted on movies...

Page 83: ...derexposed Try increasing exposure compensation Theframeisdominatedbyverybrightobjects The subject may be underexposed Try increasing exposure compensa tion The frame is mostly dark for example a spotlit subject on a darkened stage The subject may be overexposed Try reducing exposure compensation Exposure compensation can be adjusted from the shoot ing menu or using the ADJ lever TheShootingMenu S...

Page 84: ...ADJ lever in and press or or press the ADJ lever left or right until the exposurecompensationslider is displayed 2Adjust exposure compensation Press or to choose an exposure compensation value Press the shutter release button to take a pic ture or press the ADJ lever or C D to return to shooting mode At settings other than 0 0 expo sure compensation is displayed in the picture display Caution Expo...

Page 85: ...e frame in continuous mode this option is equivalent to Auto Outdoors Use when shooting in daylight under clear skies Cloudy Use when shooting in daylight under cloudy skies Incandescent Lamp Use with incandescent lighting Fluorescent Lamp Use with fluorescent lighting Manual Settings Measure white balance manually page 80 Detail Make fine adjustments to white balance page 81 At settings other tha...

Page 86: ...o select an option Press the shutter release button to take a picture or press the ADJ lever or C D to return to shooting mode Manual MeasuringWhiteBalance To measure a value for white balance 1Select Manual Settings Highlight Manual Settings in the white balance menu 2Measure white balance Frame a blank piece of paper or other white object so that it fills the frame and press the DISP button Repe...

Page 87: ...e 1Select Detail Highlight Detail in the white balance menu and press the DISP button 2Choose a setting Press or to choose a white balance Press C D when settings are com plete 3Return to shooting mode Press C D to return to shooting mode Note Selecting an option other than Detail resets detail white balance ...

Page 88: ...ted while the modifications are in effect Selecting White Balance Com pensation in the shooting menu page 54 displays the controls shown at right Choose white bal ance compensation using the or buttons or press the DISP button to reset white balance compensation to a neutral value Press C D to save changes and exit or press the DISP but ton twice to cancel Blue Green Magenta Amber Amount White bal...

Page 89: ... C D White balance compensation can also be assigned to the Fn buttons pages 121 122 When the mode dial is rotated to 4 white balance com pensation is only available in movie and dynamic range double shot modes The White Balance Compensation option in the playback menu page 103 does not use the same values as the shooting menu option ...

Page 90: ...age 125 ISO 64 ISO 1600 Sensitivity is set to the selected value The current sensitivity is shown in the picture display if Auto or Auto Hi is selected the sensitiv ity selected by the camera is shown when the shutter re lease button is pressed halfway Sensitivity can be selected in the shooting menu page 54 or assigned to the ADJ lever page 119 and adjusted as described below 1Display ISO sensiti...

Page 91: ...ure size size ISO sensitivity ISO sensitivity Picture Picture size size ISO sensitivity ISO sensitivity Default Default Min Min Max Max Default Default Min Min Max Max 640 100 64 283 2592 100 64 154 1280 238 3264 2048 176 3648 Restore Defaults To restore default shooting menu settings pages 55 56 rotate the mode dial to 5 and select Restore Defaults in the shooting menu A confirmation dialog will ...

Page 92: ...ed to a MY mode page 53 you can use this option to switch between 5 P A S and M modes without ro tating the mode dial to a new set ting This option is only available in MY modes and is not displayed if the shooting mode currently selected for Reg My Settings is a scene mode ...

Page 93: ... files 1Rotate the mode dial to 4 The option currently selected for 4 mode appears in the display 2Press C D A menu of scene mode op tions will be displayed 3Select 3 Press or to highlight 3 movie and press C D to exit to movie mode 4Shoot Press the shutter release button to begin recording press again to end Recording ends automatically when memory is full ...

Page 94: ...ptions selected for Movie Size and Frame Rate page 89 Notes The flash can not be used The camera focuses when the shutter release button is pressed to begin recording The amount of time remaining is calculated based on the amount of memory available and may not diminish at an even rate Shooting menu options differ from those available in other modes page 55 Charge the battery before shooting or us...

Page 95: ...shooting menu Press C D to display the scene menu Press to highlight the mode tab press to highlight the shooting menu tab and press to place the cur sor in the shooting menu 2Select Movie Size or Frame Rate Highlight Movie Size or Frame Rate and press to display options for the selected item 3Highlight an option Movie Size Choose 640 640 480 pixels or 320 320 240 pixels FrameRate Choose30Frames S...

Page 96: ...e indicated by a 3 icon 3Start playback Press the ADJ lever in to start playback Progress is shown in the playback display The following opera tions can be performed To To Press Press Description Description Advance rewind 8 9 Hold 8 to fast forward 9 to rewind If movie is paused movie will advance or rewind one frame keep button pressed for slow advance or rewind Pause resume ADJ Press the ADJ le...

Page 97: ... menu Press the C D but ton to display the playback menu 2Select a menu item Press or to scroll through the menu and press to display options for the highlighted item The playback menu contains the following options Option Option Page Page Slide Show 92 Protect 92 DPOF 95 Resize 97 Option Option Page Page Copy to Card from Internal Memory 97 Skew Correction 98 Level Compensation 100 White Balance ...

Page 98: ...topped press any button to end the slide show Protect Protect pictures from accidental deletion Protected files are indi cated by the icon shown at right Caution Formatting erases all files including protected files ProtectingIndividualPictures To protect or remove protection from individual files play the pic ture back and select Protect in the playback menu to display the op tions shown at right...

Page 99: ...ess C D 2Select Sel Indiv or Sel Range Select Protect in the playback menu to display the options shown at right To select im ages one at a time highlight Sel Indiv press C D and proceed to Step 3 To se lect one or more ranges consisting of two images and allphotographsbetweenthem highlightSel Range press C D and proceed to Step 3 1 3Select photographs Press or to high light photos and press C D t...

Page 100: ...mage and press C D to select The se lected image and other images in the selected range will be marked with icons Repeat Steps 3 1 3 2 to select additional ranges or press the ADJ lever in to select or deselect individual photographs as described in Step 3 4Press the Fn2 button A message will be displayed while the camera pro tects the selected files The camera will then return to normal playback ...

Page 101: ... DPOF DPOF Digital Print Order Format is a standard used to specify the photos to be printed and the number of prints Photos selected for printing are marked with a DPOF print indicator page 7 SelectingIndividualPhotosforPrinting To add a photo to or remove it from the print order play the pic ture back and select DPOF in the playback menu to display the op tions shown at right if the desired imag...

Page 102: ...and choose the number of prints Press or to highlight additional photos and or to choose the number of prints To remove a photograph from the print order press until the number of prints is zero 3Press C D A message will be displayed while the camera cre ates the print order The camera will then return to multi frame playback Note For information on removing all photos from the print order see pag...

Page 103: ...7 for information on choosing the size of photographs during shooting Copy to Card from Internal Memory To copy all files from internal memory to a memory card insert the memory card in the camera and select Copy to Card from Internal Memory in the playback menu page 91 A message will be displayed while copying is in prog ress the camera will return to playback when copying is complete Notes If th...

Page 104: ... orange frame The camera can detect up to five objects to select a different object press or press to exit without correcting perspective If the camera is unable to detect a suitable subject an er ror message will be displayed 3Press C D A message will be displayed while the camera cop ies the photo Copying takes from about 2 to 46 sec onds depending on image size page 99 Caution Skew correction i...

Page 105: ...e approx Time approx Size Size Time approx Time approx 3 648 2 736 21sec 2 048 1 536 8sec 3 264 2 448 17sec 1 280 960 5sec 2 592 1 944 12sec 640 480 2sec To reduce the time required create a small copy of the original using Resize page 97 and perform skew correction on the copy Skew correction can also be performed during shooting pages 46 51 ...

Page 106: ...vel Compensation Press C D to display the playback menu highlight Level Compensation and press 3Select Auto Highlight Auto and press If the camera is able to cre ate a copy a preview will be displayed with the original image displayed at upper left the corrected copy at right If the camera can not create a copy an error message will be displayed and the camera will exit to the play back menu 4Pres...

Page 107: ...xels shadows on the left and bright pix els highlights on the right Press the ADJ lever in to cycle through the black point mid point and white point and press or to position the selected point for enhanced brightness and con trast as described on the following page For help press the Fn2 button press the button again to return to the preview display 2Press C D Press C D to copy the image to exit ...

Page 108: ...move the mid point left or right to ad just brightness Correcting overexposure Increasing contrast To increase contrast align the black point and white point with the darkest and brightest pixels as shown at right You can then move the mid point left or right to adjust brightness Cautions Level correction is available only with still images taken with this camera It is not available with movies or...

Page 109: ... to a neutral value to view or hide help press the Fn2 button 4Press C D Press C D to copy the image to exit without creating a copy press DISP twice A message will be displayed while the camera copies the photo Cautions White balance compensation is available only with still images taken with this camera It is not available with movies or pictures taken using S Cont or M Cont The desired results ...

Page 110: ...ug into the video input connector Be sure the plugs are securely connected Do not use force Video input yellow Audio input white 3Connect the camera Open the terminal cover and plug the cable into the A V cable connector Do not use force 4Tune the television to the video channel Select video input See the television manual for de tails 5Turn the camera on Press the 6 button for about a second to t...

Page 111: ...e following video standards NTSC used in North America the Caribbean parts of Latin America and some East Asian countries and PAL used in the United Kingdom and much of Europe Australia New Zealand and parts of Asia and Africa SECAM is not supported Where possible the cam era is set to the standard used in your country or region before shipment before connecting the camera to a device that uses a ...

Page 112: ...era conforms to PictBridge a standard widely used for direct printing and direct printing is consequently only available with PictBridge compliant printers See the documentation pro vided with your printer for information on whether it supports PictBridge Connecting the Camera Connecting the Camera Connect the camera to the printer using the supplied USB cable 1Turn the camera off Be sure the came...

Page 113: ...e the above message is displayed it may in some cases be replaced after two sec onds by a message stating that the camera is connecting to a computer Turn the camera off and press the ADJ lever in again The message will be replaced by the PictBridge play back display shown at right if the PictBridge play back display does not appear the camera is still es tablishing a connection to the printer Cau...

Page 114: ...f an error is displayed during printing check the printer and take the appropriate action Printing Photos One at aTime To print a selected photograph 1Select a photo Press or until the desired photo is shown in the Pict Bridge playback display and press the ADJ lever in The menu shown at right will be displayed highlight 1 File and press C D Tip PrintingOneCopyofAllPhotos To print one copy of all ...

Page 115: ...rType Choose the paper type Layout Choose the number of pictures per page Date Print Include the time and date of recording See page 16 for information on selecting the order in which the time and date are displayed If the picture was taken using Date Imprint page 76 only the im printed date will be printed File Name Print Include the file name Optimize Image Choose whether the printer optimizes p...

Page 116: ...ght will be displayed highlight Set and press C D Select Cancel to exit without changing the default set ting 3Start printing To start printing press C D when the direct print menu shown in Step 2 is displayed A message is displayed during printing to exit before printing is complete press the DISP button The PictBridge play back display will appear when printing is complete ...

Page 117: ...a photo graph press until the num ber of prints is zero 4Select additional photos Press or to highlight additional photographs and press or to choose the number of prints 5Adjust printer settings Press C D to display the direct print menu Adjust settings as described on pages 109 110 6Start printing To start printing press C D when the direct print menu is displayed A message is displayed dur ing ...

Page 118: ...t the tab for the current menu and press or to highlight the key custom settings tab page 113 or the setup menu tab page 113 Press to place the cursor in the selected tab q w q Key custom settings tab w Setup menu tab 3Select a menu item Press or to highlight a menu item and press to display options for the high lighted item 4Select an option Press or to highlight an option and press C D to select...

Page 119: ...23 The setup menu tab contains the following options Option Option Default Default Page Page Format Card 124 Format Internal Memory 124 LCD Brightness 124 ISO Auto High Settings AUTO 400 125 AF Auxiliary Light On 125 Auto Power Off 5Min 125 Operation Sounds All 125 Volume Settings medium 126 LCD ConfirmationTime 0 5seconds 126 One Press Zoom Ratio 9 8 126 AutoRotate On 127 Level Setting Display 27...

Page 120: ...e camera to the desired settings The following settings can be stored Camera settings Shooting mode 5 P A S M or 4 aperture modes A and M shutter speed modes S and M focus position for manual focus and scene macro flash self timer and display modes Shooting menu options All options except Interval Shooting Auto Aperture Shift and Switch Shoot ing Mode White balance compensation will be stored if M...

Page 121: ...exit without saving settings press the DISP button To save the settings to a box to be recalled and assigned to the mode dial at a later date page 116 select My Settings Box and press Highlight the desired box and press C D Unnamed boxes will be named using the current date If the box has already been assigned a name the dialog shown at right will be displayed Select Yes to use the current name No...

Page 122: ...it without assigning settings to the mode dial press the DISP button Caution If Edit My Settings is used to edit boxes that are currently as signed to the mode dial the changes will be reflected when the mode dial is rotated to the position assigned to the box Changes to settings assigned directly to MY1 MY2 or MY3 are not however reflected in the boxes currently assigned to the mode dial and if t...

Page 123: ...dit box settings select My Settings Box and press Highlight the desired box and press 2Edit settings Press or to highlight items and press to edit see the section for each item in this manual for more informa tion After editing each item press to return to the set tings list where you can edit additional settings 3Save changes and exit Press C D to save changes and exit to exit without saving chan...

Page 124: ...hlighted char acter at the current cursor position to delete the character at the current cursor position select Delete Press Fn2 to switch be tween upper and lower case Names can be up to 32 characters long Press the ADJ lever in to use the new name or press DISP to exit without renaming the settings My Settings for Fn Settings Select On to include the options assigned to the Fn but tons page 121...

Page 125: ...e 59 meter ing page 65 continuous page 68 bracketing page 70 flash compensation page 72 manual flash amount page 73 and exposure compensation page 77 The ADJ lever can also be used to select white balance in and modes contrast in mode and exposure com pensation in and modes UsingtheADJ Lever To select an option currently assigned to the ADJ lever 1Display options With the camera in shooting mode p...

Page 126: ...an option and press the ADJ lever in or press C D to select Tip Keep the ADJ lever pressed to page rapidly through the available options ADJ Shutter Confirmation Select On to use the shutter release button to select the highlighted option when using the ADJ lever ...

Page 127: ...age 66 2 4 Exposure Comp Display the exposure compensation slider page 77 2 4 White Balance Display white balance options page 79 2 WB Correction Display white balance compensation controls page 82 2 5 ISO Display ISO sensitivity options page 84 2 4 Quality Display options for picture quality and or size page 57 or movie size page 89 1 If focus is locked in autofocus mode page 59 selecting manual ...

Page 128: ...lash Comp Display the flash compensation slider page 72 2 4 6 Flash Amount Adjust manual flash output page 73 2 4 5 6 Self timer Set the self timer page 26 4 By default AF MF is assigned to the button and Self timer to the t button Zoom Button Choose the role played by the 8 and 9 buttons Choose from none off digital zoom page 22 exposure com pensation page 77 and white balance page 79 Caution Dig...

Page 129: ...ed to the 8 and 9 buttons page 122 or AE lock is assigned to an Fn but ton page 121 pressing the affected button in manual exposure mode sets shutter speed and or aperture to values close to those needed for optimal exposure This option determines whether shutter speed or aperture is adjusted to achieve optimal exposure Aprtr Priority Aperture remains at the selected value shutter speed is adjuste...

Page 130: ...y card is inserted dis plays an error message Turn the camera off and insert a memory card Tip WriteProtection To prevent memory cards from being formatted slide the write protect switch to the LOCK position page 14 Restore the switch to its original position to resume normal operation LCD Brightness Selecting this option displays the control shown at right Press or to adjust picture display brigh...

Page 131: ... no operations are performed Select from Off the camera does not turn off automati cally 1 minute 5 minutes and 30 minutes Operation Sounds Choose when the camera plays a sound Option Option Description Description All Sounds are played at startup when the shutter is released when the camera focuses and when an error occurs If Sound or Disp Snd is selected for Level Setting page 27 the cam era wil...

Page 132: ...back zoom or deleted see pages 32 and 33 and Off photographs are not displayed in the picture display af ter shooting One Press Zoom Ratio Select the magnification at which pictures are displayed when zoomed in using the C D button or ADJ le ver page 32 Choose from 5 7 9 8 and 16 Note Maximum magnification varies with image size Image size pixels Image size pixels Maximum magnification Maximum mag...

Page 133: ...uring slide shows in multi frame playback or when displayed on a TV nor are they rotated when the camera is upside down or if the camera is rotated during play back zoom or while skew correction is in progress Note During bracketing or when recording pictures with Continuous selected for Continuous Mode the camera only records the ori entation for the first photograph in each series The remaining ...

Page 134: ...three grid for rule of thirds com position A four by four grid with diagonal lines run ning from corner to corner makes it easy to find the center of the subject Use for architec tural photography or photographing products for display A two by two grid with the center of the frame left clear to make it easier to view the subject Use if your subject is in motion ...

Page 135: ...cted with the mode dial Show My Setting Name Select On to display the name of the settings assigned to the current position on the mode dial when the dial is rotated to MY1 MY2 or MY3 Shooting Info Display Frame SelectOntodisplayshootingicons in a frame surrounding the view through the lens page 6 making it easier to frame photographs in the picture display The frame is not displayed in movie mode...

Page 136: ...tion using the up down dial pressing the ADJ lever left or right pressing the Fn1 or Fn2 button or pressing the flash OPEN switch FOPEN to raise the flash The display turns off if the shutter release button is pressed halfway or no operations are performed for a few seconds Notes Regardless of the setting chosen the picture display turns on when any of the following buttons are pressed the ADJ lev...

Page 137: ...ecorded if B W TE is selected for Image Settings RAW JPEG Setting Choose the quality and size of JPEG copies recorded when a RAW quality option is selected for Picture Qual ity Size page 57 Select Fine or Normal to record a fine or normal quality copy of the same dimensions as the RAW image N640 VGA to record a normal quality copy 640 480 pixels in size Note If a RAW quality option with an aspect ...

Page 138: ...tible with the default color space used in Adobe Photoshop and other image editing software Note however that colors will only be reproduced correctly in software that supports the Adobe RGB color space Note too that specialized equip ment is required to print the full range of colors in the Adobe RGB gamut when printed using consumer household printers or digi tal photo print services colors will...

Page 139: ...om ratio Size pixels Size pixels Zoom ratio Zoom ratio Size pixels Size pixels 1 0 3 648 2 736 10M 1 8 2 048 1 536 3M 1 1 3 264 2 448 8M 2 9 1 280 960 1M 1 4 2 592 1 944 5M 5 7 640 480 VGA The current picture size is dis played in the picture display when the camera is zoomed in Caution The option selected for Digital Zoom image only takes effect when Digital Zoom is selected for Zoom Button page ...

Page 140: ...Notes This option applies only to memory cards The names of photos in internal memory consist of RIMG and a four digit number Photos copied to a computer using DL 10 page 136 are given new names consisting of RIMG and a four digit number Photos taken with AdobeRGB selected for Color Space Setting page 132 are indicated by file names beginning with an under score e g _R010001 jpg or _RIMG001 jpg Ca...

Page 141: ... menus are displayed Option Option Description Description Option Option Description Description 日本語 Japanese Русский Russian English English 简体中文 Simplified Chinese Deutsch German 繁体中文 Traditional Chinese Français French 한국어 Korean Italiano Italian ไทย Thai Español Spanish Video Out Mode When connecting the camera to a TV or VCR page 104 choose a video out mode that matches the standard used in t...

Page 142: ...ayed by your computer Windows Windows You can copy pictures to your computer by either of the following methods Install the supplied DL 10 software page 138 and use it to copy pictures as described on page 144 Copy pictures in Windows Explorer page 145 Caution Pictures can not be copied from the camera to computers running Windows 98 or Windows 98SE Use a card reader to copy pictures from a memory...

Page 143: ...n Video Video 1024 768 pixels or more with 16 bit color or better Miscellaneous Miscellaneous Compatible CD ROM drive Compatible USB port Cautions 64 bit operating systems Windows 98 Windows 98SE and Windows Me are not supported Operating systems that have been upgraded from an earlier version are not supported as USB may fail to function as expected The supplied software may not function as expec...

Page 144: ...ver Connect earlier Ricoh cameras to computers running Windows 98 Windows 98 SE Windows Me or Windows 2000 Not required for this camera WIAdriver Connect earlier Ricoh cameras to computers running Windows XP or Windows Vista Not required for this camera Browse User s Manual Software Version View the Software User Guide in pdf format page iv Acrobat Reader or Adobe Reader is required if necessary i...

Page 145: ... used by this camera If the above Caplio software is currently installed you will be prompted to uninstall it before installing the supplied DC soft ware Follow the on screen instructions Installing the DC soft ware replaces Caplio Viewer Caplio Server and Caplio Setting with the software listed above which can be used in the same way as the Caplio versions note that this software will not be inst...

Page 146: ...nstaller dialog will be displayed automatically 2Click Installing the software Windows Vista A User Account Control dialog will be displayed Click Allow to display a language se lection dialog OtherversionsofWindows A language selection dialog will be displayed 3Select a language and click OK The dialog shown at right will be displayed Click Next 4Select a destination The supplied software will be...

Page 147: ...he computer A message will be displayed prompting you to restart your computer Select Yes I want to restart my computer now and click Finish to restart the computer 8Unblock DL 10 A Windows security dialog will be displayed when the computer restarts Click Unblock for DL 10 Note See page 143 for information on uninstalling the software Adobe Reader Adobe Reader is required to view the SoftwareUser...

Page 148: ... Adobe Reader Double click the Acrobat folder and then double click the folder for the language of your choice Dou ble click the file beginning with AdbeRdr910 and follow the on screen instructions If a User Account Control dialog is displayed click Continue Notes See the Adobe Reader Help menu for information on Adobe Reader Installation of Adobe Reader 9 1 requires MSI MicrosoftWindows Installer...

Page 149: ...ol Panel Windows XP or Windows Vista or Settings Control Panel Windows 2000 Double click Add Remove Programs 2Uninstall the software Select the software you wish to uninstall DC Soft ware or Irodio Photo Video Studio and click Change Remove A confirmation dialog will be dis played click OK If a message appears warning that a shared file has been detected select Don t display this message again and...

Page 150: ...matically Pictures are copied to folders in the Digital Camera folder in My Docu ments if you were previously using Caplio software pictures will instead be copied to folders in the Ca plio folder Pictures are sorted into separate folders by date of recording make sure the camera clock is set to the correct date and time before shooting 3Disconnect the cable when transfer is complete See page 147 ...

Page 151: ...ted as a removable drive in My Com puter with pictures stored in folders as shown at right If a memory card is inserted in the camera the drive will be named as shown at right and the contents of the memory card will be displayed If no memory card is inserted the drive will be named RICOHDCI and the contents of internal memory will be displayed Copy pictures to the desired location on your compute...

Page 152: ...C card slot data can be read directly from the memory card be sure that the reader or adapter is compatible with both the computer and the memory card Pic tures are stored on memory cards as shown below Image files Caution Do not use a computer to view or edit pictures on a memory card Pictures that have been viewed or modified on a computer can no longer be displayed on the camera Copy pictures t...

Page 153: ...lect Safely Remove USB Mass Stor age Device or Stop USB Mass Storage Device from the menu that appears You can then disconnect the USB cable Notes A warning may be displayed if the USB cable is disconnected without first removing the camera from the system as described above Be sure to remove the camera from the system before disconnecting the cable Confirm that transfer is complete before removin...

Page 154: ... view the Software User Guide note that Acrobat Reader is required to view the Software User Guide under Mac OS 9 Copying Pictures to a Macintosh To copy pictures to a Macintosh computer 1Turn the camera off 2Connect the supplied USB cable Connect the cable to the com puter USB port Caution Do not use force when connecting the cable or when handling the camera with the cable connected Connect the ...

Page 155: ...sconnecting the camera from the computer drag the camera volume into the Trash or select the cam era volume and choose Eject from the Special menu Mac OS 9 or File menu Mac OS X You can then disconnect the USB cable Notes A warning may be displayed if the USB cable is disconnected without first removing the camera from the system as described above Be sure to remove the camera from the system befo...

Page 156: ...IsWrite Protected Card is write protected locked Unlock card 14 Print settings cannot be set for this file File is a movie or other file that can not be selected for printing Insufficient Memory Capacity short Insufficientmemorytostoreadditionalfiles Deleteexistingfiles or increase amount of memory available 33 124 Maximum number of images selected for printing Set number of prints for other image...

Page 157: ...ra has turned off automati cally to save power Turn camera on 14 Battery is exhausted Charge battery rechargeable bat tery only insert fresh battery or use AC adapter 10 12 165 Battery is incompatible Use supplied battery or compat ible AAA batteries 11 The camera does not turn off Camera malfunction Remove and reinsert battery or disconnect and reconnect AC adapter 12 165 Low battery indicator di...

Page 158: ...ntil flash lamp stops blink ing 25 Memory card is locked Unlock card 14 Memory card contacts are dirty Clean with soft dry cloth Can not view photos after shooting Display time is too short Choose longer display time 126 Picture display is blank Camera is off or picture display is dark Turn camera on or adjust picture display brightness 14 124 Picture display is off Press DISP to turn picture disp...

Page 159: ...duce flash output move away from subject or use different light source 72 Photo is overexposed Use exposure compensation or choose faster shutter speed 44 77 Picture display is too bright Adjust picture display brightness 124 Photos are too dark Flash is off and subject is poorly lit Raise flash and choose another flash mode 24 Photo is underexposed Use exposure compensation or choose slower shutt...

Page 160: ...nected Reconnect A V cable 104 Video mode does not matchTV Choose another video mode 135 Can not view pic tures on memory card Memory card empty or not in serted Insert card that has been format ted in camera and contains pic tures recorded with camera 13 124 Card was not formatted in cam era Pictures were created with other device Memory card contacts are dirty Clean with soft dry cloth Card malf...

Page 161: ...y or disconnect and reconnect AC adapter 12 165 Date is incorrect Clock is not set correctly Set clock to correct date and time 135 Date has been reset Battery has not been inserted for about a week Set clock to correct date and time 135 Camera does not turn off automati cally Off selected for Auto Power Off Choose another setting 125 Camera does not beep Beep is muted Choose another option for Vo...

Page 162: ...confirm that the program is from a repu table source and click Unblock Caution Blocking denies the affected program access to the Internet To ensure that your computer is not infected by viruses and other malware click Keep Blocking if you can not identify the program name or publisher If you clicked Keep Blocking to block a Ricoh application you can remove the block in Windows Firewall 1Open the ...

Page 163: ...ther DL 10 is listed under Programs and Services If it is place a check in the check box next to DL 10 and click OK If it is not listed click Add Program to add DL 10 to the list of excep tions If you clicked Ask Me Later to block DL 10 a security alert will be displayed the next time the program starts Click Un block to remove the block ...

Page 164: ... autoexposure lock Mode Program AE aperture priority AE shutter priority AE manual exposure Exposure compensation Manual 2 0 to 2 0EV in increments of 1 3EV auto bracketing 0 5EV 0EV 0 5 EV and 0 3EV 0EV 0 3EV ISO sensitivity Standard Output Sensitivity Auto Auto Hi ISO 64 ISO 100 ISO 200 ISO 400 ISO 800 ISO 1600 White balance Auto Multi P AUTO Outdoors Cloudy Incandescent Lamp Fluorescent Lamp Ma...

Page 165: ...s of 5s to 1 hour in increments of 5s 4 color bracketing B W TE color space selection noise reduction histogram display framing grid depth of field indicator tilt indicator hot shoe Other playback options Auto image rotation multi frame playback playback zoom up to 16 resize Interface USB 2 0 High Speed Mini B connector Mass Storage5 audio output 1 0Vp p 75Ω Video signal format NTSC PAL Power sour...

Page 166: ...promoted by Adobe Systems Inc 3 Compatible with the Design rule for Camera File system DCF a JEITA standard and DPOF Full compatibility with other devices is not guaran teed 4 Flash off 5 Mass Storage is supported under Windows 2000 Windows XP Windows Vista Mac OS 9 0 9 2 2 and Mac OS X 10 1 2 10 5 6 6 Measured according to CIPA standard For reference only actual number of shots varies greatly acc...

Page 167: ...5 30882 61951 640 480 640 480 705 7553 15359 30159 61643 123489 247716 Text Text mode mode 3 648 2 736 3 648 2 736 38 414 842 1653 3379 6769 13879 2 048 1 536 2 048 1 536 109 1184 2363 4640 9486 19005 38125 Movies Movies 640 480 30fps 640 480 30fps 51s 9min 15s 18min 49s 38min 41s 75min 31s 151min 18s 303min 31s 640 480 15fps 640 480 15fps 1min 42s 18min 20s 37min 17s 76min 41s 149min 40s 299min 5...

Page 168: ...on lens with a focal length multiplier of 0 75 for wide angle shots giving a com bined focal length of 21mm 35 mm format equivalent Requires GH 2 Case included CA 1 cable switch A wired remote shutter release that attaches to the camera USB con nector GV 1 external viewfinder An optical viewfinder that attaches to the camera hot shoe Frames of fer coverage for 21mm and 28mm lenses 35 mm format equ...

Page 169: ...al accessories visit the Ricoh website http www ricohpmmc com Tip AttachingtheNeckStrap Remove the end of the neck strap from the buckle and attach the strap as shown at right Tip TheRingCap Remove the ring cap before attaching a conversion lens or the lens hood and adapter To remove the ring cap Turn the camera off and rotate the cap counterclockwise until it can be removed To reattach the ring c...

Page 170: ...inder CA 1 cable switch DB 65 rechargeable battery supplied DB 60 rechargeable batteries can also be used BJ 6 battery charger supplied AC 4c AC adapter GH 2 lens hood and adapter GW 2 wide conversion lens Filters Attach to hot shoe Attach to USB connector Remove ring cap before attaching 43mm 43mm Optional accessory Available from third party supplier ...

Page 171: ...ny batter ies 1 2 2Insert the AC adapter coupler The battery latch will click into place when the coupler is fully inserted 3Place the cable in the cable channel Open the power DC input cable cover and place the power cable in the cable channel 4Close the battery card cover Close q and latch w the cover Caution Be sure the cover is latched 1 2 5Plug the adapter in Attach the AC cable to the adapte...

Page 172: ... be displayed while the AC adapter is in use This is normal and you can continue using the camera Do not pick up the camera by the cable when the AC adapter is attached DisconnectingtheACAdapter Be sure the camera is off before disconnecting the AC adapter 1Unplug the adapter 2Open the battery card cover Slide the release lever to OPEN and open the cover 3Remove the AC adapter coupler 4Close the b...

Page 173: ...F 1 off and attach the GF 1 to the camera hot shoe Hot shoe 3Turn the flash and camera on Note If the optional flash unit icon is not displayed turn the GF 1 and camera off and then remove and reattach flash Cautions Blur may occur at slow shutter speeds Do not use the built in flash when the GF 1 is attached Failure to observe this precaution could cause injury or damage the prod uct ...

Page 174: ...ting Select an option other than Auto for ISO sensitivity page 84 5Turn the flash on Turn the flash on and set it to auto mode Set aper ture and ISO sensitivity to the values selected with the camera Take a test shot and adjust flash aper ture and ISO settings as necessary Turn the optional flash unit off before removing it from the camera Cautions If the external flash is on it will fire with eve...

Page 175: ...ng any expenditure incurred thereby TelevisionPlayback The supplied A V cable can be used to connect the cam era to televisions and monitors equipped with a video input terminal The camera supports the NTSC and PAL video formats before connecting the camera to a video device select the appropriate video output mode Precautions for Use Precautions for Use This product was manufactured for use in th...

Page 176: ... picture display Abrupt changes in temperature may cause condensation result ing in visible condensation inside the lens or camera malfunction This can be avoided by placing the camera in a plastic bag to slow the temperature change and removing it only after the air in the bag has reached the same temperature its surroundings To prevent damage to the product do not insert objects into the holes i...

Page 177: ...sticides Failure to observe this precaution could result in damage to the camera or its finish In the unlikely event of malfunction visit a Ricoh Repair Center The camera contains high voltage circuits Do not disassemble The picture display is easily scratched avoid touching it with hard objects Storage Do not store the camera where it will be exposed to extreme heat or humidity large changes in t...

Page 178: ...f the customer will be charged to the customer whether or not they are incurred during the warranty period 6 This warranty only applies to the camera and not to the accessories such as the case and strap nor does it apply to the battery and other consumables provided 7 Any consequential damages arising from failure of the camera such as expenses incurred in taking pictures or loss of expected prof...

Page 179: ...ealer or an experienced radio TV technician for help FCC 15 105B Changes or modifications not expressly approved by the party responsible for com pliance could void the user s authority to operate the equipment FCC 15 21 Properly shielded and grounded cables and connectors must be used for connection to a host computer in order to comply with FCC emission limits FCC 15 27 An AC adapter with a ferr...

Page 180: ... 14 18 25 AVI 87 B B Backlighting 77 Battery ii 8 10 12 159 164 165 170 171 Battery charger ii 10 165 169 Battery level 8 Battery card cover 3 12 13 165 Black and white 66 67 70 71 Blur 20 Bracketing 70 71 Brightness 100 102 124 C C Cable switch 162 Caplio 139 Card Sequence No 134 Case soft 163 CD ii 138 140 142 CL BKT Black White TE 131 Clock 16 Close up 23 Color 66 67 70 71 79 82 132 Color Space...

Page 181: ... 3 119 120 Focus 18 19 59 65 Focus 58 63 Focus lock 21 Focus target 61 63 Format Card 124 Format Internal Memory 124 Formatting 124 Frame Rate 89 Frame size 89 Framing grid 36 128 Full Press Snap 64 G G GF 1 167 Grid 36 128 Grid Guide Display Options 128 H H Hand strap ii Highlights 37 Histogram 37 38 101 102 Hot shoe ii 162 167 168 Hot shoe cover ii I I Image Settings 66 67 Information Display Mo...

Page 182: ...30 158 170 171 Picture quality 57 58 Picture Quality Size 57 58 Picture size 57 Playback menu 91 103 Playback Mode Mode Dial Options 123 Playback zoom 32 Playback movies 90 Playback photographs 29 32 91 105 Playback TV 104 105 Plus Normal Shooting 49 50 POWER button 2 14 15 17 122 Power Button Lamp 122 Pre AF 65 Printing 76 95 96 106 111 Protect 92 94 R R RAW 30 57 58 131 RAW JPEG Setting 131 Reca...

Page 183: ... Tilt indicator 27 28 Time and date 16 76 Timer 26 Tripod screw hole 3 48 61 TV 104 105 135 169 U U Up down dial 2 5 32 123 USB cable ii 107 144 148 USB cable connector 3 107 144 148 V V Video Out Mode 135 Viewfinder external 130 162 Viewing photographs 29 32 104 105 Volume 90 126 Volume Settings 126 W W Warranty 169 172 White balance 77 83 103 White Balance 79 81 White Balance Compensation playba...

Page 184: ...656 580 Deutschland innerhalb Deutschlands außerhalb Deutschlands 06331 268 438 49 6331 268 438 France à partir de la France en dehors de la France 0800 88 18 70 33 1 60 60 19 94 Italia dall Italia dall estero 02 696 33 451 39 02 696 33 451 España desde España desde fuera de España 91 406 9148 34 91 406 9148 http www service ricohpmmc com ...

Page 185: ...ww ricoh usa com RICOHINTERNATIONALB V EPMMC Oberrather Str 6 40472 Düsseldorf GERMANY innerhalb Deutschlands 06331 268 438 außerhalb Deutschlands 49 6331 268 438 http www ricohpmmc com RICOH UK LTD PMMC UK from within the UK 02073 656 580 from outside of the UK 44 2073 656 580 RICOHFRANCES A S PMMCFRANCE à partir de la France 0800 88 18 70 en dehors de la France 33 1 60 60 19 94 RICOH ESPANA S A ...

Reviews: