EN
Page 22 of 91
INSTRUCTION, USE AND
MAINTENANCE MANUAL
9.2.8 Protection guard assembly with au-
tomatic width measuring device and
laser device "12 o'clock" (optional)
1. Fit the protective casing, complete with automatic
width measuring device and laser device "12
o'clock”, as described in Par. 9.2.5.
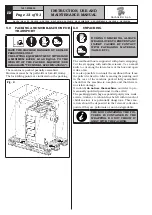
2. Connect the cable (
Fig. 21 ref. 1
) of the ultrasonic
sensor of the automatic width measuring unit (
Fig.
21 ref. 2
) and the cable (
Fig. 21 ref. 3
) of the
external laser device (
Fig. 21 ref. 4
) to the con-
nectors provided (
Fig. 21 ref. 5
).
3. At the end of the connection, introduce the con-
nectors in wheel cover slot (
Fig. 21 ref. 6
), as
illustrated in
Fig. 21
.
Eventually, fasten connec-
tor’s cables (
Fig. 21 ref. 5
) with a clamp (
Fig. 21
ref. 7
).
Fig. 21
IF THE AUTOMATIC WIDTH GAUGE
IS PRESENT OR NEEDS TO BE
INSTALLED, ONLY 2 CLAMPS
MUST BE USED (ONE INSIDE THE
FRAME AND THE OTHER ON THE
WHEEL COVER SUPPORT). BOTH
ELECTRIC CABLES HAVE THE
SAME PATH.
9.2.9 Check correct operation of laser device
"12 o'clock" (optional)
To check the correct operation of the "12 o'clock" laser
device, proceed as follows:
1. Mount a wheel to be balanced on the chuck.
2. Take the wheel measurements in DYN mode and
make the spin.
AT THE END OF THE SPIN THE
LASER PLACED ON THE WHEEL
COVER WILL TURN ON INDICAT-
ING THE POINT OF APPLICATION
OF THE WEIGHT ON THE EXTER-
NAL SIDE OF THE WHEEL.
3. Fit the clip weight, indicated by the machine, on the
external side of the wheel, in the point indicated by
the laser.
4. Press the green repositioning button.
THE WHEEL WILL REPOSITION
ITSELF FOR THE APPLICATION OF
THE CLIP WEIGHT ON THE INNER
SIDE OF THE WHEEL ITSELF AND
THE LASER UNDER THE BRIDGE
WILL LIGHT UP INDICATING THE
PRECISE POINT OF APPLICATION
OF THE WEIGHT ITSELF.
5. Fit the clip weight, indicated by the machine on the
internal side of the wheel in the point indicated by
the laser.
6. Close the wheel cover again and make a new spin.
AT THE END OF THE LAUNCH, IF
THE WORDS “OK-OK” APPEAR
ON THE MONITOR, IT MEANS
THAT THE LASERS INDICATE THE
CORRECT POSITION. OTHERWISE
IT IS NECESSARY TO CONTACT
TECHNICAL ASSISTANCE FOR A
VERIFICATION AND POSSIBLE
CALIBRATION OF THE LASERS.
G3.150 - GP3.150 - G3.150S - GP3.150S - G3.150WS - GP3.150WS - G3.150WSPLUS - GP3.150WSPLUS - G3.150SA - G3.150WSA
RAVAGLIOLI S.p.A.
1297-M058-00

