background image

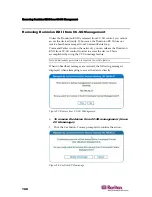
KX Diagnostics 
 

174


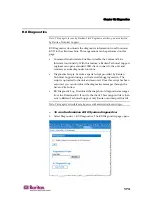
Figure 87: KX Diagnostics 

2.


To enable the Command Line Interface for use by Raritan Technical 
Support: 

Note: UDP Port 21 is required for this feature. 

a.


Check the Enable Command Line Interface for KX Diagnostics 
checkbox. 

b.


Click OK. 

c.


UDP port 21 must be opened and made available to Raritan 
Technical Support. 

d.


Raritan Technical Support will also need to know the 
administrative password for the Dominion KX II. 

e.


Once Raritan Technical Support has completed their testing, 
return UDP port 21 to its original state. 

3.


To execute a diagnostics script file emailed to you from Raritan 
Technical Support: 

a.


Retrieve the diagnostics file supplied by Raritan and unzip as 
necessary. 

b.


Use the Browse button. A Choose file dialog opens. 

c.


Navigate to and select this diagnostics file. 

d.


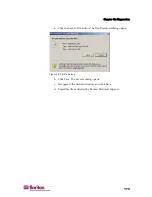
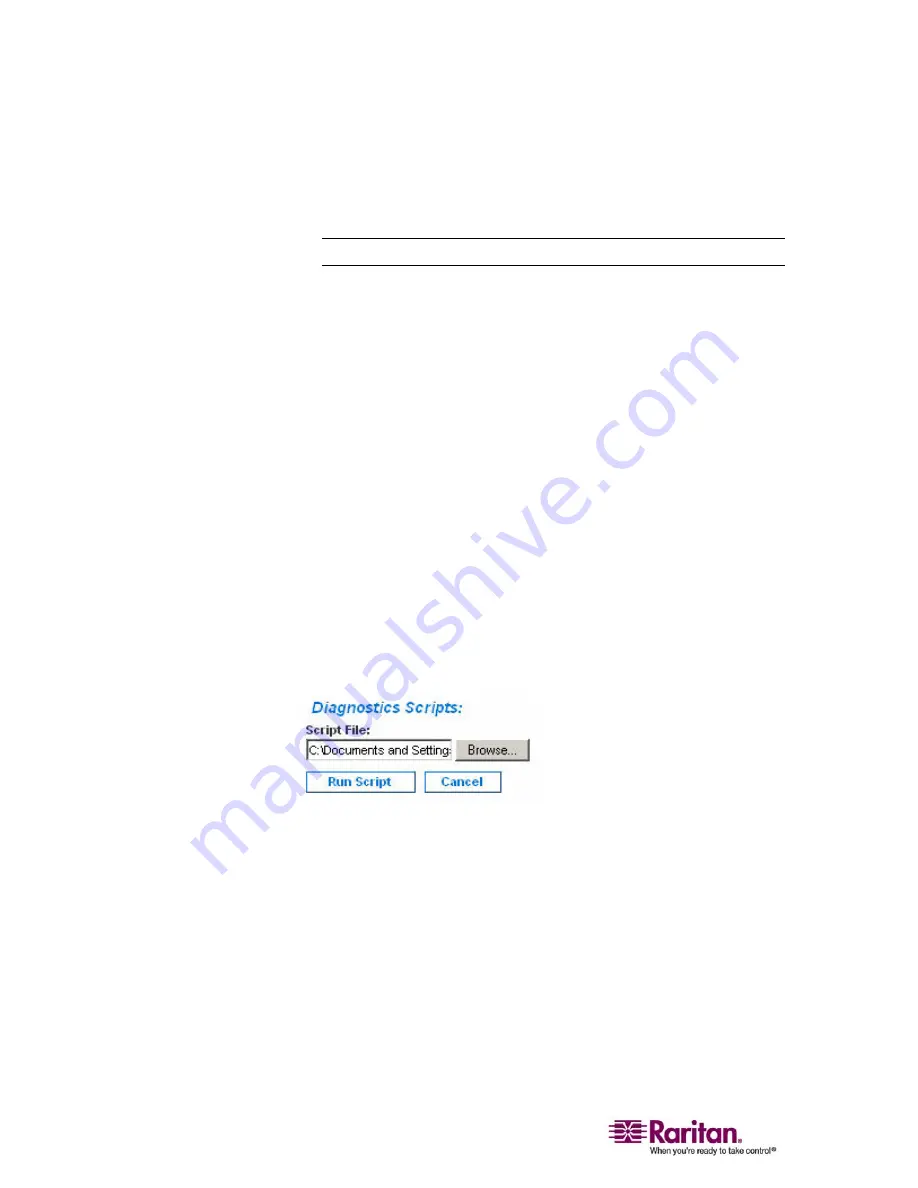
Click Open. The file is displayed in the Script File field: 


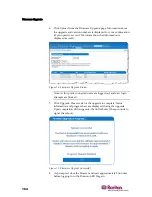
Figure 88: Diagnostics Scripts 

e.


Click Run Script. 

f.


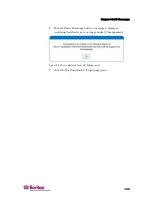
Sent this file to Raritan Technical Support using step 4. 

4.


To create a diagnostics file to send to Raritan Technical Support: 

Summary of Contents for DOMINION KX II DKX2-0E-E

Page 1: ...Dominion KX II User Guide Release 2 0 5 Copyright 2007 Raritan Inc DKX2 0E E September 2007 255 62 4023 00...

Page 2: ...trademarks are the property of their respective holders FCC Information This equipment has been tested and found to comply with the limits for a Class A digital device pursuant to Part 15 of the FCC R...

Page 3: ...s Clients 10 Supported Browsers 11 Supported Operating Systems and CIMs Target Servers 12 D2CIM USB G2 Note 13 Chapter 3 Installation and Configuration 14 Overview 14 Step 1 Configure Target Servers 1...

Page 4: ...ication 36 Note to CC SG Users 36 Supported Protocols 36 Note on Microsoft Active Directory 36 Authentication vs Authorization 37 Users Groups and Access Permissions 38 Users 38 Groups 38 Relationship...

Page 5: ...6 Virtual KVM Client 64 Overview 65 Options 66 Menu Tree 66 Toolbar 66 Mouse Pointer Synchronization 67 Mouse Synchronization Tips 68 Connection Menu 69 Properties Dialog 69 Connection Info 71 Exit 7...

Page 6: ...ver Setup File Server ISO Images Only 96 Chapter 8 User Management 98 User Management Menu 98 User List 99 Add New User 100 Modify Existing User 101 User Group List 102 Add New User Group 103 Setting...

Page 7: ...Destinations 132 SNMP Agent Configuration 133 SNMP Trap Configuration 133 Power Supply Setup Page 136 Port Configuration Page 138 Power Control 140 Connect the Power Strip 140 Name the Power Strip Por...

Page 8: ...age 171 Trace Route to Host Page 172 KX Diagnostics 173 Chapter 13 KX II Local Console 176 KX II Local Console 176 Physical Connections 177 Reset Button 177 Starting the KX II Local Console 178 Simult...

Page 9: ...B Updating the LDAP Schema 197 Returning User Group Information 197 From LDAP 197 From Microsoft Active Directory 197 Setting the Registry to Permit Write Operations to the Schema 198 Creating a New A...

Page 10: ...after Files Added 210 Target BIOS Boot Time with Virtual Media 210 CC SG 211 Virtual KVM Client Version not Known from CC SG Proxy Mode 211 Proxy Mode and MPC 211 Appendix D FAQs 212 General Questions...

Page 11: ...Figure 15 Favorites List 51 Figure 16 Edit Favorite Information 52 Figure 17 Discover Devices Local Subnet 53 Figure 18 Discover Devices KX Subnet 55 Figure 19 Add New Favorite 56 Figure 20 Port Acces...

Page 12: ...vent Management Settings 130 Figure 57 Syslog Configuration 131 Figure 58 Event Management Destinations 132 Figure 59 Power Supply Setup 136 Figure 60 Port Configuration 138 Figure 61 Power Strip Conn...

Page 13: ...ton back of unit 177 Figure 93 Local Console Port Access 180 Figure 94 Local Port Settings 182 Figure 95 Factory Reset Local Console Only 185 Figure 96 Device Managed by CC SG Message 187 Figure 97 Re...

Page 14: ......

Page 15: ...1 In This Chapter Dominion KX II Overview 2 Virtual Media 3 Product Photos 3 Product Features 4 Terminology 6 Package Contents 7 User Guide 7 Chapter 1 Introduction...

Page 16: ...5 5e 6 cabling Its advanced features include virtual media 128 bit encryption dual power supplies remote power control dual Ethernet LDAP RADIUS Active Directory Syslog integration and Web management...

Page 17: ...ng the widest variety of CD DVD USB internal and remote drives and images Unlike other solutions the Dominion KX II supports virtual media access of hard drives and remotely mounted images for added f...

Page 18: ...KX2 464 rack mountable brackets included Dual power supplies with failover auto switching power supply with power failure warning 16 32 or 64 on KX2 464 server ports Multiple user capacity 1 2 4 remot...

Page 19: ...with D2CIM VUSB CIM Absolute Mouse Synchronization with D2CIM VUSB CIM Plug and Play Web based access and management Intuitive Graphical User Interface GUI 128 bit encryption of complete KVM signal in...

Page 20: ...multi sync VGA monitor attached directly to Dominion KX II to control target servers locally directly at the rack not through the network CIMs Computer Interface Modules Dongles that connect to each...

Page 21: ...1 Rackmount Kit 2 AC Power Cords 1 Cat5 Network Cable 1 Cat5 Network Crossover Cable 1 Set of 4 Rubber Feet for desktop use 1 Application Note 1 Warranty Card User Guide The Dominion KX II User Guide...

Page 22: ...configuration and access Chapter 8 User Management User and group management passwords group based IP access control and authentication settings Chapter 9 Device Management Network settings date time...

Page 23: ...rity manageability miscellaneous and troubleshooting Related Documentation For more information about the Raritan Multi Platform Client MPC refer to the Raritan Multi Platform Client MPC and Raritan R...

Page 24: ...be entered entirely in lowercase letters The first time you start the Dominion KX II you are required to change the default password Tip For backup and business continuity purposes it is strongly rec...

Page 25: ...File Server mounting directly from KX SUSE Linux Professional 9 2 and 10 Yes Locally held ISO image Remote File Server mounting directly from KX Fedora Core 5 and above Yes Locally held ISO image Rem...

Page 26: ...ominion KX I DCIMs Dominion KX II D2CIMs V M A M IM S M Windows XP Windows 2000 Windows 2000 Server Windows 2003 Server Windows Vista P2CIM PS2 P2CIM AUSB UKVMPD UUSBPD DCIM PS2 DCIM USB DCIM USB G2 D...

Page 27: ...ote The DCIM USB G2 provides a small slide switch on the back of the CIM Move the switch to P for PC based USB target servers move the switch to S for Sun USB target servers A new switch position take...

Page 28: ...cation 36 Users Groups and Access Permissions 38 Overview This section provides a brief overview of the installation process Each step is further detailed in the remaining sections of this chapter To...

Page 29: ...ach target server s video resolution and refresh rate are supported by Dominion KX II and that the signal is non interlaced Video resolution and cable length are important factors in the ability to ob...

Page 30: ...and Intelligent mouse modes mouse parameters must be set to specific values which are described later in this manual Mouse parameters do not have to be altered for Absolute Mouse Synchronization D2CIM...

Page 31: ...target servers running Windows 2000 or XP you may wish to create a user name that will be used only for remote connections through Dominion KX II This will enable you to keep the target server s slow...

Page 32: ...fects tab c Clear the Use the following transition effect for menus and tooltips option d Click OK e Close the Control Panel Windows Vista To configure target servers running Microsoft Windows Vista 1...

Page 33: ...l Linux Settings Red Hat 9 Note The following settings are optimized for standard mouse mode only To configure target servers running Linux graphical user interface 1 Configure the mouse settings a Se...

Page 34: ...re target servers running Linux command line 1 Set the mouse acceleration to exactly 1 and set the threshold to exactly 1 Enter this command xset mouse 1 1 This should be set for execution upon login...

Page 35: ...ake sure that the alias usb controller line in the modules conf file is as follows alias usb controller usb uhci Note If there is another line using usb uhci in the etc modules conf file it needs to b...

Page 36: ...ize the mouse cursors To configure the mouse settings 1 Select Desktop Control Center The Desktop Preferences dialog opens 2 Select Mouse The Mouse Preferences dialog opens 3 Open the Motion tab 4 Wit...

Page 37: ...the Save current setup option from the dialog presented 5 Click OK Tip If you do not want to be prompted upon logout follow these procedures instead To make your settings permanent in Linux no prompt...

Page 38: ...te Aspect Ratio 1600 x 1200 75 Hz 4 3 1280 x 1024 60 75 85 Hz 5 4 1152 x 864 75 Hz 4 3 1024 x 768 60 70 75 85 Hz 4 3 800 x 600 56 60 72 75 85 Hz 4 3 720 x 400 85 Hz 9 5 640 x 480 60 72 75 85 Hz 4 3 3...

Page 39: ...red icon in the upper left hand corner Mouse Settings To configure the mouse settings Sun Solaris 10 1 1 Select Launcher Application Manager Desktop Controls opens 2 Select Mouse Style Manager The Sty...

Page 40: ...it usr sbin pgxconfig prconf 1 usr sbin pgxconfig res 1024x768x75 2 Logout or restart computer 64 bit usr sbin m64config prconf 1 usr sbin m64config res 1024x768x75 2 Logout or restart computer 32 bit...

Page 41: ...up dialog opens 2 Select the Logout Confirmation Dialog option of On This option prompts you to save your current session when you logout Apple Macintosh Settings For target servers running an Apple M...

Page 42: ...Japanese keyboard 4 Press Enter 5 Shut down the unit and power ON once again The DCIM SUSB performs a reset power cycle 6 Using MPC type something to verify that the characters are correct Step 3 Conf...

Page 43: ...ncluded AC power cord to the Dominion KX II and plug into an AC power outlet 2 For dual power failover protection attach the second included AC power cord and plug it into a different power source tha...

Page 44: ...rnet cable from the network port labeled LAN2 to an Ethernet switch hub or router Enable Automatic Failover on the Network Configuration screen refer to Network Settings LAN Interface Settings see LAN...

Page 45: ...VGA H and V sync and not composite sync 3 Attach the keyboard mouse connector of your CIM to the corresponding ports on your target server Using a standard straight through UTP Cat5 5e 6 cable connect...

Page 46: ...ord field 4 Type a new password in the New Password field retype the new password in the Confirm New Password field Passwords can be up to 64 characters in length and can consist of English alphanumer...

Page 47: ...brace Less than sign Tilde Assigning an IP Address These procedures describe how to assign an IP Address using the Network Settings page For complete information about all of the fields and the opera...

Page 48: ...on KX II unit IP address Subnet mask Gateway IP address Primary DNS server IP address and optional Secondary DNS server IP address 5 When finished click OK Your Dominion KX II unit is now network acce...

Page 49: ...ick OK Specifying Power Supply Auto detection The Dominion KX II provides dual power supplies and can automatically detect and provide notification regarding the status of these power supplies Proper...

Page 50: ...ion KX II local port users will be authenticated against the local user database or the Remote Authentication server LDAP or RADIUS configured on the Dominion KX II they will not be authenticated agai...

Page 51: ...to determine his system and port permissions The user s assigned privileges determine what type of access is allowed This is called authorization When Dominion KX II is configured for remote authentic...

Page 52: ...an encrypted format There are several forms of authentication and this one is known as local authentication All users have to be authenticated if Dominion KX II is configured for LDAP or RADIUS that...

Page 53: ...ser Management for more information about creating and editing user groups Relationship between Users and Groups Users belong to a group and groups have privileges Organizing the various users of your...

Page 54: ...User Interfaces There are several user interfaces in the Dominion KX II providing you with easy access any time anywhere These include the KX II Local Console the KX II Remote Console and the Multi P...

Page 55: ...d to the server s keyboard mouse and video ports There are many similarities among the KX II Local Console and the KX II Remote Console graphical user interfaces and where there are differences they a...

Page 56: ...opened One Virtual KVM Client is opened for each target server permitting simultaneous access when supported by the specific Dominion KX II unit for example KX2 116 supports only one remote session Th...

Page 57: ...launch in a new window that does not contain a menu bar tool bar scroll bar or address bar Work in this window and toggle to other open windows using the ALT TAB command 2 When MPC launches a device t...

Page 58: ...05 Java Runtime Environment JRE Important It is recommended that you disable Java caching and clear the Java cache Please refer to your Java documentation or the Raritan Multi Platform Client MPC and...

Page 59: ...ages o In the future do not show this warning o Always trust content from this publisher To launch the Dominion KX II Remote Console 1 Log on to any workstation with network connectivity to your Domin...

Page 60: ...lection The options are organized into various tabs After successful login the Port Access page opens listing all ports along with their status and availability You can sort by Port Number Port Name S...

Page 61: ...mote Client RRC User Guide Logging Out To quit the Dominion KX II Console Click Logout in the upper right hand corner of the page Note Logging out also closes any open Virtual KVM Client sessions Domi...

Page 62: ...KX II Remote Console are identified in the following table Option Local Console Remote Console Virtual Media 9 File Server Setup 9 Backup Restore 9 Firmware Upgrade 9 KX Diagnostics 9 Manage Favorite...

Page 63: ...ss page and provides the ability to Create and manage a list of favorite devices Quickly access frequently used devices List your Favorites either by name or IP Address Discover Dominion KX II devices...

Page 64: ...utton Favorite Devices currently displayed by IP Address Click Display by Name to toggle Manage Favorites Menu The Manage Favorites menu provides these options Favorites List Discover Devices Local Su...

Page 65: ...o add a Favorite Click the Add button The Add New Favorite on page 56 page opens To delete a Favorite Important Please exercise caution in the removal of favorites you are not prompted to confirm thei...

Page 66: ...on The Edit page opens Figure 16 Edit Favorite Information 3 Update the fields as necessary Description Type something meaningful IP Address Type the IP Address of the Dominion KX II unit Port Change...

Page 67: ...Local Subnet This option discovers the devices on your local subnet that is the subnet where the Dominion KX II Remote Console is running access these devices directly from this page or add them to y...

Page 68: ...n To use a different discovery port a Clear the Use Default Port 5000 option b Type the port number into the Discover on Port field c Click Save 1 Click Refresh The list of devices on the local subnet...

Page 69: ...n KX II units to interoperate and scale automatically The Dominion KX II Remote Console automatically discovers the Dominion KX II units in the subnet of the Dominion KX II Figure 18 Discover Devices...

Page 70: ...or IP Address for that device A new browser opens to that device Add New Favorite To add a device to your favorites list 1 Select Manage Favorites Add New Device to Favorites The Add New Favorite pag...

Page 71: ...er Port Access Page 58 Connecting to a Target Server 59 Port Action Menu 60 Switching between Target Servers 61 Disconnecting Target Servers 61 Power Controlling a Target Server 62 Chapter 5 Accessing...

Page 72: ...KX II Target servers are servers that you want to control through the Dominion KX II unit they are connected to the Dominion KX II ports at the back of the unit Note For each connection to a target se...

Page 73: ...lity The Availability can be Idle Connected Busy or Unavailable 2 Click the Port Name of the target server you want to access The Port Action Menu is displayed Refer to Port Action Menu on page 60 for...

Page 74: ...ximum of four for units with 4 remote users maximum of two for units with 2 remote users maximum of 1 for units with 1 remote user this option is visible only when one or more Virtual KVM Clients are...

Page 75: ...cess the Dominion KX II Port Access page 2 Click the Port Name of the target you want to access now The Port Action Menu is displayed 3 Select the Switch From option from the Port Action Menu The Virt...

Page 76: ...ss tab to open it The Port Access page opens 2 Click the Port Name of the appropriate target server The Port Action Menu is displayed Figure 22 Port Action Menu power options 3 Select Power Cycle A me...

Page 77: ...a Target Server To power OFF a target server 1 From the KX II Remote Console click the Port Access tab to open it The Port Access page opens 2 Click the Port Name of the appropriate target server The...

Page 78: ...hapter Overview 65 Options 66 Mouse Pointer Synchronization 67 Connection Menu 69 Keyboard Menu 73 Video Menu 77 Mouse Menu 81 Virtual Media 84 Tools Menu 84 View Menu 85 Help Menu 86 Chapter 6 Virtua...

Page 79: ...dows can be minimized maximized and moved around your computer desktop Note Refreshing your HTML browser will close the Virtual KVM Client connection so please exercise caution Figure 23 Virtual KVM C...

Page 80: ...Dominion KX II in a CC SG configuration do not use the CC SG proxy mode if you are planning to use the Multi Platform Client MPC Options Menu Tree The following diagram represents all of the menu opti...

Page 81: ...use pointer lies within the Virtual KVM Client target server window mouse movements and clicks are directly transmitted to the connected target server While in motion the client mouse pointer slightly...

Page 82: ...or more information 3 Verify that the mouse and video have been properly configured during the installation process Please refer to Chapter 3 Installation and Configuration see Installation and Config...

Page 83: ...ndwidth Connection Properties Manually adjust bandwidth related options connection speed color depth etc The parameters in the Properties Dialog can be optimized to suit your needs for different opera...

Page 84: ...the color depth transmitted to remote users in order to maximize usability in all bandwidths 15 bit RGB Color 8 bit RGB Color 4 bit Color 4 bit Gray 3 bit Gray 2 bit Gray Black and White Important For...

Page 85: ...ent 71 To cancel without saving changes Click Cancel Connection Info To obtain information about your Virtual KVM Client connection Select Connection Connection Info The Connection Info window opens F...

Page 86: ...e out Connect Time The duration of the connect time FPS The frames per second transmitted for video Horizontal Resolution The screen resolution horizontally Vertical Resolution The screen resolution v...

Page 87: ...nce to the target server To send a Ctrl Alt Delete key sequence to the target server Select Keyboard Send Ctrl Alt Delete or Click the Send Ctrl Alt Delete button from toolbar Keyboard Macros Keyboard...

Page 88: ...Macro window opens Figure 29 Add Keyboard Macro 3 Type a name in the Keyboard Macro Name field This is the name that will display on the Virtual KVM Client menu bar after the macro is created In this...

Page 89: ...this example both keys pressed must also be released 6 Review the Macro Sequence which has been automatically generated using the Keys to Press and Keys to Release selections Verify that the Macro Seq...

Page 90: ...ect the macro from the Keyboard Macros window To execute a macro 1 Select Keyboard Keyboard Macros The Keyboard Macros window opens 2 Select the macro from among those listed 3 Click Run Macro Modifyi...

Page 91: ...In addition you can manually adjust the settings using the Video Settings option Refresh Screen The Refresh Screen option forces a refresh of the video screen The entire video screen is redrawn Refres...

Page 92: ...display Note The Calibrate Color option applies to the current connection only To calibrate the color 1 Open a remote KVM connection to any target server running a graphical user interface 2 Select V...

Page 93: ...ter out the electrical interference of video output from graphics cards This feature optimizes picture quality and reduces bandwidth Higher settings transmit variant pixels only if a large color varia...

Page 94: ...Raritan Technical Support before making any changes Clock Controls how quickly video pixels are displayed across the video screen Changes made to clock settings cause the video image to stretch or sh...

Page 95: ...icon in the upper left corner of the screen To cancel with saving your changes Click Cancel Mouse Menu When controlling a target server the KX II Remote Console displays two mouse cursors one belongi...

Page 96: ...rs on screen While in single mouse mode the Synchronize Mouse option is not available there is no need to synchronize a single mouse cursor Single Mouse Cursor To enter single mouse mode Select Mouse...

Page 97: ...ork properly certain conditions must be met For additional information on Intelligent Mouse mode refer to the Raritan Multi Platform Client User Guide Appendix B Conditions for Intelligent Mouse Synch...

Page 98: ...mouse mode enable logging keyboard type and the exit target screen resolution mode hotkey To set the tools options 1 Select Tools Options The Options window opens Figure 34 Tools Options 2 Check the E...

Page 99: ...or without the toolbar display To toggle the display of the toolbar on and off Select View View Toolbar Scaling Scaling your target window allows you to view the entire contents of the target server...

Page 100: ...olution is disabled full screen mode is available only when the Dominion KX II device is not under CC SG management Help Menu About Raritan Virtual KVM Client This menu option provides version informa...

Page 101: ...88 Prerequisites for Using Virtual Media 90 Using Virtual Media 91 Opening a KVM Session 92 Connecting to Virtual Media 93 Disconnecting Virtual Media 95 File Server Setup File Server ISO Images Only...

Page 102: ...media as if it were physically connected to the target server itself Virtual media can include internal and USB mounted CD and DVD drives USB mass storage devices PC hard drives and ISO images disk i...

Page 103: ...Chapter 7 Virtual Media 89 Figure 35 Virtual Media Connection...

Page 104: ...cryption Share on page 151 must also be enabled in the Security Settings page Client PC Certain virtual media options require administrative privileges on the client PC e g drive redirection of comple...

Page 105: ...ior to attempting to access this media 2 Verify that the appropriate prerequisites see Prerequisites for Using Virtual Media on page 90 are met 3 File server ISO images only If you plan to access file...

Page 106: ...ge from the Dominion KX II Remote Console Figure 36 Open KVM Session 2 Connect to the target server from the Port Access page a Click the Port Name for the appropriate server b Select the Connect opti...

Page 107: ...evice If other users are connected to the same target server they must also close their connections to the target server To access a drive on the client computer 1 From the Virtual KVM Client select V...

Page 108: ...When the user does not have read write permission Port Permission Access is set to None or View Port Permission VM Access is set to Read Only or Deny CD ROM DVD ROM ISO Images This option mounts CD R...

Page 109: ...own lists The file servers and image paths available are those that you configured using the File Server Setup page Only items you configured using the Dominion KX II File Server Setup page will be in...

Page 110: ...cified here will become available for selection in the Remote Server ISO Image Hostname and Image drop down lists in the Map Virtual Media CD ISO Image dialog see CD ROM DVD ROM ISO Images on page 94...

Page 111: ...the Selected checkbox for all media that you want accessible as virtual media 4 Click Save All media specified here will now be available for selection in the Map Virtual Media CD ISO Image dialog To...

Page 112: ...and Authentication Settings Use To User List Display an alphabetical list of all users add modify or delete users Add New User Add new users modify user information User Group List Display an alphabet...

Page 113: ...st page opens Figure 40 User List To add a new user Click the Add button The User page opens For complete information about the User page refer to Add New User on page 100 To modify an existing user 1...

Page 114: ...of failed login attempts has exceeded the maximum login attempts set in the Security Settings screen Refer to Security Settings on page 147 for more information To add a new user 1 Open the User page...

Page 115: ...isting User Group select Individual Group from the drop down list For more information about permissions for an Individual Group refer to Set Permissions for Individual Group on page 110 6 To activate...

Page 116: ...he Group Name column heading From the User Group List page you can also add modify or delete user groups To list the user groups Select User Management User Group List The User Group List page opens F...

Page 117: ...ne the users belonging to a particular group sort the User List by User Group 1 Select a group from among those listed by checking the checkbox to the left of the Group Name 2 Click Delete 3 You are p...

Page 118: ...Add New User Group 104 Click the Add button from the User Group List page Figure 43 Group Page...

Page 119: ...users belonging to a specific group unlike the IP Access Control on page 153 list feature which applies to all access attempts to the device and takes priority 6 Click OK Note Several administrative...

Page 120: ...ne Denied access completely Deny Virtual media permission is denied altogether for the port Deny Denied access completely View View the video but not interact with the connected target server Read Onl...

Page 121: ...and delete IP access control rules on a group level basis Figure 44 Group based IP Access Control List To add append rules 1 Type the starting IP Address in the Starting IP field 2 Type the ending IP...

Page 122: ...Rule To delete a rule 1 Specify the Rule you want to delete 2 Click Delete 3 You are prompted to confirm the deletion Click OK Important ACL rules are evaluated in the order in which they are listed...

Page 123: ...xisting User Group Note All permissions are enabled and cannot be changed for the Admin group To modify an existing user group 1 From the Group page change the appropriate fields and set the appropria...

Page 124: ...Permissions on page 106 for more information 4 Set the IP ACL optional This feature limits access to the Dominion KX II device by specifying IP addresses Refer to Group based IP Access Control List s...

Page 125: ...assword field Passwords can be up to 64 characters in length and can consist of English alphanumeric characters and special characters see Valid Special Characters on page 32 4 Click OK 5 You will rec...

Page 126: ...our Dominion KX II Refer to Authentication vs Authorization for more information about how authentication and authorization operate and differ Note Even if you select remote authentication LDAP or RAD...

Page 127: ...ng the LDAP option enables the remaining LDAP fields selecting the RADIUS option enables the remaining RADIUS fields 3 If you selected Local Authentication proceed to step 6 4 If you selected LDAP rea...

Page 128: ...ng RADIUS Remote Authentication on page 118 for information about completing the fields in the RADIUS section of the Authentication Settings page 6 When finished click OK to save To cancel without sav...

Page 129: ...ort is 389 The client then sends operation requests to the server and the server sends responses in turn Reminder Microsoft Active Directory functions natively as an LDAP authentication server To use...

Page 130: ...rtificate File Consult your authentication server administrator to get the CA certificate file in Base64 encoded X 509 format for the LDAP server Use the Browse button to navigate to the certificate f...

Page 131: ...7 for information about updating the AD LDAP schema To enable your AD server on the Dominion KX II 1 Using Dominion KX II create special groups and assign proper permissions and privileges to these gr...

Page 132: ...gure 50 Authentication Settings RADIUS 1 Type the IP Address of your primary and optional secondary remote authentication servers in the Primary Radius Server and Secondary Radius Server fields respec...

Page 133: ...drop down list PAP With PAP passwords are sent as plain text PAP is not interactive the username and password are sent as one data package once a connection is established rather than the server sendi...

Page 134: ...The encrypted password Accounting Request 4 Acct Status 40 Start 1 Starts the accounting NAS Port Type 61 VIRTUAL 5 for network connections NAS Port 5 Always 0 NAS IP Address 4 The IP Address for the...

Page 135: ...ings Dominion KX II Local Console only Use To Network Customize the network configuration for the Dominion KX II Date Time Set date time time zone and Network Time Protocol NTP Event Management Settin...

Page 136: ...ns to the device all connections will be dropped when the Dominion KX II unit reboots Basically there are two ways to setup your IP Configuration None This option is the recommended option Static IP S...

Page 137: ...for more information about each of the fields 4 Update the LAN Interface Settings Refer to LAN Interface Settings on page 125 for more information about each of the fields 5 Click OK to set these con...

Page 138: ...elected for the IP auto configuration the following Network Basic Settings fields are enabled allowing you to manually set the IP configuration IP Address The default IP Address is 192 168 0 192 Subne...

Page 139: ...ets on page 28 Bandwidth Limit The default is no limit Select from among the options in the drop down list to set a maximum amount of bandwidth that can be consumed by this Dominion KX II unit for all...

Page 140: ...fails When this option is enabled the following two fields are used Ping Interval seconds Ping interval determines how often Dominion KX II checks the status of the network connection setting this to...

Page 141: ...ol on page 153 page opens Note These ACL values are global affecting the Dominion KX II unit as a whole You can also create ACLs on a group level basis For example you can create an Outsourced Vendors...

Page 142: ...o set the date and time 1 Select Device Settings Date Time The Date Time Settings page opens Figure 55 Date Time Settings 2 Select your time zone from the Time Zone drop down list 3 Select the method...

Page 143: ...nchronize with NTP Server option a Enter the IP address of the Primary Time server b Optional Enter the IP address of the Secondary Time server 6 Click OK Event Management The Dominion KX II Event Man...

Page 144: ...and their functions Dominion KX II offers SNMP Agent support through Event Management Refer to SNMP Agent Configuration on page 133 and SNMP Trap Configuration on page 133 for more information about S...

Page 145: ...identify the group an SNMP device or agent may belong to more than one SNMP community 5 Specify whether the community is Read Only or Read Write using the Type drop down list 6 Configure up to five SN...

Page 146: ...enerated if the SNMP Logging Enabled option is checked Syslog events will only be generated if the Enable Syslog Forwarding option is checked Both of these options are in the Event Management Settings...

Page 147: ...NMP connection between the Dominion KX II SNMP Agent and an SNMP manager SNMP Trap Configuration SNMP provides the ability to send traps or notifications to advise an administrator when one or more co...

Page 148: ...s conflict was resolved networkFailure An Ethernet interface of the product can no longer communicate over the network networkParameterChanged A change has been made to the network parameters password...

Page 149: ...serLogin A user has successfully logged into the Dominion KX II and has been authenticated userLogout A user has successfully logged out of the Dominion KX II properly userModified A user account has...

Page 150: ...wer supply fail For example if power supply number one fails the power LED at the front of the unit will turn red To enable automatic detection for the power supplies in use 1 Select Device Settings P...

Page 151: ...red To turn off the automatic detection Clear the checkbox for the appropriate power supply To reset to factory defaults Click the Reset To Defaults button To cancel without saving changes Click the...

Page 152: ...II physical port To change a port configuration 1 Select Device Settings Port Configuration The Port Configuration Page opens Figure 60 Port Configuration This page is initially displayed in port numb...

Page 153: ...M D2CIM VUSB 2 Click the Port Name for the port you want to edit For KVM ports the Port page see Associate Target Servers to Outlets Port Page on page 143 is opened From this page you can name the por...

Page 154: ...45 of the D2CIM PWR to the female RJ 45 connector on the power strip 2 Connect the female RJ 45 connector of the D2CIM PWR to any of the available female system port connectors on the Dominion KX II...

Page 155: ...power strip The Type and the Name fields are pre populated please note that the CIM Type cannot be changed The following information is displayed for each outlet in the power strip outlet Number Name...

Page 156: ...another name to the outlet To name the power strip and outlets Note CommandCenter Service Gateway does not recognize power strip names containing spaces 1 Change the Name of the power strip to somethi...

Page 157: ...erver settings if you are using the D2CIM VUSB CIM see Note for D2CIM VUSB CIM Usage on page 145 The CIM Type and the Port Name fields are pre populated please note that the CIM type cannot be changed...

Page 158: ...is displayed To change the port name 1 Type something descriptive in the Name field For example the name of the target server would be a likely candidate The name can be up to 32 alphanumeric characte...

Page 159: ...a Mac target server check the Absolute mouse scaling for MAC server option Certain BIOS do not support USB high speed capabilities and the attempt to auto negotiate does not work If you are experienc...

Page 160: ...P Access Control Use To Security Settings Configure security settings for login limitations strong passwords user blocking and encryption share IP Access Control Control access to your Dominion KX II...

Page 161: ...rver certificates are self signed Java applet certificates are signed by a VeriSign certificate Encryption guarantees that your information is safe from eavesdropping and these certificates ensure tha...

Page 162: ...from several client workstations simultaneously Enable Password Aging When checked all users are required to change their passwords periodically based on the number of days specified in Password Agin...

Page 163: ...ch When checked strong password rules are enforced Users with passwords not meeting strong password criteria will automatically be required to change their password on their next login When cleared on...

Page 164: ...e specified number of unsuccessful login attempts The three options are mutually exclusive Disabled The default option users are not blocked regardless of the number of times they fail authentication...

Page 165: ...ser ID option is selected The valid range is 1 10 Figure 67 Security Settings User Blocking When a user ID is deactivated after the specified number of failed attempts the administrator must change th...

Page 166: ...ard AES is a National Institute of Standards and Technology specification for the encryption of electronic data 128 is the key length When AES 128 is specified please be certain that your browser supp...

Page 167: ...is reset to raritan Disable All Local Resets No reset action is taken Checking Your Browser for AES Encryption If you do not know if your browser uses AES check with the browser manufacturer or navig...

Page 168: ...trol checkbox to enable IP access control and the remaining fields on the page 3 Select the Default Policy This is the action taken for IP addresses that are not within the ranges you specify Accept I...

Page 169: ...e new rule is placed ahead of the exiting rule and all rules are moved down in the list To replace a rule 1 Specify the Rule you want to replace 2 Type the IP Address and subnet mask in the IP Mask fi...

Page 170: ...II Local Console only Upgrade Report and Reboot Maintenance Features Local Remote Console Use To Local Remote Audit Log View Dominion Dominion KX II events sorted by date and time 9 9 Device Informati...

Page 171: ...on about the latest upgrade performed 9 9 Reboot Reboot the Dominion Dominion KX II unit 9 9 Audit Log A log is created of Dominion KX II system events To view the audit log for your Dominion KX II un...

Page 172: ...nagement page Description Detailed description of the event To save the Audit Log Note Saving the Audit Log is available only on the Dominion KX II Remote Console not on the Local Console 1 Click the...

Page 173: ...view information about your Dominion KX II and CIMs Select Maintenance Device Information The Device Information page opens Figure 72 Device Information The following information is provided about th...

Page 174: ...up the user configuration settings from the Dominion KX II in use and restoring those configurations to the new Dominion KX II You can also setup one Dominion KX II and copy its configuration to mult...

Page 175: ...want to run Full Restore A complete restore of the entire system generally used for traditional backup and restore purposes Protected Restore Everything is restored except device specific information...

Page 176: ...IM Firmware Upgrade The CIM Upgrade from KX Flash page opens Figure 74 CIM Upgrade from KX Flash 2 The Port number Name Type Current CIM Version and Upgrade CIM Version are displayed for easy identifi...

Page 177: ...ion file RFP found on the Raritan Firmware Upgrades Web page http www raritan com support firmwareupgrades and download the file 2 Unzip the file Please read all instructions included in the firmware...

Page 178: ...de Review Note At this point connected users are logged out and new login attempts are blocked 7 Click Upgrade Please wait for the upgrade to complete Status information and progress bars are displaye...

Page 179: ...Upgrade Report page opens Figure 78 Upgrade Report Information is provided about the last Dominion KX II upgrade that was run the final status of that upgrade and the firmware version Information is a...

Page 180: ...n KX II 1 Select Maintenance Reboot The Reboot page opens Figure 79 Reboot 2 Click the Reboot button You are prompted to confirm the action Figure 80 Reboot Confirmation 3 Click Yes to proceed with th...

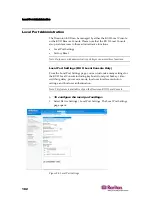
Page 181: ...commands The following Diagnostics menu options help you debug and configure the network settings Network Interface Network Statistics Ping Host Trace Route to Host The KX Diagnostics option is inten...

Page 182: ...ation about your network interface Select Diagnostics Network Interface The Network Interface page opens Figure 81 Network Interface The following information is displayed Whether the Ethernet interfa...

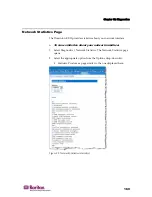
Page 183: ...twork interface To view statistics about your network interface 1 Select Diagnostics Network Statistics The Network Statistics page opens 2 Select the appropriate option from the Options drop down lis...

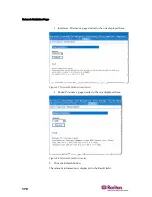
Page 184: ...ge similar to the one displayed here Figure 83 Network Statistics interfaces Route Produces a page similar to the one displayed here Figure 84 Network Statistics route 3 Click the Refresh button The r...

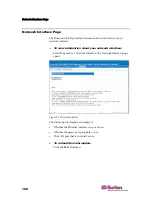
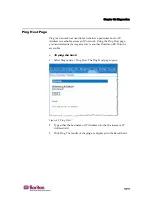
Page 185: ...Using the Ping Host page you can determine if a target server or another Dominion KX II unit is accessible To ping the host 1 Select Diagnostics Ping Host The Ping Host page opens Figure 85 Ping Host...

Page 186: ...nostics Trace Route to Host The Trace Route to Host page opens Figure 86 Trace Route to Host 2 Type either the Hostname or IP Address into the Hostname or IP Address field 3 Select the Maximum Hops fr...

Page 187: ...te diagnostic functions Diagnostics Scripts Execute a special script provided by Raritan Technical Support during a critical error debugging session The script is uploaded to the unit and executed Onc...

Page 188: ...Dominion KX II e Once Raritan Technical Support has completed their testing return UDP port 21 to its original state 3 To execute a diagnostics script file emailed to you from Raritan Technical Suppor...

Page 189: ...ick the Save to File button The File Download dialog opens Figure 89 File Download b Click Save The Save As dialog opens c Navigate to the desired directory and click Save d Email this file as directe...

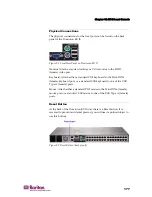
Page 190: ...connected servers the performance is as if you were directly connected to the server s keyboard mouse and video ports The KX II Local Console provides the same administrative functionality as the Domi...

Page 191: ...Attach either a standard PS 2 keyboard to the Mini DIN6 female keyboard port or a standard USB keyboard to one of the USB Type A female ports Mouse Attach either a standard PS 2 mouse to the Mini DIN6...

Page 192: ...page 157 To reset the unit 1 Power off the Dominion KX II unit 2 Use a pointed object to press and hold the reset button 3 While continuing to hold the reset button power the Dominion KX II unit back...

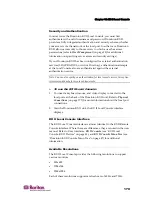
Page 193: ...entication for local console access this option is recommended only for secure environments To use the KX II Local Console 1 You need a keyboard mouse and video display connected to the local ports at...

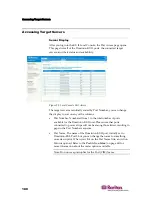
Page 194: ...of the columns Port Number Numbered from 1 to the total number of ports available for the Dominion KX II unit Please note that ports connected to power strips will not be among those listed resulting...

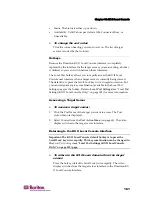
Page 195: ...tion available in the Local Port Settings page as the hotkey Refer to Local Port Settings see Local Port Settings KX II Local Console Only on page 182 for more information Accessing a Target Server To...

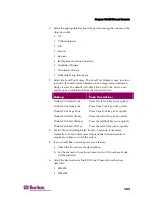
Page 196: ...an access these functions Local Port Settings KX II Local Console Only From the Local Port Settings page you can customize many settings for the KX II Local Console including keyboard local port hotke...

Page 197: ...s Scroll Lock key twice quickly Double Click Num Lock Press Num Lock key twice quickly Double Click Caps Lock Press Caps Lock key twice quickly Double Click Left Alt key Press the left Alt key twice q...

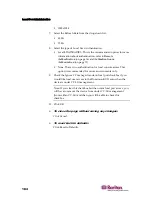
Page 198: ...n for local console access This option is recommended for secure environments only 9 Check the Ignore CC managed mode on local port checkbox if you would like local user access to the Dominion KX II e...

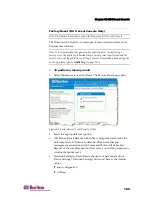
Page 199: ...the audit log please refer to Audit Log on page 157 To perform a factory reset 1 Select Maintenance Factory Reset The Factory Reset page opens Figure 95 Factory Reset Local Console Only 2 Select the...

Page 200: ...ace Speed Duplex Enable Automatic Failover Ping Interval seconds Timeout Seconds You will be prompted to confirm this action because all network settings will be permanently lost 1 Click Reset to cont...

Page 201: ...Dominion KX II device is under CommandCenter Secure Gateway control and you attempt to access the device directly using the Dominion KX II Remote Console the following message is displayed after entry...

Page 202: ...k you can release the Dominion KX II from CC SG control in order to access the device This is accomplished by using the CC Unmanage feature Note Maintenance permission is required to use this feature...

Page 203: ...nage 189 2 Click the Really Unmanage button A message is displayed confirming that the device is no longer under CC management Figure 99 Device Removed from CC Management 3 Click OK The Dominion KX II...

Page 204: ...k Speed Settings 195 Environmental Requirements Operating Temperature 0 40 32 104 Humidity 20 85 RH Altitude N A Vibration 5 55 5 HZ 0 38mm 1 minutes per cycle 30 minutes for each axis X Y Z Shock N A...

Page 205: ...ct Dimensions WxDxH 1 75 x 17 3 x 11 4 44mm x 439mm x 290mm 1 75 x 17 3 x 11 4 44mm x 439mm x 290mm 1 75 x 17 3 x 11 4 44mm x 439mm x 290mm 1 75 x 17 3 x 11 4 44mm x 439mm x 290mm 1 75 x 17 3 x 11 4 4...

Page 206: ...2CIM VUSB DCIM PS2 DCIM USB DCIM SUSB Line Item Description Dominion KX II Computer Interface Module USB Port with Virtual Media Dominion KX I II Computer Interface Module PS 2 Port Dominion KX I II C...

Page 207: ...2 lbs 0 2 lbs 6 4 lb 12 8 lb Product Dimensions WxDxH 1 3 x 3 0 x 0 6 1 3 x 3 0 x 0 6 1 3 x 3 0 x 0 6 32 1 3 x 3 0 x 0 6 64 Shipping Weight 0 2 lbs 0 2 lbs 8 01 lb 18 13 lb Shipping Dimensions WxDxH 7...

Page 208: ...to configure this setting refer to Network Settings on page 122 SNTP Time Server on Configurable UDP Port 123 optional Dominion KX II offers the optional capability to synchronize its internal clock...

Page 209: ...or environmental conditions and user expectations The following table summarizes the maximum target server distance for various video resolutions and refresh rates Video Resolution Refresh Rate Maximu...

Page 210: ...hernet specification these should be no communication however note that the Dominion KX II behavior deviates from expected behavior Note For reliable network communication configure the Dominion KX II...

Page 211: ...ns of the user s group Your remote LDAP server can provide these user group names by returning an attribute named as follows rciusergroup attribute type string This may require a schema extension on y...

Page 212: ...Directory Schema root node in the left pane of the window and then click Operations Master The Change Schema Master dialog opens Figure 100 Change Schema Master 2 Optional Check the checkbox before T...

Page 213: ...ld 5 Type rciusergroup in the LDAP Display Name field 6 Type 1 3 6 1 4 1 13742 50 in the Unique x5000 Object ID field 7 Type a meaningful description in the Description field 8 Click on the Syntax dro...

Page 214: ...gure 102 Adding the Attributes 3 Select Properties from the menu The user Properties window appears 4 Click on the Attributes tab to open it Figure 103 Adding the Attributes to the Class 5 Click Add 6...

Page 215: ...soft available on the Windows 2003 server installation CD These scripts are loaded onto your system with a Microsoft Windows 2003 installation ADSI Active Directory Service Interface acts as a low lev...

Page 216: ...the left pane of the window select the CN Users folder Figure 105 ADSI Edit CN Users 7 Locate the user name whose properties you want to adjust in the right pane Right click on the user name and sele...

Page 217: ...Appendix B Updating the LDAP Schema 203 9 Select rciusergroup from the Attributes list Figure 106 Administrator Properties attribute editor...

Page 218: ...204 10 Click Edit The String Attribute Editor dialog opens Figure 107 User Properties 11 Type the user group created in Dominion Dominion KX II in the Edit Attribute field Figure 108 Edit Attribute ad...

Page 219: ...de link in the KX II Remote Console interface Non US Keyboards French Keyboard Caret Symbol Linux Clients only The Virtual KVM Client and the Multi Platform Client MPC do not process the key combinati...

Page 220: ...cter displaying twice when using French keyboards with Windows XP clients Note This does not occur with Linux clients Numeric Keypad From the Virtual KVM Client and the Multi Platform Client the numer...

Page 221: ...he UK keyboard Alt Gr 4 which is the Euro symbol will only generate a keyTyped followed by a keyReleased event for that value without a keyPressed event Java 1 6 improves upon this by filling in the k...

Page 222: ...ointer Synchronization Fedora When connected in dual mouse mode to a target server running Fedora the target and local mouse pointers may lose synchronization after some time To re synchronize the mou...

Page 223: ...k with the Java plugin SUSE VESA Video Modes The SuSE X org configuration tool SaX2 generates video modes using modeline entries in the X org configuration file These video modes do not correspond exa...

Page 224: ...BIOS when a virtual media session is active unless the Use Full Speed for Virtual Media CIM option is enabled from the Port page Virtual Media not Refreshed after Files Added After a virtual media dr...

Page 225: ...ommandCenter Secure Gateway CC SG in proxy mode the Virtual KVM Client version is unknown In the About Raritan Virtual KVM Client dialog the version is displayed as Version Unknown Proxy Mode and MPC...

Page 226: ...Universal Virtual Media 217 Ethernet and IP Networking 218 Servers 222 Installation 224 Local Port 226 Power Control 228 Scalability 229 Computer Interface Modules CIMs 230 Security 231 Manageability...

Page 227: ...e such as pcAnywhere Windows Terminal Services Remote Desktop VNC etc However because Dominion KX II is not a software but a hardware solution it s much more powerful OS and hardware independent Domin...

Page 228: ...sly Will my existing KX I CIMs work with the Dominion KX II switch Yes existing KX I CIMs will work with the Dominion KX II switch In addition select Paragon CIMs will work with the KX II This provide...

Page 229: ...Can two people access the same server one remotely and one from the local port Yes the local port is completely independent of the remote ports The local port can access the same server using the PC S...

Page 230: ...odem download speed typical 8 second s How do I access servers connected to Dominion KX II if the network ever becomes unavailable Dominion KX II offers a dedicated modem port for attaching an externa...

Page 231: ...onsequently triggers the action for this key combination in the active window the client PC Universal Virtual Media Question Answer What Dominion KX II models support virtual media All Dominion KX II...

Page 232: ...es Dominion KX II features dual gigabit Ethernet ports to provide redundant failover capabilities Should the primary Ethernet port or the switch router to which it is connected fail Dominion KX II wil...

Page 233: ...environment They can be increased to provide even higher quality video color depth or decreased to optimize for low speed connections As a general rule a conservative estimate for bandwidth utilizati...

Page 234: ...with a VPN Yes Dominion KX II uses standard Internet Protocol IP technologies from Layer 1 through Layer 4 Traffic can be easily tunneled through standard VPNs How many TCP ports must be open on my fi...

Page 235: ...a fixed IP address I m having problems connecting to the Dominion KX II over my IP network What could be the problem The Dominion KX II relies on your LAN WAN network Some possible problems include E...

Page 236: ...ion will be activated and fully functional Do I need to install a Web server such as Microsoft Internet Information Services IIS in order to use Dominion KX II s Web browser capability No Dominion KX...

Page 237: ...he Dominion KX II box The following is included a Dominion KX II unit b Quick Setup Guide c standard 19 rack mount brackets d User manual CD ROM e Network cable f Crossover cable g Localized AC Line C...

Page 238: ...Cat5e or Cat6 How far can my servers be from Dominion KX II In general servers can be up to 150 feet 45 m away from Dominion KX II depending on the type of server Please refer to the Raritan Web site...

Page 239: ...o all remote clients and the optional CommandCenter Secure Gateway management appliance How do I connect a serially controlled RS 232 device to Dominion KX II such as a Cisco router switch or a headle...

Page 240: ...KX II s at the rack access goes way beyond conventional OSDs Featuring the industry s first browser based interface for at the rack access KX II s local port uses the same interface for local and remo...

Page 241: ...s all remote clients and external management servers in real time If I use Dominion KX II s remote administration tools to change the name of a connected server does that change propagate to the local...

Page 242: ...e configuration step just right click on the server name to power on off or recycle a hung server Note that a hard reboot provides the physical equivalent of unplugging the server from the AC power li...

Page 243: ...If deployment of Raritan s CC SG management appliance isn t an option multiple Dominion KX II units still interoperate and scale automatically The KX II s remote user interface and the Multi Platform...

Page 244: ...purchase Paragon CIMs for use with Dominion KX II Also note that when connected to Dominion KX II Paragon CIMs transmit video at a distance of up to 150 feet the same as Dominion KX II CIMs not at 100...

Page 245: ...llows encryption of keyboard mouse and video data How does Dominion KX II integrate with external authentication servers such as Active Directory RADIUS or LDAP Through a very simple configuration Dom...

Page 246: ...t to Auto what level of encryption is achieved The encryption level that is auto negotiated is dependent on the browser in use Browser Encryption Level Internet Explorer 6 RC4 Internet Explorer 7 AES...

Page 247: ...er the network or through a Web browser What auditing or logging does Dominion KX II offer For complete accountability Dominion KX II logs all major user events with a date and time stamp For instance...

Page 248: ...ase However for the highest level of security the KX II forces the administrator to change the Dominion KX II default administrative username and password when the unit is first booted up I changed an...

Page 249: ...ominion KX II using another Firefox browser session from the same client I am logged out of both KX IIs is this correct behavior Yes to access two different Dominion KX II devices either close the fir...

Page 250: ......

Page 251: ...e Keyboard Layout Code Sun Targets 28 130 Changing the Default Password 32 48 Checking Your Browser for AES Encryption 158 159 CIM Upgrade 168 CIMs 220 Computer Interface Modules CIMs 201 240 Conditio...

Page 252: ...g RADIUS Remote Authentication 40 119 123 Informational Notes 46 215 Installation 234 Installation and Configuration 14 72 Intelligent 16 87 Introduction 1 IP Access Control 109 111 132 159 J Java Run...

Page 253: ...l Connections 185 187 Physical Specifications 200 Ping Host Page 178 Port Access Page 61 Port Action Menu 62 63 188 189 Port Configuration Page 144 147 149 Power Control 146 238 Power Controlling a Ta...

Page 254: ...stems and CIMs Target Servers 12 Supported Protocols 38 Supported Video Resolutions 15 SUSE Linux 10 1 Settings 22 SUSE VESA Video Modes 219 Switching between Target Servers 64 Synchronize Mouse 85 Sy...

Page 255: ...Index 241 W Windows 2000 Settings 18 Windows 3 Button Mouse on Linux Targets 220 Windows Vista 18 Windows XP Windows 2003 Settings 17...

Page 256: ......
Page 257: ...h europe raritan com GuangZhou Monday Friday 9 a m 6 p m local time Phone 86 20 8755 5561 Japan Monday Friday 9 30 a m 5 30 p m local time Phone 81 3 3523 5994 Email support japan raritan com Shanghai...

Reviews: