background image

- 68 - 


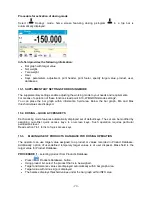
Procedure for activation of checkweighing mode 

Select <

  Checkweighing> mode, home screen featuring checkweighing pictogram 

  in a top 

bar is automatically displayed. 


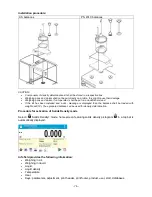
Info field provides the following information: 


Bar graph with checkweighing thresholds 


Gross weight, 


Tare weight, 


User, 


Keys: parameters, adjustment, print header, print footer, specify checkweighing thresholds, 
product, user, databases. 


14.1.  SUPPLEMENTARY SETTINGS FOR CHECKWEIGHING MODE 

The supplementary settings enable adjusting the working mode to your needs and requirements.  
For means of operation of these functions read point 8.10 „WEIGHING mode settings”. 
You  can place the  bar graph  within information field area. Below the bar graph, Min and Max 
threshold values are displayed. 
 

14.2. CHECKWEIGHING – QUICK ACCESS KEYS 

Each working mode features automatically displayed set of default keys. The set can be modified by 
assigning out-of-list quick access keys to on-screen keys. Such operation requires particular 
permissions level.  
Read section 7.6.1 for list of quick access keys. 
 

14.3. MAKING USE OF CHECKWEIGHOING THRESHOLDS  

In order to use checkweighing thresholds: 


Select product <

> with Min and Max threshold declared  


Enter numerical value for the thresholds using <

> or <

> or <

> button, in this case 

thresholds do not refer to any product. 


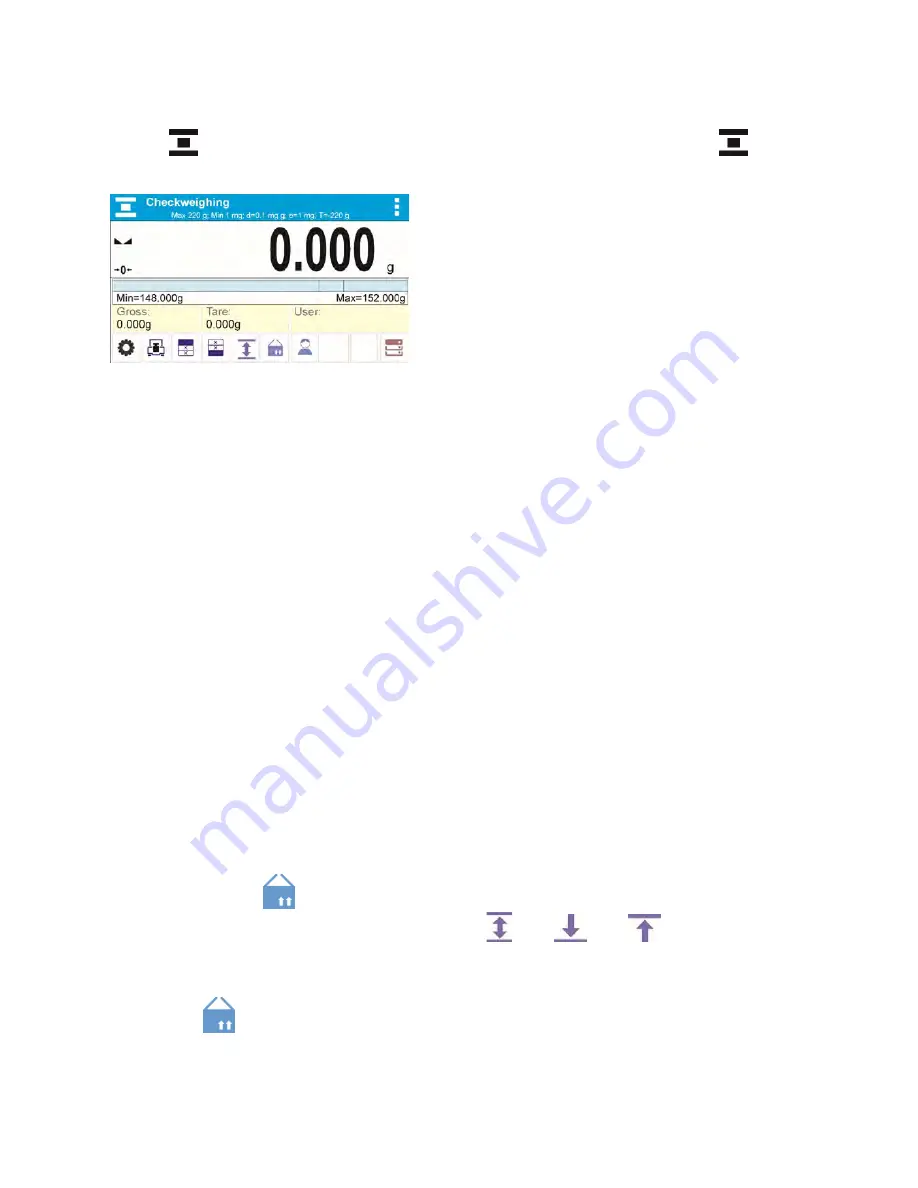
PROCEDURE 1

 – selecting product from Products Database  


Press <

 Products Database> key. 


Using product list, select the product that is to be weighed. 


The balance displays threshold values under the bar graph within INFO area. Bar graph colour 
corresponds to the current status of weight: 

  Yellow colour: weight value below Min threshold value 

Summary of Contents for AS X2 Series

Page 1: ...X2 Synergy SERIES AS X2 Analytical Balances PS X2 Precision Balances APP X2 Precision Balances WLC X2 Precision Balances USER MANUAL IMMU 16 18 07 16 EN www radwag com...

Page 2: ...at you are bound to achieve success You have purchased a device that has been designed and manufactured to give you years of service Congratulations and thank you for selecting RADWAG product JULY 201...

Page 3: ...Device 17 3 6 Temperature Stabilisation Time 17 3 7 Connecting Additional Hardware 17 4 Start Up 18 5 Keyboard Buttons Functions 18 6 Weighing Mode Home Screen 19 7 Operating Balance Menu 19 7 1 Enter...

Page 4: ...3 Parameters Related to a Working Mode 62 13 Parts Counting 63 13 1 Supplementary Settings for Parts Counting Mode 63 13 2 Parts Counting Quick Access Keys 64 13 3 Setting Reference Mass by Entering D...

Page 5: ...mulations 87 22 1 Supplementary Settings for Formulations Mode 88 22 2 Formulations Quick Access Keys 88 22 3 Adding Formulation to Formulations Database 88 22 4 Using Formulations for Weighing 90 22...

Page 6: ...116 27 Communication Protocol 118 27 1 List of Commands 118 27 2 Response Format 119 27 3 Manual Printout Automatic Printout 129 28 Peripheral Devices 130 29 Error Messages 130 30 Additional Equipment...

Page 7: ...7 1 GENERAL INFORMATION 1 1 DIMENSIONS AS X2 series PS X2 series...

Page 8: ...8 APP X2 series WLC X2 series...

Page 9: ...cable is a standard network cable terminated with RJ45 on both ends Scale computer cable RS232 Scale printer cable CITIZEN EPSON 1 4 INTENDED USE X2 series balances are designed to provide accurate me...

Page 10: ...lized contrary to its intended use balance defects if service claims removing or destroying protective stickers which secure the balance s housing against unauthorized access mechanical defects or def...

Page 11: ...free of vibrations and shakes free of air movement and dust Ambient air temperature should not exceed the range of 10 C 40 C Ambient relative humidity should not exceed 80 During balance operation amb...

Page 12: ...lock should your balance be transported in the future Install components following the above diagram bottom insert 2 centring ring embossment side up 3 weighing pan 4 draft shield 5 CAUTION AS balanc...

Page 13: ...2 weighing pans which can be used in turns It must be remembered that balance activation is only possible with one weighing pan assembled at a time Attempt of activating the balance with two weighing...

Page 14: ...Be careful while detaching the components so as not to cause any damages to the balance mechanism 2 Using handheld vacuum cleaner remove dust from the weighing chamber 3 Using a dry flannel cloth clea...

Page 15: ...ess rinse the pane using running water first distilled next Rinsing is a necessary cleaning process stage allowing to remove remaining soap detergents and other cleansers from the panes prior their re...

Page 16: ...to use microfibre cloth While polishing the surface use circular movements Use clean dry cloth AS series sequence of actions Undo and remove top pane protection next slide the pane out of guide bar Re...

Page 17: ...he program number appears the indication gets to ZERO displayed reading unit depends on the balance During the balance start the test of an internal mass adjustment mechanism occurs single location an...

Page 18: ...o carry out the logging procedure for detailed logging procedure read later sections of this user manual CAUTION Remember to start the balance with no load on the weighing pan 5 KEYBOARD BUTTONS FUNCT...

Page 19: ...t Section comprising supplementary information on currently performed operations and function buttons CAUTION Data and buttons contained in the workspace are freely configurable For detailed informati...

Page 20: ...ment procedure respectively a particular window with parameters or list of appropriate settings is displayed 7 2 SCREEN SCROLLING There are two methods for scrolling the screen of parameters window Th...

Page 21: ...a USB flash drive Press to add a new record to a database Press to select variables out of the list for a printout Press to search for a particular record in a database Press to move exit one level u...

Page 22: ...lds refer to section 7 6 of this user manual 7 5 RETURN TO WEIGHING MODE Introduced modifications are automatically saved in menu on return to the weighing mode press soft key repeatedly keep pressing...

Page 23: ...is likewise as for label the only difference is that for the text field it is the user who specifies which function is to be assigned to it The function does not have to refer to displayed informatio...

Page 24: ...can only take such area that holds no other widgets yet The software automatically detects which widgets can be applied for a particular area this is conditioned by widget dimensions 4 It is possible...

Page 25: ...elds next 7 6 1 Quick Access Keys You can define quick access keys the keys are displayed underneath weight indication section Quick access key provides direct access to the most frequently operated f...

Page 26: ...26 Enter particular key setup Select the key The selected key is displayed automatically on a home screen...

Page 27: ...ll modes Databases All modes User All modes Product All modes Customer All modes Packaging All modes Adjustment All modes Variable 1 All modes Variable 2 All modes Variable 3 All modes Hide show last...

Page 28: ...ercent Weighing mode exclusively Start Solids and Liquids Density modes and Formulations mode Results Statistics mode exclusively Finish Statistics mode exclusively Finish Peak Hold mode exclusively F...

Page 29: ...of information type available for the selected label Select data to be displayed The selected label is displayed automatically on a home screen Information type Label information type Modes featuring...

Page 30: ...nation mode exclusively Temperature Solids Density Determination mode exclusively Liquid density Solids Density Determination mode exclusively Sinker volume Liquids Density Determination mode exclusiv...

Page 31: ...ormation to be displayed in the first and the second line of the field plus you can decide on a function that is to be assigned to a particular text field Upon completed setup operation the selected t...

Page 32: ...is to be placed Select text field and its size Text field settings window opens Define particular text field parameters Line 1 e g text Time Line 2 e g variable 3 variable for current time displaying...

Page 33: ...e bar graph presents in a graphic form how much of balance capacity is in use Additionally it shows Min and Max thresholds positions for Checkweighing mode and for Dosing mode it shows target weight v...

Page 34: ...ion off 8 WEIGHING OPERATION Load a weighed object on a balance weighing pan On stabilization of weighing result indicated by stability marker visible on the left side of balance display read the meas...

Page 35: ...f its maximum capacity Load the weighing pan steadily avoiding shocks YES NO Place weighed loads centrally on the weighing pan YES NO Avoid side loading in particular side shocks NO NO 8 2 LOGGING Ful...

Page 36: ...editing of parameters of the following submenus Readout Working modes Communication Peripherals Misc Access to Date and Time submenu denied The advanced operator can start and carry out all weighing p...

Page 37: ...are which units shall be accessible while selecting a temporary unit by means of key Units with parameter value set to Yes option are available for selection in particular working modes i e modes faci...

Page 38: ...r determining new zero point recognized by the balance as precise zero Zeroing is possible only for stable status of display indication CAUTION Zeroing the display indication is possible only within 2...

Page 39: ...negative values is impossible On taring negative values the balance responds with an error message In such case zero balance indication and repeat taring procedure Manual tare determination Procedure...

Page 40: ...lay indicates selected tare value with a minus sign or While in optional mode press button if displayed on the screen Window with a list of tare values recorded into tare database opens Select the pac...

Page 41: ...ss to it Depending on the filter the weighing time is shorter V FAST and FAST or longer SLOW and V SLOW CAUTION The higher filter level the longer weighing time Value release Since ambient conditions...

Page 42: ...balance function For available functions list refer to point 7 6 1 Upon completed configuration procedure the software runs function assigned to a particular proximity sensor having detected motion a...

Page 43: ...e measurement and zero marker are shown on a display Deposit load the balance sends the first stable measurement to the printer port Remove the load from the pan Next measurement is possible when the...

Page 44: ...f tolerance low or out of tolerance high with this option on the software disables confirmation of the measurement that is out of tolerance low Warn select to make the balance display respective picto...

Page 45: ...grams informing on mass whether it is out of tolerance low or out of tolerance high with this option on the software disables confirmation of the measurement that is out of tolerance low Warn select t...

Page 46: ...RANGE BALANCES AND WEIGHING refers PS 200 2000 X2 and WLC 1 10 X2 balances An example for PS 200 2000 X2 balance PS 200 2000 X2 balance is a dual range weighing device with readability for I weighing...

Page 47: ...Language parameter enables selecting the language of the balance menu descriptions Available languages POLISH ENGLISH RUSSIAN SPANISH FRENCH GERMAN ITALIAN CZECH CHINESE ARABIC TURKISH KOREAN Permiss...

Page 48: ...rs sensitivity adjustment Proximity sensors sensitivity parameter specifies distance within which the sensors can be operated its scale is expressed in percent and it ranges from 0 to 100 For lower pe...

Page 49: ...any key on the balance keypad The display remains blank also when balance menu is entered Auto switch off AUTO OFF parameter enables automatic display deactivation the parameter functioning is likewis...

Page 50: ...ults provide balance data calculated error for Max capacity and value of repeatability of indication expressed as standard deviation An exemplary report Autotest GLP Report Balance type PS 3000 R2 Bal...

Page 51: ...utomatic adjustment Manual internal adjustment Adjustment with an external weight of declared mass which cannot be modified or of any mass but not lower than 30 of maximum range CAUTION In case of ver...

Page 52: ...th an optional standard of mass ranging between 0 3 Max and Max User adjustment and external adjustment procedures are likewise with one exception before user adjustment start a message box for enteri...

Page 53: ...COM1 Report content is declared in PRINTOUTS ADJUSTMENT REPORT menu Instruction on how to declare settings for this option is to be found further down this manual read sections referring to printouts...

Page 54: ...E Option enables providing an area for the signature of a user performing the adjustment Procedure for naming the project For the parameters described above one of these values must be selected NO do...

Page 55: ...ODUCT Option enables printing out the name of a currently selected product Header GLP printout Footer CUSTOMER Option enables printing out the name of a currently selected Customer Header GLP printout...

Page 56: ...declared for the adjustment report printout see sec 14 1 of this user manual Header GLP printout Footer DASHES Option enables printing out separating dashes Header Footer EMPTY LINE Option enables pr...

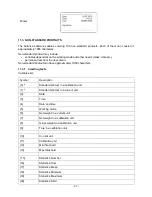
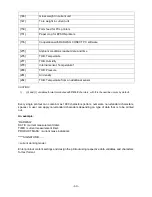
Page 57: ...roximately 1900 characters 11 3 1 Inserting texts Variables list Symbol Description 0 1 Standard printout in a calibration unit 1 1 Standard printout in a current unit 2 Date 3 Time 4 Date and time 5...

Page 58: ...duct Code 52 Product EAN code 53 Product Mass 54 Product Tare 56 Product Minimum 57 Product Maximum 66 Product Tolerance 70 Variable 1 71 Variable 2 72 Variable 3 75 User Name 76 User Code 77 User Acc...

Page 59: ...nsor CAUTION 1 0 and 1 variables format terminates with CR LF charcters with this the newline occurs by default Every single printout can contain max 1900 characters letters numerals non standard char...

Page 60: ...ce this enables easier and quicker editing of the printouts Willing to insert any text it is necessary to select a respective menu option and using the keyboard type the text 11 4 VARIABLES Variable i...

Page 61: ...ard reference Density of solids Means of operation based on Archimedes principle a balance determines density of solids The mode requires an optional density determination kit Density of liquids Means...

Page 62: ...currently operated one press pictogram of currently used working mode the pictogram is located in the top left hand corner wait for the available working modes list to be displayed select the working...

Page 63: ...ode Select Parts counting mode home screen featuring parts counting pictogram in a top bar is automatically displayed Info field provides the following information Gross weight Tare weight Net weight...

Page 64: ...tolerance of the total value 4 Measurement result has to be stabilised For means of other functions operation read section 8 10 WEIGHING mode settings 13 2 PARTS COUNTING QUICK ACCESS KEYS Each worki...

Page 65: ...S BY DETERMINING PART MASS Procedure Put a container on a weighing pan tare its mass Press Determine part mass button Reference quantity editing window featuring an on screen keyboard is displayed Ent...

Page 66: ...met the balance displays a message Sample mass too low Mass of a single part must not be lower than 0 1 of balance reading unit Unless this condition is met the balance displays a message Single part...

Page 67: ...parts to be counted on the weighing pan the balance displays totalized parts In course of calculation ACAI function pictogram is displayed providing the function is active Acquire mass of a single par...

Page 68: ...hreshold values are displayed 14 2 CHECKWEIGHING QUICK ACCESS KEYS Each working mode features automatically displayed set of default keys The set can be modified by assigning out of list quick access...

Page 69: ...ues CAUTION Max threshold value has to be greater than Min threshold value For thresholds value modification the following buttons are used Min threshold value modification enter the new value using a...

Page 70: ...K ACCESS KEYS Each working mode features automatically displayed set of default keys The set can be modified by assigning out of list quick access keys to on screen keys Such operation requires partic...

Page 71: ...get Value button Window with an on screen numeric keyboard is displayed use it to enter the target value Confirm the entered value Window with an on screen numeric keyboard is displayed again use it t...

Page 72: ...e features automatically displayed set of default keys The set can be modified by assigning out of list quick access keys to on screen keys Such operation requires particular permissions level Read se...

Page 73: ...n measurement result stabilization press Determine reference mass set as 100 button dialog bar with prompts is displayed at the bottom follow the prompts Load the part to be weighed and upon measureme...

Page 74: ...ss relating to the product is recorded automatically and displayed in reference mass field 0 000 indication is displayed for unloaded pan All samples weighed afterwards are compared with the reference...

Page 75: ...et of weighing pans for density determination of solids with density lower that density of water Kit intended for AS balances 1 Beaker base 2 Stand 3 Sinker 4 Beaker 5 Thermometer holder 6 Thermometer...

Page 76: ...been installed and nuLL message is displayed than the balance shall be loaded with weights set 12 Thus prepared balance can be used for density determination Procedure for activation of Solids Densit...

Page 77: ...screen keys Such operation requires particular permissions level Read section 7 6 1 for list of quick access keys 17 3 SOLIDS DENSITY DETERMINATION Prior to procedure start it is necessary to set proc...

Page 78: ...isplayed in a bottom bar 9 Put your sample on a top weighing pan sample weight measurement carried out in the air confirm the indication upon stabilization 10 The following message is displayed in a b...

Page 79: ...sample of a given liquid In order to operate this mode an optional density kit supplementary equipment appropriate to a model of used balance is required Density determination kit is the same for soli...

Page 80: ...for liquid density determination Its volume given on a sinker hanger is precisely calculated Prior to determination enter the sinker volume value into balance memory Determination of density for a par...

Page 81: ...ly press key To finish density determination process press key The home screen for liquid density mode is displayed The next measurement can be started now The balance operates with previously entered...

Page 82: ...measurement is to be carried out manually on pressing key or automatically YES automatically performed operation NO manually performed operation Automatic operation basis the object is measured automa...

Page 83: ...time autostart auto thres Load the object that is to be weighed on a weighing pan press key for automatic operation mass determination process starts when the pre set auto threshold mass is exceeded...

Page 84: ...print header print footer statistics delete statistics product user databases 20 1 SUPPLEMENTARY SETTINGS FOR STATISTICS MODE The supplementary settings enable adjusting the working mode to your need...

Page 85: ...matically 21 PEAK HOLD Peak Hold is a working mode allowing you to snap value of maximum force applied to the weighing pan during one loading Apart from standard settings for this mode described in th...

Page 86: ...s automatically displayed set of default keys The set can be modified by assigning out of list quick access keys to on screen keys Such operation requires particular permissions level Read section 7 6...

Page 87: ...can use formulations database the program helps you dose particular ingredients you are prompted with messages providing you with respective instruction make mixture on your own without using formulat...

Page 88: ...t the value is set to 1 22 2 FORMULATIONS QUICK ACCESS KEYS Each working mode features automatically displayed set of default keys The set can be modified by assigning out of list quick access keys to...

Page 89: ...tomatically Enter necessary data List of information defined for formulation Name click Name button new window opens go to the window and enter formulation name Code click code button new window opens...

Page 90: ...e manually formulation that is saved in the Formulation Database formulation that is saved in the Formulation Database using multiplier function Select a particular formulation weigh each of its ingr...

Page 91: ...to confirm ingredient weight 1 is recorded into balance memory Sum field provides weight of dosed ingredient no 1 indication is tared repeat the steps for remaining mixture ingredients having complete...

Page 92: ...ign from boosting mixture weight to a specified value if there is such a need wait to see the following message press button to confirm mixture dosing ends formulation report is printed and recorded i...

Page 93: ...nges gradually depending on the ingredient weight read Dosing section for detailed description of bar graph pour specified amount of ingredient no 1 press button to confirm weight of ingredient 1 is r...

Page 94: ...he below procedure Procedure With YES value selected the program asks you to specify multiplier value prior to each process start Following the prompts load container intended for the ingredients go t...

Page 95: ...REPORT Upon each completed formulation process the program generates a report The report is recorded in Formulations reports database Report file name contains date and time of particular process perf...

Page 96: ...96 Status Completed Signature...

Page 97: ...Enter a database and press Add button located in the top bar Define fields for the new record data content depends on the database On returning to the databases window a new record is displayed on the...

Page 98: ...AG that can be downloaded from the website www radwag pl AMBIENT CONDITIONS database serves informative purposes only Using records preview option you can check ambient conditions and observe how they...

Page 99: ...list the new record has been added Editing information relating to an operator press selected operator name the selected operator parameters are displayed select data that is to be modified introduce...

Page 100: ...Procedure Enter Databases submenu press Formulations key Press Add button to design a new formulation or Select already existing formulation button and press it List of parameters defined for a formu...

Page 101: ...G RECORDS Each measurement result sent from a balance to a printer or a computer is saved in the database of weighing records Balance user can preview data from each weighing record Procedure Enter Da...

Page 102: ...abases submenu Enter Alibi database and press selected record Information defined for a particular measurement recorded into a database Measurement date Measurement time Measurement result Weight Tare...

Page 103: ...1 or COM2 Set appropriate values The RS 232 ports enable the following setting of transmission parameters Baud rate 2400 4800 9600 19200 38400 57600 115200 bit s Parity None Even Odd 24 2 ETHERNET POR...

Page 104: ...nected very strong signal 2 Balance connected strong signal 3 Balance connected poor signal 4 Balance connected very poor signal 5 No connection too poor signal or inaccessible selected network or inv...

Page 105: ...rk of your choice password window is displayed using an on screen keyboard enter the password NETWORK CONFIGURATION window is displayed connection procedure starts automatically Press button to go one...

Page 106: ...t group of parameters opens automatically If you are authorized you can Export databases user s parameters Import databases user s parameters During export the program saves files with databases and p...

Page 107: ...version In order to continue press Next button Window for target folder selection Select a respective folder and click Next key to proceed Ready to Install window In order to run installation process...

Page 108: ...mpleted driver installation connect balance to a computer use 1 8 meter long USB A B cable maximally in case of already connected balance it is necessary to disconnect it and using USB cable connect t...

Page 109: ...ss key next press Peripherals Computer set parameters related to cooperation with a computer computer port available options none COM 1 COM 2 USB Ethernet Wi Fi CAUTION Communication via Ethernet does...

Page 110: ...00 to 0 1 s The setting is valid for continuous transmission in calibration unit and in current unit activated by means of the balance it is also valid for continuous transmission activated by command...

Page 111: ...critical signs of a given language respective baud rate obligatory for a given printer must be chosen see the printer settings Additionally code page of a sent printout must be accordant with a code p...

Page 112: ...age 1254 1B5203 UK signs chart 1B5202 DE signs chart 1D564108 Paper crop 0C Form feed for PCL printers 25 3 RECORD OF MEASUREMENT DATA ONTO A USB FLASH DRIVE The balance software enables record of mea...

Page 113: ...113 The data can be printed using any printer connected to a computer New data can be recorded to an existing file therefore you can continue recording measurement data using the file once created...

Page 114: ...a content is set using balance Procedure press button enter PERIPHERALS submenu enter ADDITIONAL DISPLAY submenu enter BOTTOM TEXT AREA TEMPLATE parameter an on screen keyboard is displayed Enter data...

Page 115: ...ons of the balance keyboard were pressed If you need to use only one button connect it directly to COM 2 port or use the electrical outlet In order to ensure the proper cooperation you need to remembe...

Page 116: ...cy of sensor registered data and to determine how often the displayed pictograms providing information on ambient conditions state are to be refreshed Internal sensor 1 enter this parameter to specify...

Page 117: ...emperature change rate for higher change rate values the balance displays blinking red thermometer pictogram Min humidity min humidity value for lower humidity values the thermometer pictogram is red...

Page 118: ...ng unit SU Send stable measurement result in current measuring unit SUI Immediately send measurement result in current measuring unit C1 Switch on continuous transmission in basic measuring unit C0 Sw...

Page 119: ...ecognised XX _ E CR LF time limit exceeded while waiting for a stable measurement result time limit is balance characteristic parameter XX stands for a name of a sent command _ stands for spaces Comma...

Page 120: ...sult S_I CR LF command understood but not accessible at this moment MASS FRAME response mass value in a basic measuring unit Response format 1 2 3 4 5 6 7 15 16 17 18 19 20 21 S space stability marker...

Page 121: ...4 5 6 7 15 16 17 18 19 20 21 S U I stability marker space character mass space unit CR LF An example S U I CR LF command sent from a computer S U I _ _ _ _ 5 8 2 3 7 _ k g _ CR LF command carried out...

Page 122: ...ce CR LF Mass 9 characters with right justification Unit 3 characters with left justification Give value of max checkweighing threshold Format OUH CR LF Response UH_MASA CR LF command carried out Resp...

Page 123: ...balances the command inhibits internal calibration until it is enabled via IC0 command or until the balance is turned off The command does not modify settings specifying calibration start Enable autom...

Page 124: ...ve only the number as a response An example 1 Command OMI CR LF return accessible working modes Response OMI CR LF 2_ Parts counting CR LF 4_ Dosing CR LF 12_ Checkweighing CR LF accessible working mo...

Page 125: ...ion no parameter or incorrect format US_I CR LF command understood but not accessible at this moment x parameter units symbols g mg ct lb oz ozt dwt tlh tls tlt tlc mom gr ti N baht tola msg u1 u2 nex...

Page 126: ...tood response Max capacity FS_I CR LF command understood but not accessible at this moment x Max value of reading units in between inverted commas An example Command FS CR LF return Max capacity Respo...

Page 127: ...etermining filter number n 1 very fast 2 fast 3 average 4 slow 5 very slow CAUTION The numbering is assigned to a particular filter name and it is identical for all balance types The command changes s...

Page 128: ...ssword error occurrence logging operation cannot be carried out ES CR LF command not understood format error User logout Format LOGOUT CR LF Response options LOGOUT OK CR LF command understood operato...

Page 129: ...les generating manual or automatic printouts Manual printout on stabilization of indication measurement result press key Automatic printout is generated automatically in accordance with the settings f...

Page 130: ...l variable 1 NO Non standard printout NONE Universal variable 2 NO 28 PERIPHERAL DEVICES The balance can cooperate with the following peripheral devices computer EPSON labeller PCL printer an optional...

Page 131: ...S series balances PC keyboard USB type THB 3 5 Ambient conditions module PC software LABEL EDITOR PW WIN RAD KEY 31 BALANCE DATA Balance Data menu provides information on balance and balance software...

Page 132: ...132...

Reviews: