


10
• Your caller’s name (15 letters are sent
by your telephone company)
• The caller’s area code and telephone
number
• The time and date of the call
If you answer a call before the information
appears on the screen, it will not be in the
call history.
R
EVIEWING
C
ALL
H
ISTORY
The screen displays call information for
about 20 seconds after it has been received
and without any keys being pressed.
1. Press
f
to view call history.
Ô
2. Use
f
and
g
to scroll through records in
call history. When you scroll past the
last record,
END OF LIST
appears.
Deleting a Specific Call
1. Locate the record you want to delete
from call history.
2. Press
SELECT
and then press
g
until
ERASE
flashes.
3. Press
SELECT
. The screen displays
ERASE NO YES ALL
and the phone number.
The current choice flashes.
4. Press
f
or
g
until
YES
flashes.
5. Press
SELECT
. You’ll hear a long beep
confirming the deletion.
Delete All Calls
1. While viewing call history, press
SELECT
. Then press
g
until
ERASE
flashes.
2. Press
SELECT
. The screen displays
ERASE NO YES ALL
, and the phone
number. The current choice flashes.
3. Press
g
until
ALL
flashes. Then press
SELECT
. The screen displays
ERASE ALL
NO YES
. The current choice flashes.
4. Press
f
or
g
until
YES
flashes.
5. Press
SELECT
.You will hear a long beep
confirming the deletion.
Dialing a Displayed Number
1. Locate the record in call history that you
want to dial.
2. If you wish to change how the number
is dialed, repeatedly press
#
. The
screen displays any alternate dialing
sequences available for this call (area
code + number; 1 + area code +
number; number only; 1+ number).
3. Press
SELECT
.
DIAL
flashes.
Press
SELECT
when the number is
correctly displayed for dialing.
OR
When the number is correctly displayed
for dialing, press
TALK
.
Storing a Call History Record in
the Directory
1. Locate the record in call history you
want to store in the directory.
2. If you wish to change how the number
is stored, repeatedly press
#
. The
screen displays any alternate dialing
sequences available for this call (area
code + number; 1 + area code +
number; number only; 1+ number).
3. Press
SELECT
, and then press
f
and
g
until
PGM
flashes.
The phone number will be displayed in
the new format.
4. Press
SELECT
three times to store the
call record in memory without editing.
The screen displays
DISTINCT RING?
And
the current setting.
5. Press
f
and
g
to change the setting.
Choose
Y
(Yes) if you wish the phone to
alert you to calls from this number by
changing to a distinctive ringing pattern
after the first ring. Choose
N
(No) for a
normal ringing pattern.
6. Press
SELECT
or
PROG/CHAN
to
confirm your selection. If you chose
Y
,
ª
is displayed with the directory entry.
D
ISPLAY
S
CREEN
M
ESSAGES
TAD OPERATION
This TAD (Telephone Answering Device)
gives you voice prompts (Audible Indicators)
for feature operations and voice
confirmations when you press a button or
complete an operation.
S
ETTING
D
ATE
/T
IME
1. Press
ANSWER ON/OFF
on the base to
turn on the system. The button lights.
2. Press
TIME/SET
. The system
announces the clock setting then
announces, “To set Date and Time,
press
TIME/SET
.”
3. Press
TIME/SET
.
4. Press
SELECT
until the system
announces the correct day of the week.
Then press
TIME/SET
.
Ô
NOTES
Ô
• Press OFF at any time to exit call history.
• If there are no records the phone displays
CID EMPTY
.
• The phone number will be displayed in the
format it was received.
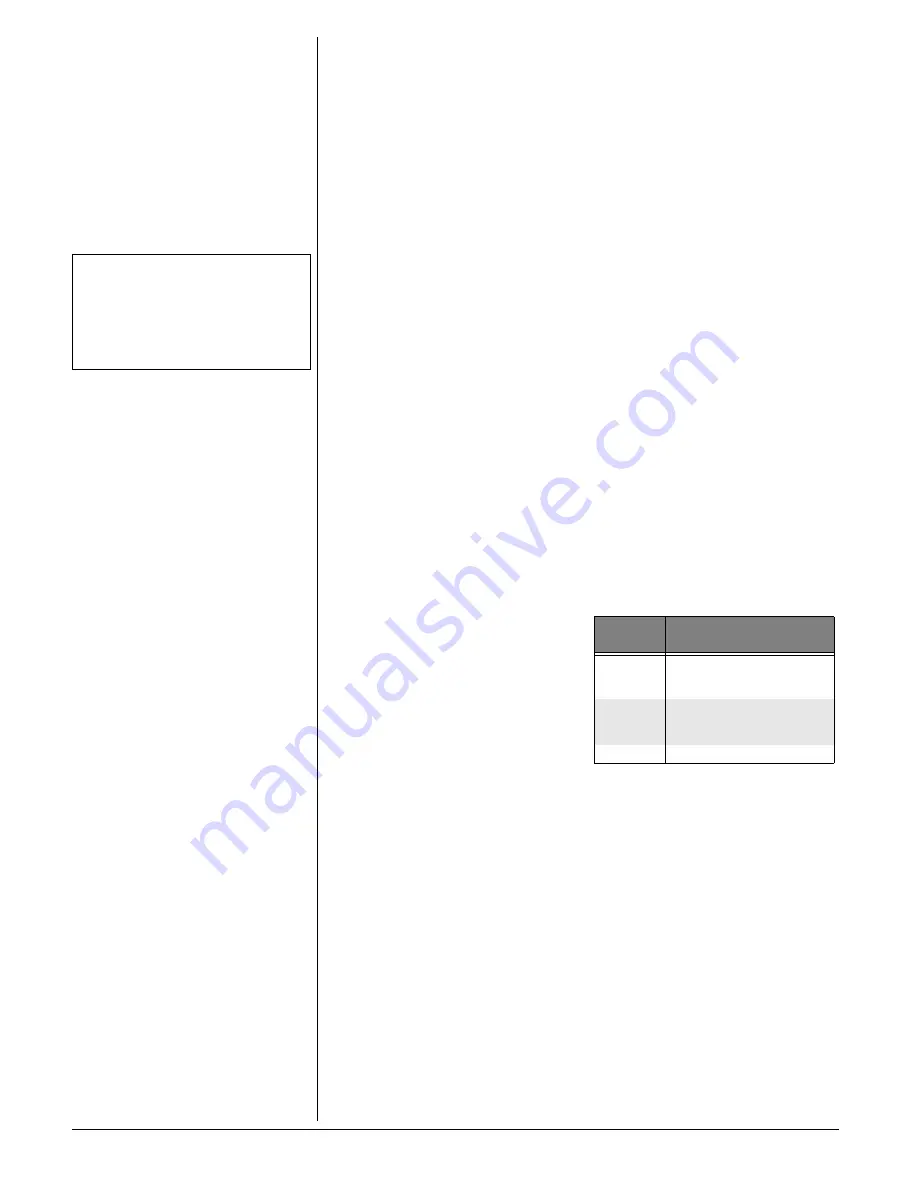
Screen
Displays:
When:
PRIVATE
the party calling is blocking
name and (or) number
information.
OUT OF
AREA
your phone company is unable
to receive information about the
caller’s name and (or) number.
L
the party calling is long distance.


