PC Connection
QL-300 User Guide
53
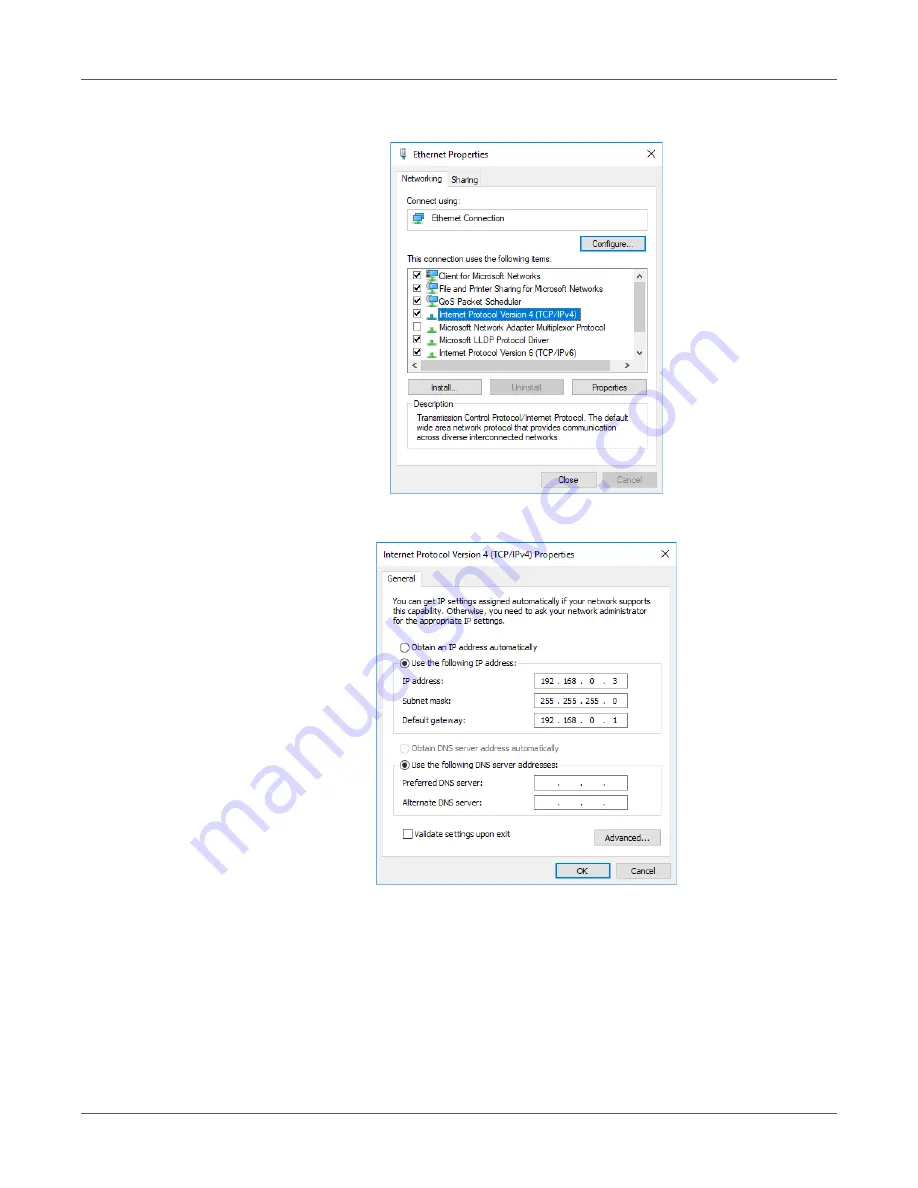
7
Select
Internet Protocol Version 4(TCP/IPv4)
, and then click
Properties
.
8
Input the IP address, subnet mask, default gateway, and DNS server, and then click
OK
.
Note: When obtaining an IP address automatically from a DHCP server, select Obtain an
IP address automatically without inputting an IP address.
Note: If a default gateway or DNS server is not to be used, do not input its address.
9
Exit the “Ethernet Properties” screen.
Summary of Contents for QL-300
Page 1: ......
Page 20: ...Installation QL 300 User Guide 20 2 Remove the top layer of packing materials...
Page 28: ...Installation QL 300 User Guide 28 3 Remove the unwinder...
Page 30: ...Installation QL 300 User Guide 30 5 Peel off the tape from two locations...
Page 41: ...Installation QL 300 User Guide 41 Unwinder Black mark Gap sensor...
Page 113: ...Printing QL 300 User Guide 113 Caution Do not touch the belt surface or damage the belt...
Page 274: ...Troubleshooting QL 300 User Guide 274 25 Lift up the fuser and exit unit locking lever...
Page 277: ...Troubleshooting QL 300 User Guide 277 29 Raise the blue lever and install the cutter unit...
Page 359: ...Cleaning QL 300 User Guide 359 2 Press down the flange locking lever 3 Remove the flange...
Page 382: ...Cleaning QL 300 User Guide 382 23 Push down the fuser unit handle and firmly push it inside...
Page 383: ...Cleaning QL 300 User Guide 383 24 Lift up the fuser and exit unit locking lever...
Page 456: ...Safety QL 300 User Guide 456...


