Adjusting the Color
QL-300 User Guide
222
e)
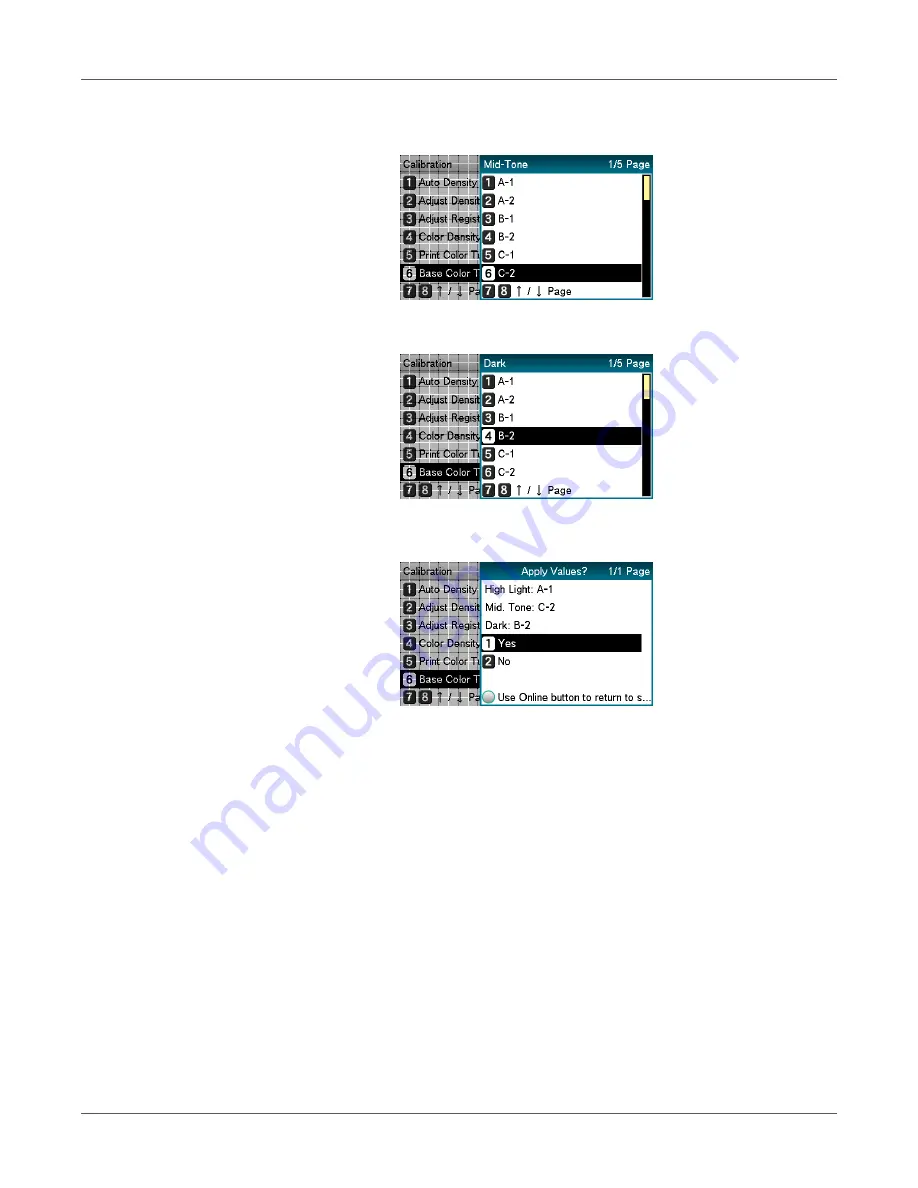
Specify the number of the desired square in the “Mid-Tone” area of the pattern, and
then press the
OK
button.
f)
Specify the number of the desired square in the “Dark” area of the pattern, and then
press the
OK
button.
g)
The pattern number specified in each area will be displayed.
If the pattern number is correct, select
Yes
, and press the
OK
button.
To respecify the pattern number select No to return to the “Calibration” screen.
Summary of Contents for QL-300
Page 1: ......
Page 20: ...Installation QL 300 User Guide 20 2 Remove the top layer of packing materials...
Page 28: ...Installation QL 300 User Guide 28 3 Remove the unwinder...
Page 30: ...Installation QL 300 User Guide 30 5 Peel off the tape from two locations...
Page 41: ...Installation QL 300 User Guide 41 Unwinder Black mark Gap sensor...
Page 113: ...Printing QL 300 User Guide 113 Caution Do not touch the belt surface or damage the belt...
Page 274: ...Troubleshooting QL 300 User Guide 274 25 Lift up the fuser and exit unit locking lever...
Page 277: ...Troubleshooting QL 300 User Guide 277 29 Raise the blue lever and install the cutter unit...
Page 359: ...Cleaning QL 300 User Guide 359 2 Press down the flange locking lever 3 Remove the flange...
Page 382: ...Cleaning QL 300 User Guide 382 23 Push down the fuser unit handle and firmly push it inside...
Page 383: ...Cleaning QL 300 User Guide 383 24 Lift up the fuser and exit unit locking lever...
Page 456: ...Safety QL 300 User Guide 456...


