69
Step 1:
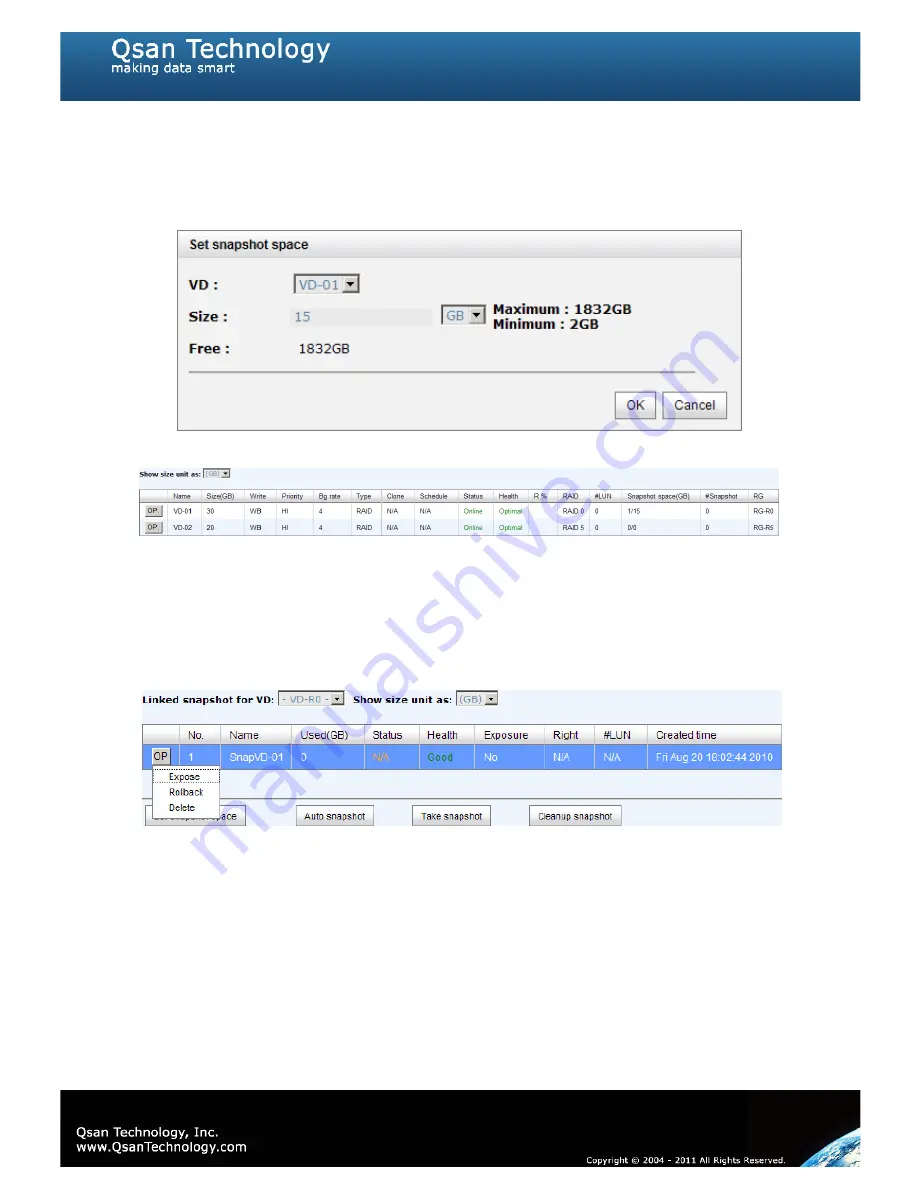
Create snapshot space. In
“/ Volume configuration / Virtual disk”
, Check to
the gray button next to the VD number; click
“Set snapshot space”
.
Step 2:
Set snapshot space. Then click
“OK”
. The snapshot space is created.
Figure 4.4.4.1
Figure 4.4.4.2
(Figure 4.4.4.2: “VD-01” snapshot space has been created, snapshot space is 15GB, and used
1GB for saving snapshot index.)
Step 3:
Take a snapshot. In
“/ Volume configuration / Snapshot”
, click
“Take
snapshot”
. It will link to next page. Enter a snapshot name.
Figure 4.4.4.3
Step 4:
Expose the snapshot VD. Check to the gray button next to the Snapshot VD
number; click
“Expose”
. Enter a capacity for snapshot VD. If size is zero, the exposed
snapshot VD will be read only. Otherwise, the exposed snapshot VD can be read / written,
and the size will be the maximum capacity for writing.
Summary of Contents for P300H61
Page 79: ...79 ...
Page 110: ...110 Figure 5 7 1 2 ...
Page 145: ...145 This form can be got from QSAN ftp ftp ftp qsan com tw QSAN_Support_Form doc ...
Page 148: ...148 Figure B 1 3 Click Done Figure B 2 Figure B 3 ...
Page 151: ...151 Figure B 8 Figure B 9 15 Click Add 16 Click Advanced ...
Page 153: ...153 Figure B 14 22 Done the iSCSI device disconnect successfully ...
Page 154: ...154 System information P300H61 P300H71 SW version 2 0 1 ...


