


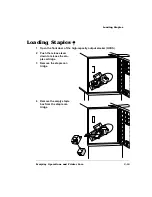


%&#
"
'
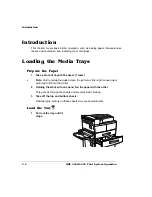
2
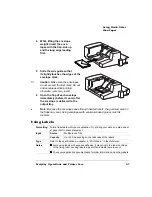
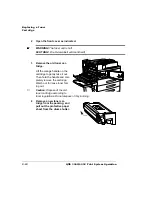
Gently lift up the right
paper guide, and slide it to
the desired setting.
3
While pressing down the
gray handle on the rear
media guide, slide it to the
desired width setting.
»
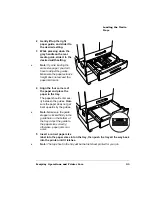
Note:
If you’re loading the
same size paper, you don’t
have to adjust the guides.
Make sure the papers stack’s
height does not exceed the
paper limit mark.
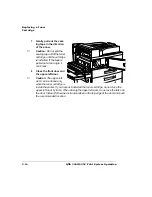
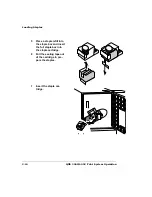
4
Align the four corners of
the paper and place the
paper in the tray.
The paper should enter eas-
ily between the guides. Make
sure the paper does not get
bent upwards by the guides.
»
Note:
Make sure the guide
stopper is locked firmly in the
guide hole on the bottom of
the tray. Adjust the guide to
the paper size correctly;
otherwise, paper jams can
occur.
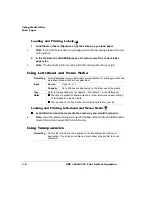
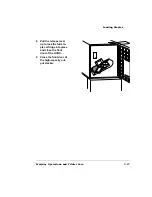
5
Insert a correct paper size
label into the paper size slot on the tray, then push the tray all the way back
into the printer until it latches.
»
Note:
The top sheet in the tray will be the first sheet printed for your job.
Summary of Contents for 3260
Page 1: ......
Page 8: ......
Page 9: ...Introduction on page 1 2 About This Manual on page 1 2...
Page 12: ......
Page 39: ...2 Lift up the handles to unlock the transfer roller 3 Remove the transfer roller...
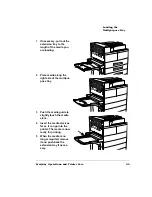
Page 46: ...1 Pull out the tray 6 2 Open the lower left door of the high capacity input feeder...
Page 48: ......
Page 87: ...2 3 2 1...
Page 90: ......
Page 106: ...4 5 8 1 Open the duplexer 2 Open the upper left door 3 Open the lower left door...
Page 111: ...4 4 5 8 1 Pull on the latch to open the duplexer 2 Open the cover inside of the duplexer...
Page 114: ...4 3 Reinsert the enve lope feeder...
Page 152: ......
Page 153: ...Sources of Support on page A 2 QMS World wide Offices on page A 4...
Page 184: ......
Page 194: ......


