7
USER MANUAL FOR
KRYPTON XG50
THERMAL IMAGING MONOCULAR
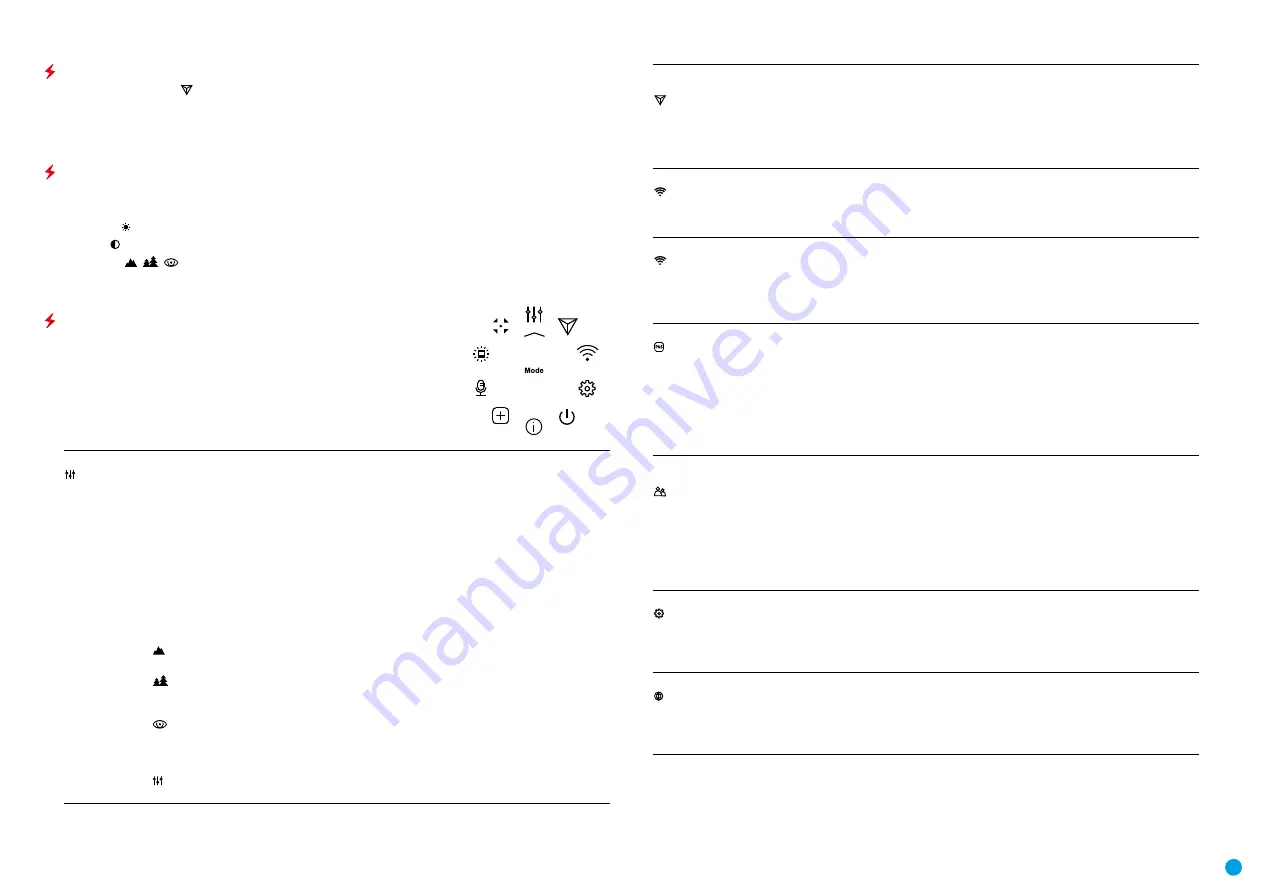
IMAGE DETAIL BOOST
The Image Detail boost function increases the sharpness of the contours of heated objects, which increases
their detail. The result of the function depends on the selected mode and observation conditions: the higher
the contrast of objects, the more noticeable the effect. This option is enabled by default, but can be disabled in
the main menu.
QUICK MENU FUNCTIONS
•
Enter the menu with a short press of the MENU
(7)
button.
•
To select the functions below, press successively MENU
(7)
button.
Brightness
– press the RIGHT
(6)
/ LEFT
(8)
buttons to change the display brightness value from 0 to 20.
Contrast
– press the RIGHT
(6)
/ LEFT
(8)
buttons to change the display contrast value from 0 to 20.
Basic mode
– it allows you to select one of the three modes as the basic one for the user mode.
•
To exit the menu, press and hold down the MENU
(7)
button, or wait 10 seconds for automatic exit.
MAIN MENU FUNCTIONS
•
Enter the menu with a long press of the MENU
(7)
button.
•
Press the RIGHT
(6)
/ LEFT
(8)
buttons to move through the menu functions.
•
One short press of the MENU
(7)
button opens a menu item.
•
To exit the menu, press and hold down the MENU
(7)
button.
Automatic exit from the menu occurs after 10 seconds of inactivity.
MAIN MENU CONTENTS AND DESCRIPTION
Mode
The device has four observation modes of the thermal imager: Forest (observation mode
of objects within low thermal contrast conditions), Rocks (observation mode of objects
within high thermal contrast conditions), Identification (high detalization mode), and User
(individual brightness and contrast settings).
Option 1:
•
Briefly press the MODE
(8)
button to switch observation modes.
Option 2:
•
Press and hold the MENU
(7)
button to enter the menu.
•
Select the Mode option with RIGHT
(6)
/ LEFT
(8)
buttons.
•
A short press of the MENU
(7)
button opens the menu.
•
Select one of the modes described below with RIGHT
(6)
/ LEFT
(8)
buttons.
•
A short press of the MENU
(7)
button confirms the selection.
Rocks.
This is the best mode when observing objects after a sunny day or within urban
conditions.
Forest.
This is the best mode when searching and observing within field conditions,
against the background of leaves, bushes and grass. The mode is highly informative about an
object being observed as well as landscape details.
Identification.
This is the best mode when observing objects within adverse weather
conditions (fog, mist, rain and snow). It allows you to recognize the characteristics of an
object being observed more clearly. Increased detail may be accompanied by insignificant
image graininess.
User.
It allows you to configure and save custom brightness and contrast settings, as well
as one of the three modes as a base.
Image Detail
Boost
Turn on/off Image Detail Boost.
•
Press and hold the MENU
(7)
button to enter the menu.
•
Select the Image Detail Boost option with the RIGHT
(6)
or LEFT
(8)
buttons.
•
A short press of the MENU
(7)
button opens the submenu.
•
To turn Image Detail Boost on or off press RIGHT
(6)
or LEFT
(8)
buttons.
•
Confirm your selection with a short press of the MENU
(7)
button.
Wi-Fi settings
This menu option allows you to set up your device for operation in a Wi-Fi network.
•
Press and hold the MENU
(7)
button to enter the menu.
•
Select the Wi-Fi settings option with RIGHT
(6)
or LEFT
(8)
buttons.
•
A short press of the MENU
(7)
button opens the menu section.
Wi-Fi activation
Turn Wi-Fi on/off.
•
Select the Wi-Fi activation option with the RIGHT
(6)
or LEFT
(8)
buttons.
•
A short press of the MENU
(7)
button opens the submenu.
•
To turn Wi-Fi on or off press RIGHT
(6)
or LEFT
(8)
buttons.
•
Confirm your selection with a short press of the MENU
(7)
button.
Password setup
This submenu allows you to set a password to access your thermal imaging monocular from a
mobile device.
•
Select the Password setup option with the RIGHT
(6)
or LEFT
(8)
buttons.
•
A short press of the MENU
(7)
button opens the submenu.
•
The default password (12345678) will appear on the screen.
•
Set your desired password with the RIGHT
(6)
and LEFT
(8)
buttons. Press the MENU
(7)
button to toggle the digits.
•
Press and hold down the MENU
(7)
button to save the password and exit the submenu.
Access level
setup
This submenu allows you to set access levels of Stream Vision application to your device.
•
Access level Owner. Stream Vision user has complete access to all device's functions.
•
Access level Guest. Stream Vision user has access only to real time video stream from the
device.
•
Select the Access level setup submenu with the RIGHT
(6)
or LEFT
(8)
buttons.
•
A short press of the MENU
(7)
button opens the submenu
•
Select Owner or Guest with the RIGHT
(6)
or LEFT
(8)
buttons.
•
Confirm your selection with a short press of the MENU
(7)
button.
General Settings
This menu section allows you to change the interface language, set the date, time, units of
measure, return the device to factory default settings and perform memory card formatting.
•
Press and hold the MENU
(7)
button to enter the menu.
•
Select General Settings option with the RIGHT
(6)
or LEFT
(8)
buttons.
•
A short press of the MENU
(7)
button opens the submenu.
Language
Interface language selection.
•
Enter the Language submenu with a short press of MENU
(7)
button.
•
Select one of the available interface languages (English, French, German, Spanish or
Russian) with the RIGHT
(6)
or LEFT
(8)
buttons.
•
Confirm your selection with a short press of the MENU
(7)
button.


