INSTALLATION MANUAL: PAA29+ V 1.4 (07/2011)
37
3.
Once you are connected to the server via ftp, upload the “paa29+.xml”
file supplied in the documentation and test CD to the “/etc/cueslib/”
directory in the server. You can see the “paa29+.xml” loaded in this
folder in the
figure 8.3.3A
. Now, you can set-up the output cues
taking the commands from this library.
4.
The procedure to create automation cues using the library is very
similar as the one without use it, but very much simple. First of all
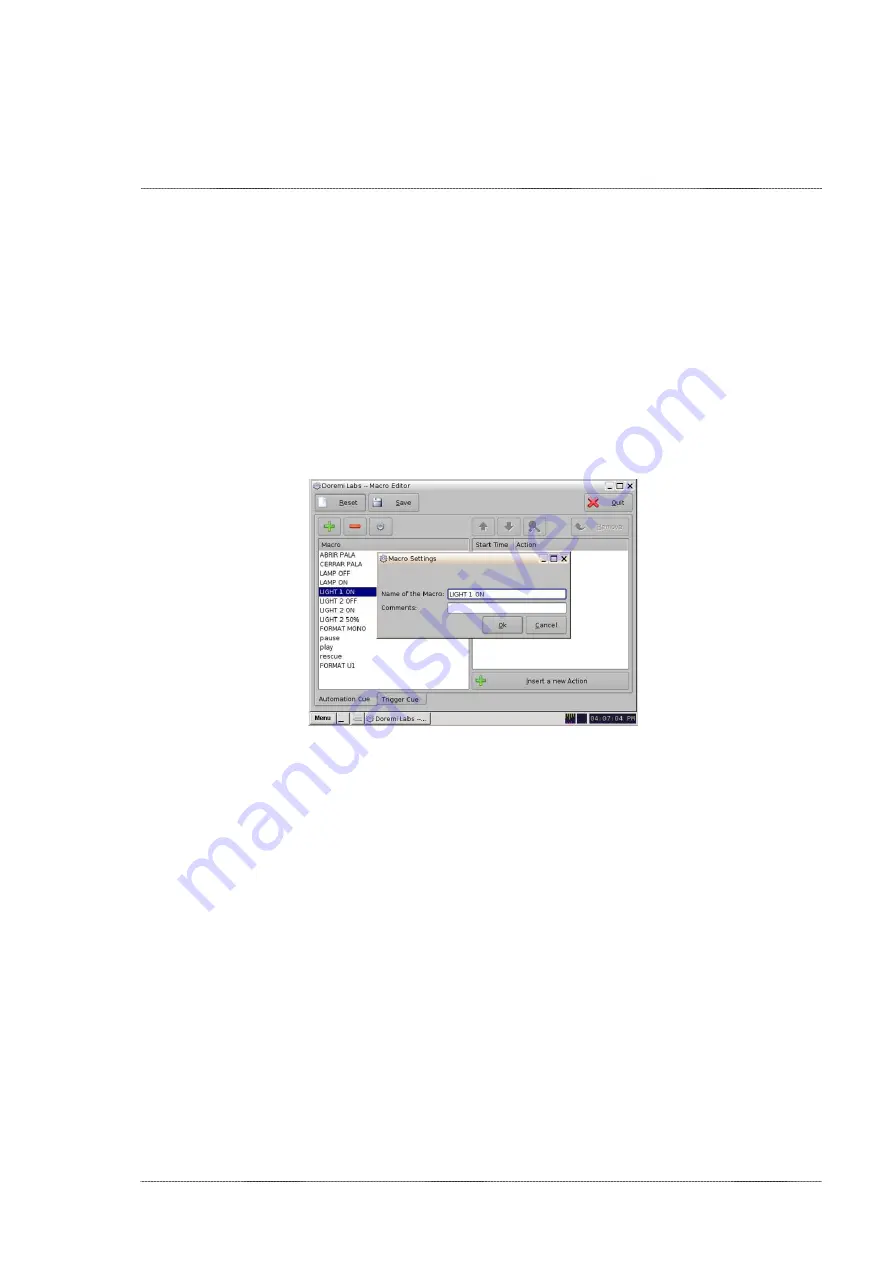
open the Doremi Marco Editor.
5.
Then create a new “Macro” with the “+” button and name it, like in the
figure 8.3.3B
.
Figure 8.3.3B
6.
Click on the button “Insert a new Action”.
7.
Select “Library / Paa29+” on the “Add a new Action” pop-up window
and click in on “Add”. See
figure 8.3.3C
.
Summary of Contents for PAA29+
Page 1: ...PAA29 v1 4 07 2011 INSTALLATION MANUAL PAA29...
Page 44: ...INSTALLATION MANUAL PAA29 V 1 4 07 2011 44 9 2 OUTPUT 2 CONNECTOR Figure 9 2A Picture 9 2B...
Page 45: ...INSTALLATION MANUAL PAA29 V 1 4 07 2011 45 9 3 OUTPUT 3 CONNECTOR Figure 9 3A Figure 9 3B...
Page 46: ...INSTALLATION MANUAL PAA29 V 1 4 07 2011 46 9 4 INPUT CONNECTOR Figure 9 4A Picture 9 4B...
Page 48: ...INSTALLATION MANUAL PAA29 V 1 4 07 2011 48 9 5 2 INPUT WITH A POSITIVE COMMON Picture 9 5 2A...


