18
Power Supply
PCB
CPU PCB
Display
PCB
‘UP’ inscribed on topside
UP
UP
Placing Back
Removal
Pullout Grip
PPI
neuro 100
AL1
AL2
neuro 102
1
2
3
4
5
6
7
8
9
10
11
12
13
14
15
16
17
18
N/O
C
+
-
RE
LA
Y
SS
R
/ D
C
Li
ne
ar
O
UT
PU
T
1
Pt100
T/C
mV
, V
, mA
INP
UT
OU
TPU
T 2
+
SSR
/ DC
Line
ar
RE
LAY
N/O
N/C
C
OU
TPU
T 3
SERIAL
COMMS.
+
SSR / DC Linear
RELA
Y
N/O
N/C
C
PPI
L
N
AC
DC
SU
PP
LY
GND
A
B
AUXILIAR
Y SP
SELECTION
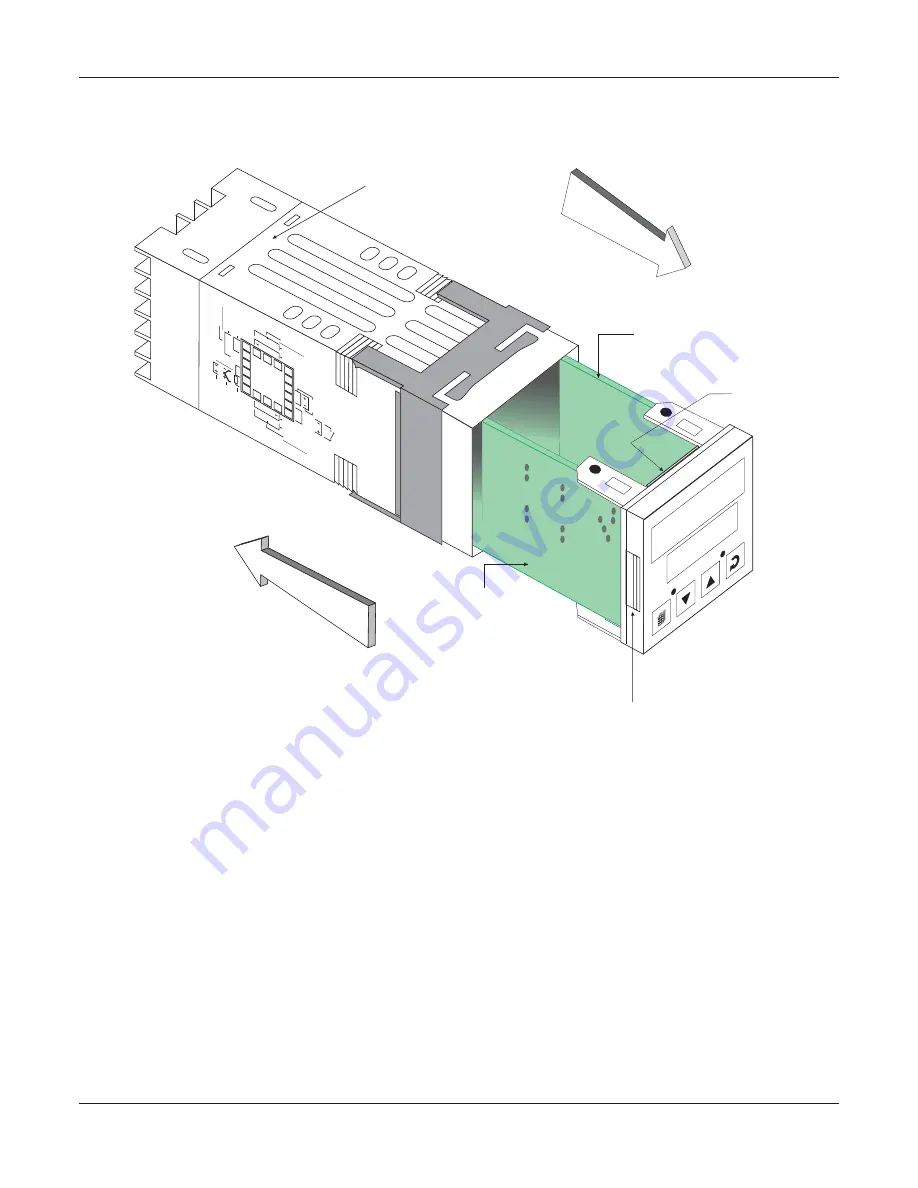
Removing Assembly from Enclosure
With the indicator upright, hold the Bezel with the fingers on the pullout grips provided on the left and right sides of the bezel.
Pull the bezel outward. The assembly comes out with the bezel.
Placing Assembly Back into Enclosure
With the indicator upright (the UP inscribed on the Enclosure is on the topside), insert the bezel gently with the boards on either
side sliding into the guides provided inside of the Enclosure. Ensure that the bezel fits in tight on the Enclosure-front to secure
the panel-sealing gasket (provided to meet IP65 safety requirements).
Figure 9.2
User Manual
neuro 100


